
Setting up the Carbdown Greenhouse Experiment 2023 (With Recipe And Shopping-list)
Introduction
Apart from a reduction in CO₂ emissions by 90% the IPCC calls for “Carbon Dioxide Removal” (CDR) that pulls large amounts of CO₂ out of the atmosphere. One promising approach is spreading fine ground rocks onto agricultural lands. The rock dissolves and reacts with water and CO₂ and generates carbonates which store the CO₂ away from the ambient air for a long time (see our video for details). This is called “Enhanced Rock Weathering” (ERW) because we speed up a natural weathering process by grinding the rock and placing it in a favorable place to increase the reaction speed.
The honest truth though is: We still know only little about the chemical processes involving carbon that actually take place in the soil once rock dust has been amended. Most importantly we do not have a reliable way of measuring the actual collection of CO₂ over time: How much CO₂ is being captured after x years? We at Project Carbdown have been working on this for 3 years now.
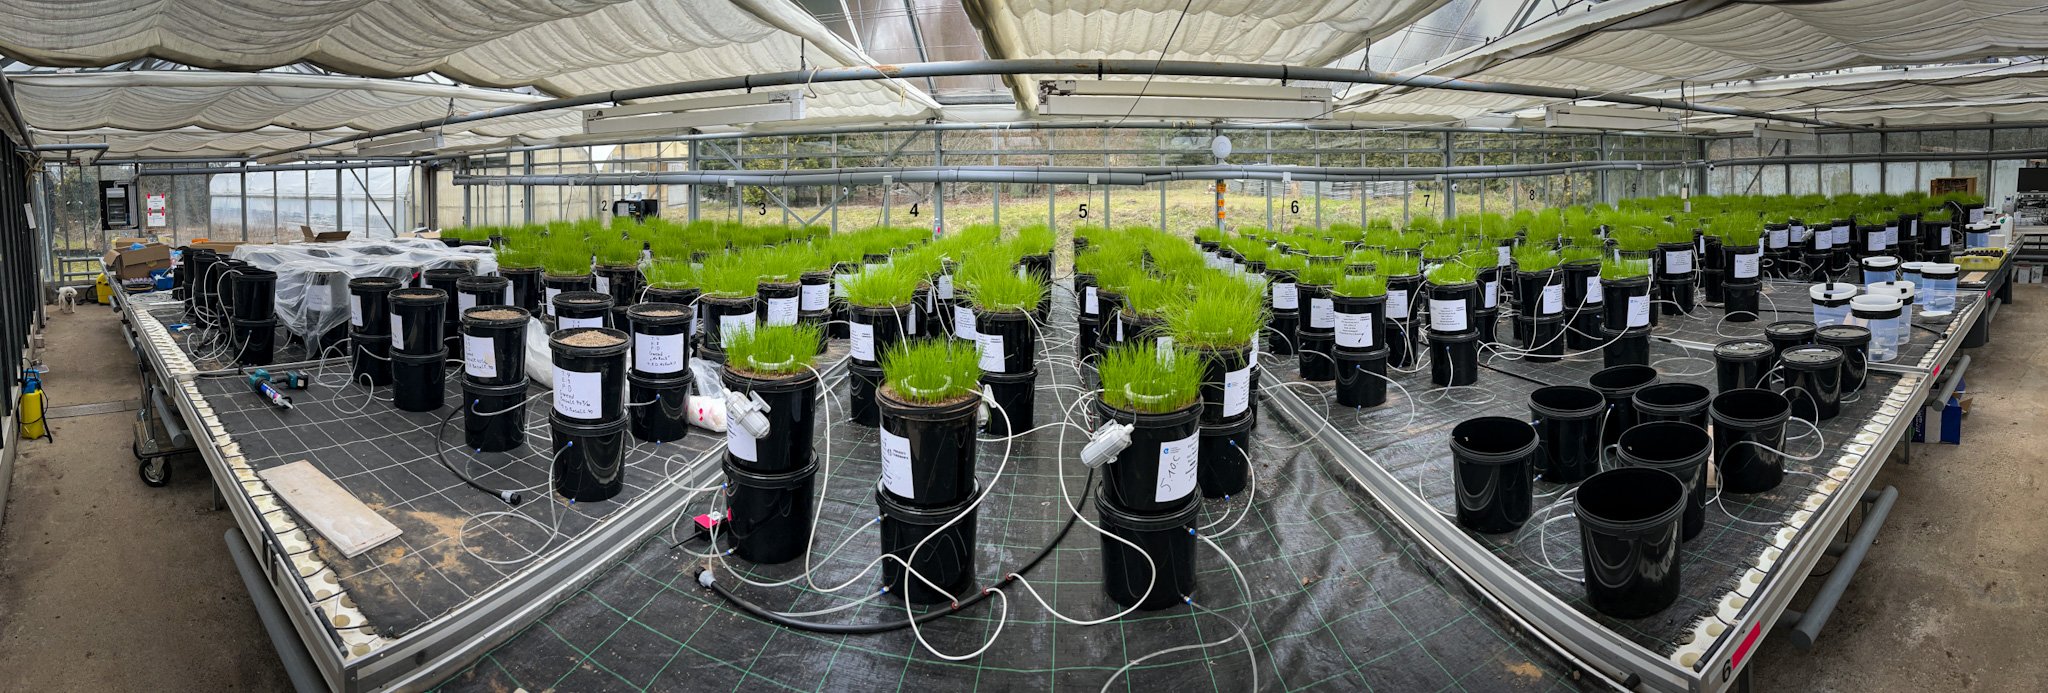
As announced in November 2022 we built our new greenhouse experiment in January 2023 that will help us understand the processes of ERW in soils using over 300 pot experiments that are monitored with a number of MRV (monitoring, reporting and verification) approaches for the next 24-36 months.
In this article we are going to describe our reasoning for the experiment design and document the actual building process. We hope this will enable other teams to build on our work and to create similar experiments where ideally the results remain somewhat comparable. Please let us know if you build upon our work: info@carbon-drawdown.de
Why A Greenhouse Experiment?
The actual doing for ERW, i.e. throwing rocks on fields, is a pretty straightforward process, only the required speed of scale-up is an actual challenge (we need a doubling every 2 years until 2050!).
But scaling requires a good MRV and the MRV of ERW is really hard because the heterogeneity and “signal noise” of nature and agriculture on croplands together with some complex things going on in the soil itself (see the Cartion Park Model) easily hides the weathering signals. What makes things worse is the fact that the observed processes are slow and some results might even take years to show up.
Apart from being the foundation for the certification and the economics of ERW, a reliable measurement method that does not require years to get meaningful data is also required to measure different variations so we can quickly iterate through all available options for rock, soil, treatment rate, location, crop, etc. and optimize the weathering.
With this in mind we believe there are three major obstacles that need to be overcome before ERW can become a major player for CDR in the future:
How much how fast?
For certification and for optimization we need one or even several, converging methods to measure how much CO₂ is actually removed from the atmosphere and in which time.How do we compare methods?
In the past scientific teams have done field and lab experiments in their country with their soils, their rocks, and their measurement methods. So data from different teams was hard to compare. We need a common set of samples and data points to be able to compare the methods and find out if they converge.Where is the (public) data?
The necessary scale of growth will inevitably make it necessary to largely work with computer models to calculate/estimate the weathering for certifications because we just can not take x samples from many thousands fields and look at them in the lab 2-4 times a year. Electronic sensors could eventually help lower the uncertainties. But there is barely any data available to train and test computer models.
With our experiment concept we want to work on all these three obstacles.
Prime Directive: Speed First!
We don’t have time. We simply can not wait for weathering data to “grow” on fields in open nature at nature’s speed (years, and very little progress in the winter, if any!). By moving our experiments into a greenhouse with a controlled environment (warm & wet for 365 days a year) we want to compress time. For our experiment we decided that we will turn all available knobs up to 11 (=to the max) that will potentially speed up the reactions - even if this means we are moving away from the situation in open fields for now.
Some of these knobs are:
temperature (we maintain a minimum temperature of 18°-20° C for 24 hours on 365 days per year because 10° C less would already reduce reaction speeds by a factor of 10, see Pogge von Strandmann et.al. 2022),
Irrigation with 100% rain water (cisterne) instead of tap water (lower TA, no ion changes over time, most tap water has no constant chemical mixture) with high irrigation rates (we use 2000 mm/a and 8000 mm/a),
perennial plants (which create CO₂ in the soil 365 days per year, we use a grass by the scientific name of “lolium perenne”),
selection of soils that promise high soil CO₂ values and high drainage potential,
and a selection of fast weathering rocks/dusts (e.g. Dunite and steel slag).
(Due to a lack of sufficient power lines we could not work with growth lamps, though.)
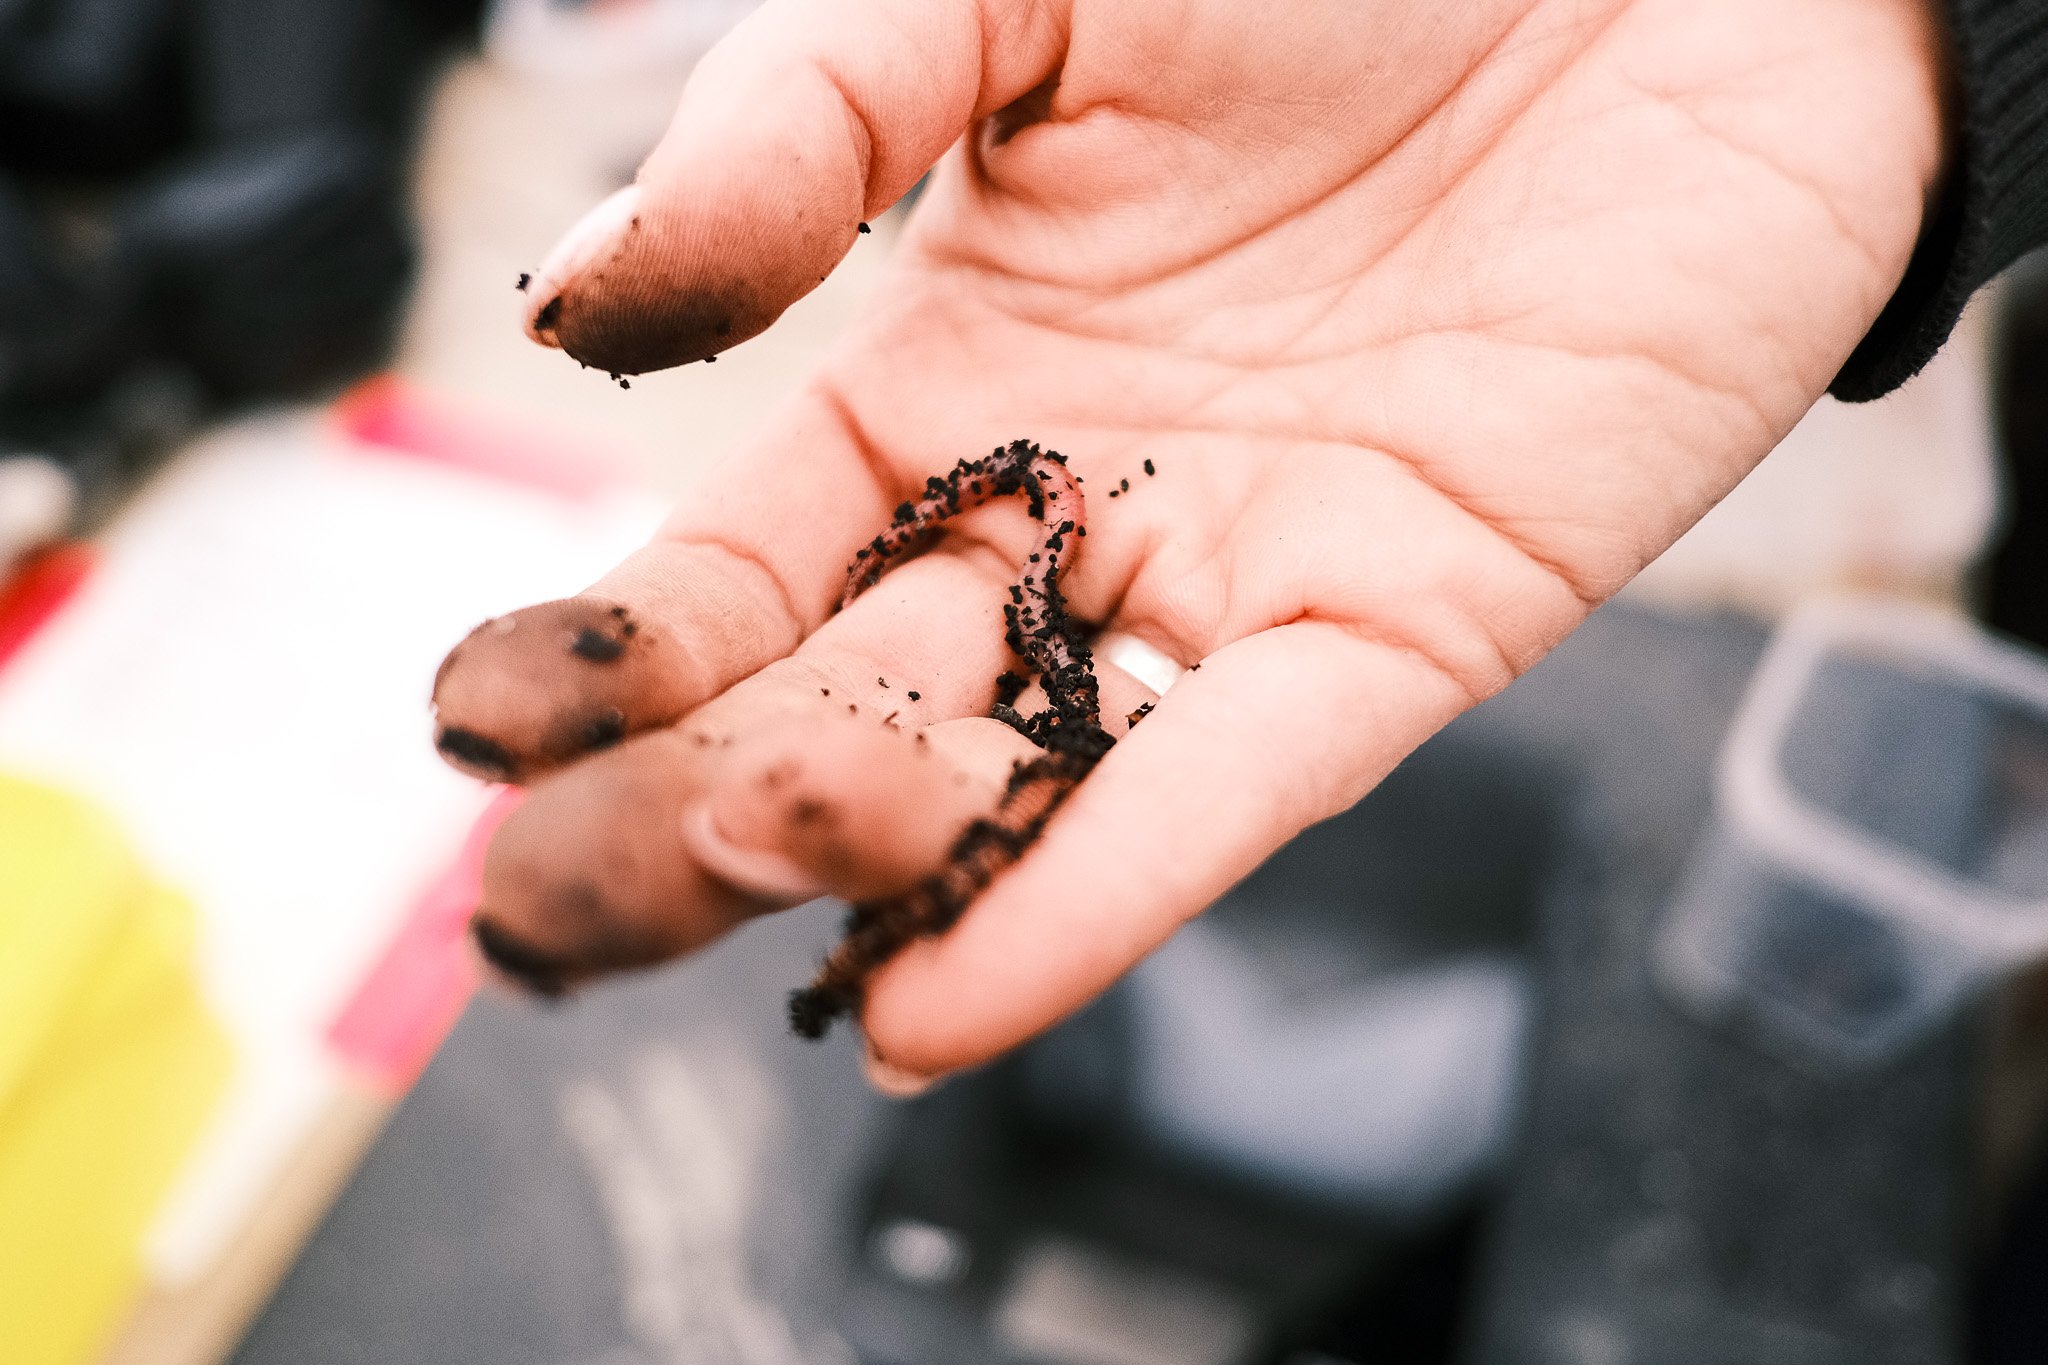
The goal is to create the fastest and strongest weathering signal that we can (while still having plant life/bio activity in our pots - we even added worms) and use this to find/develop an actual measurement method. As soon as this has been found we can move back to nature.
Second Directive: Keep cost and labor per pot low!
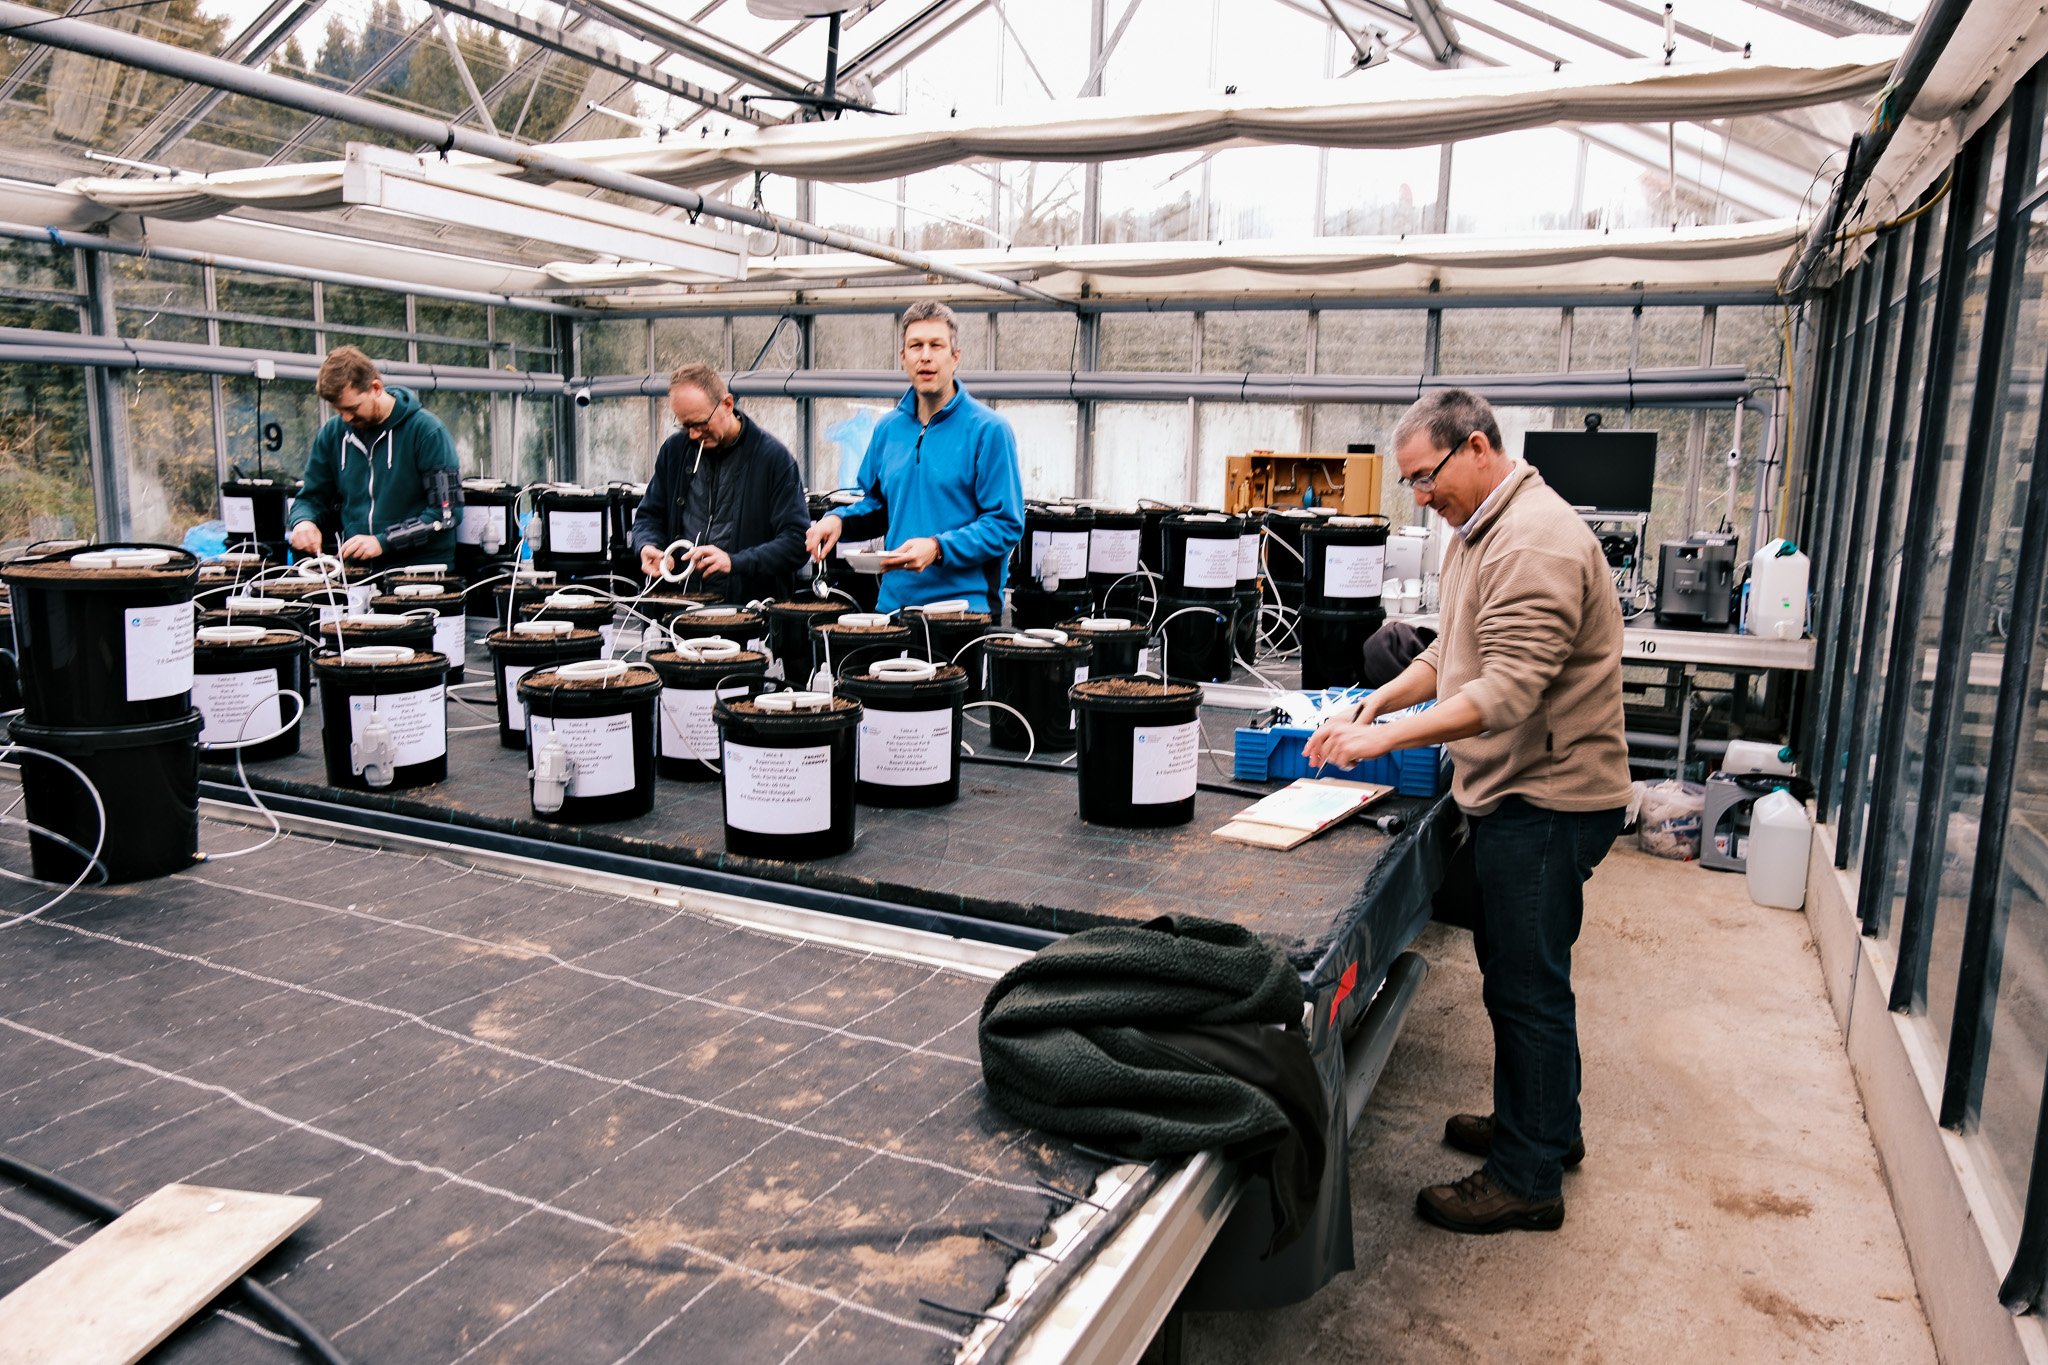
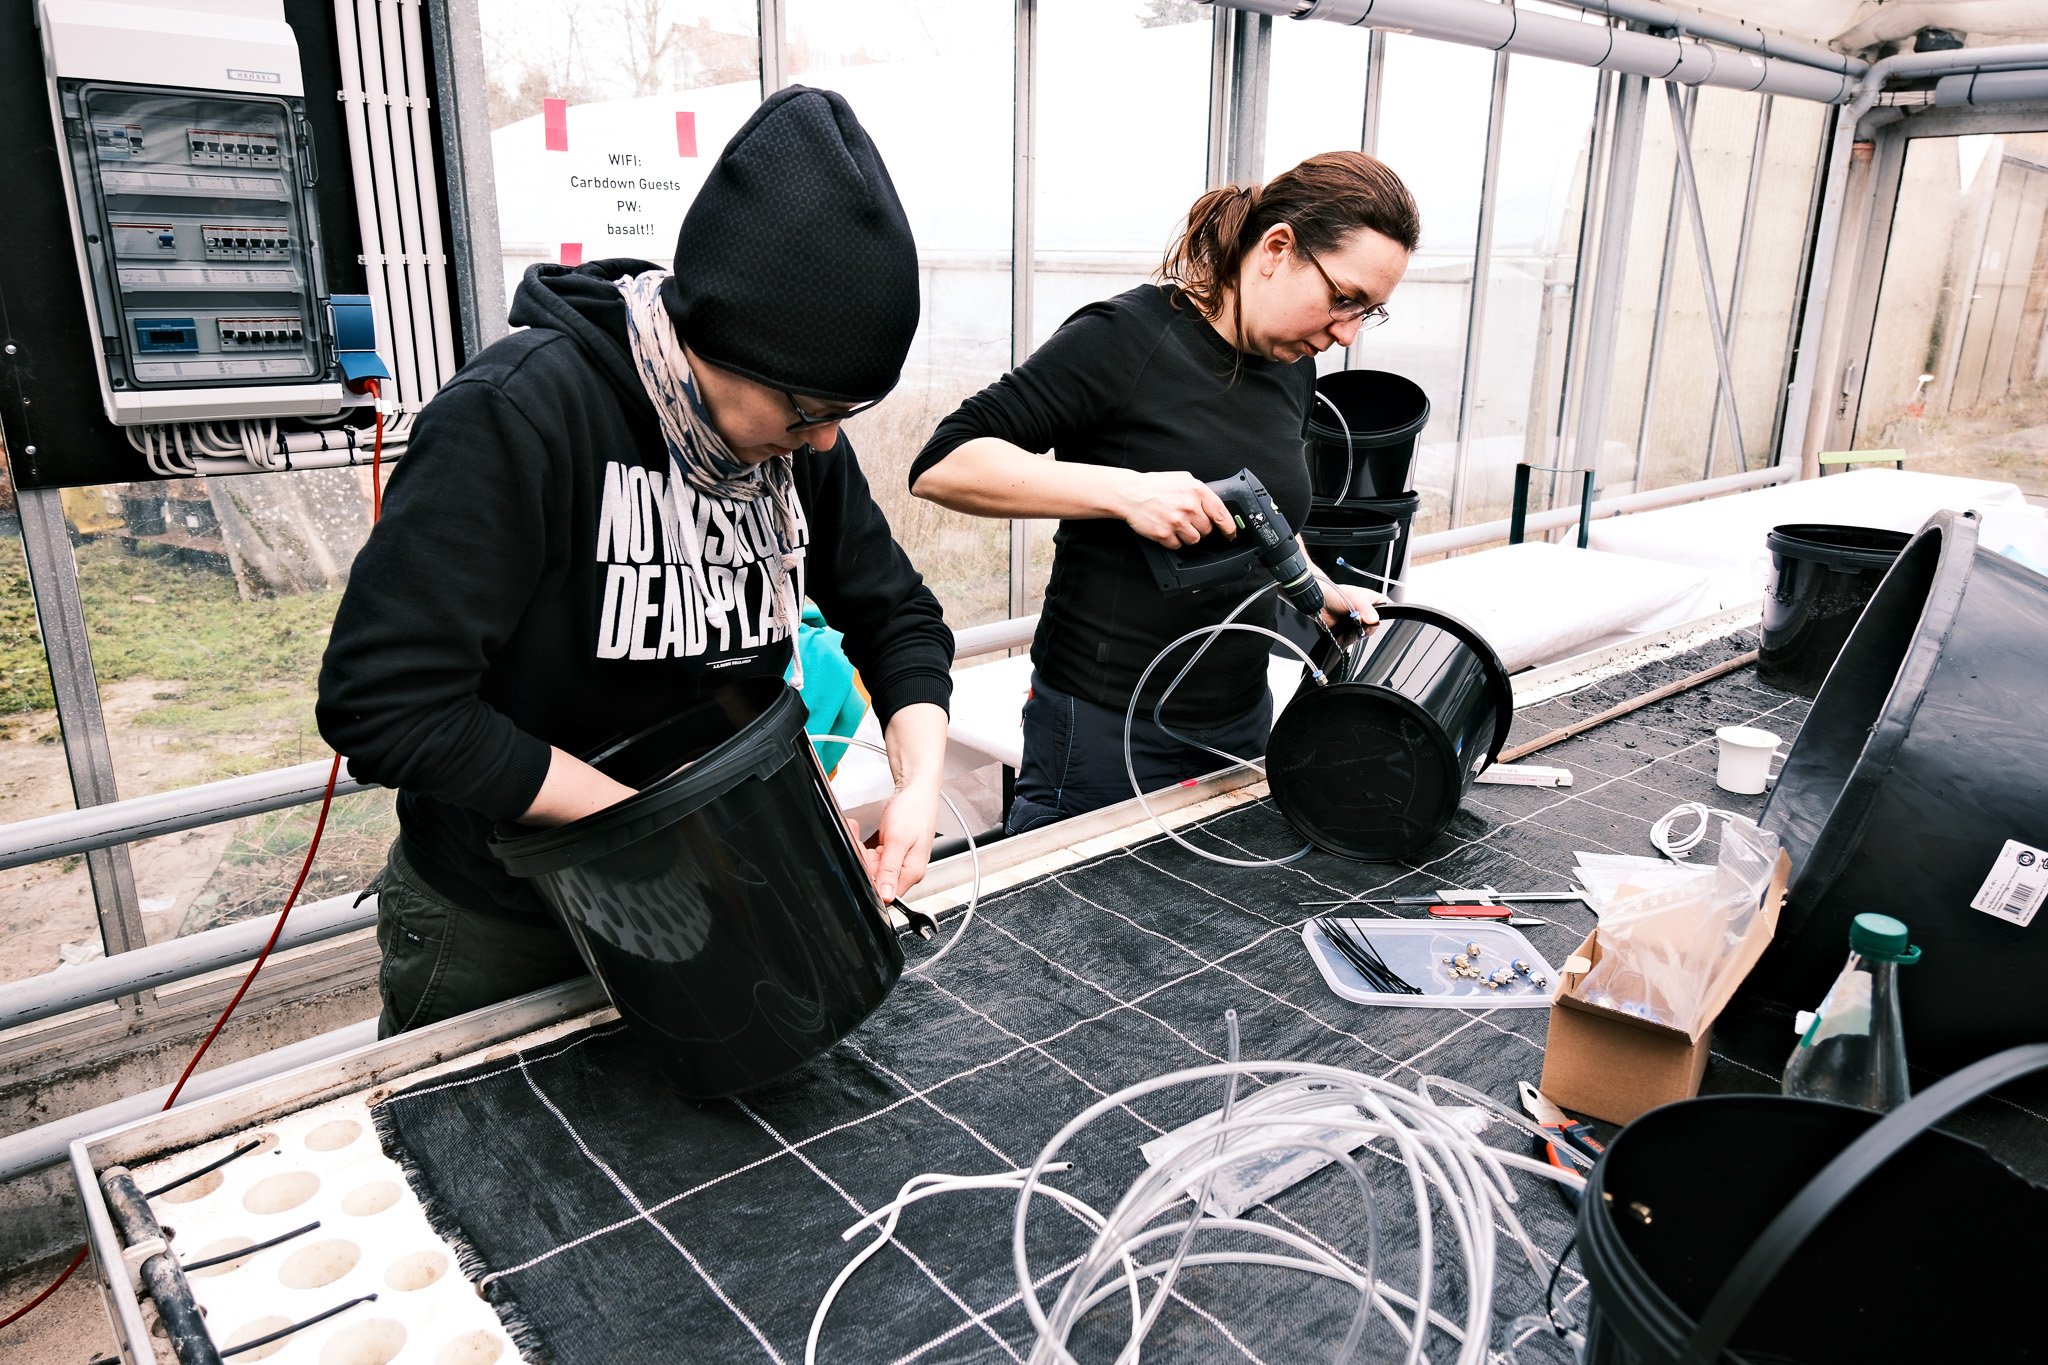
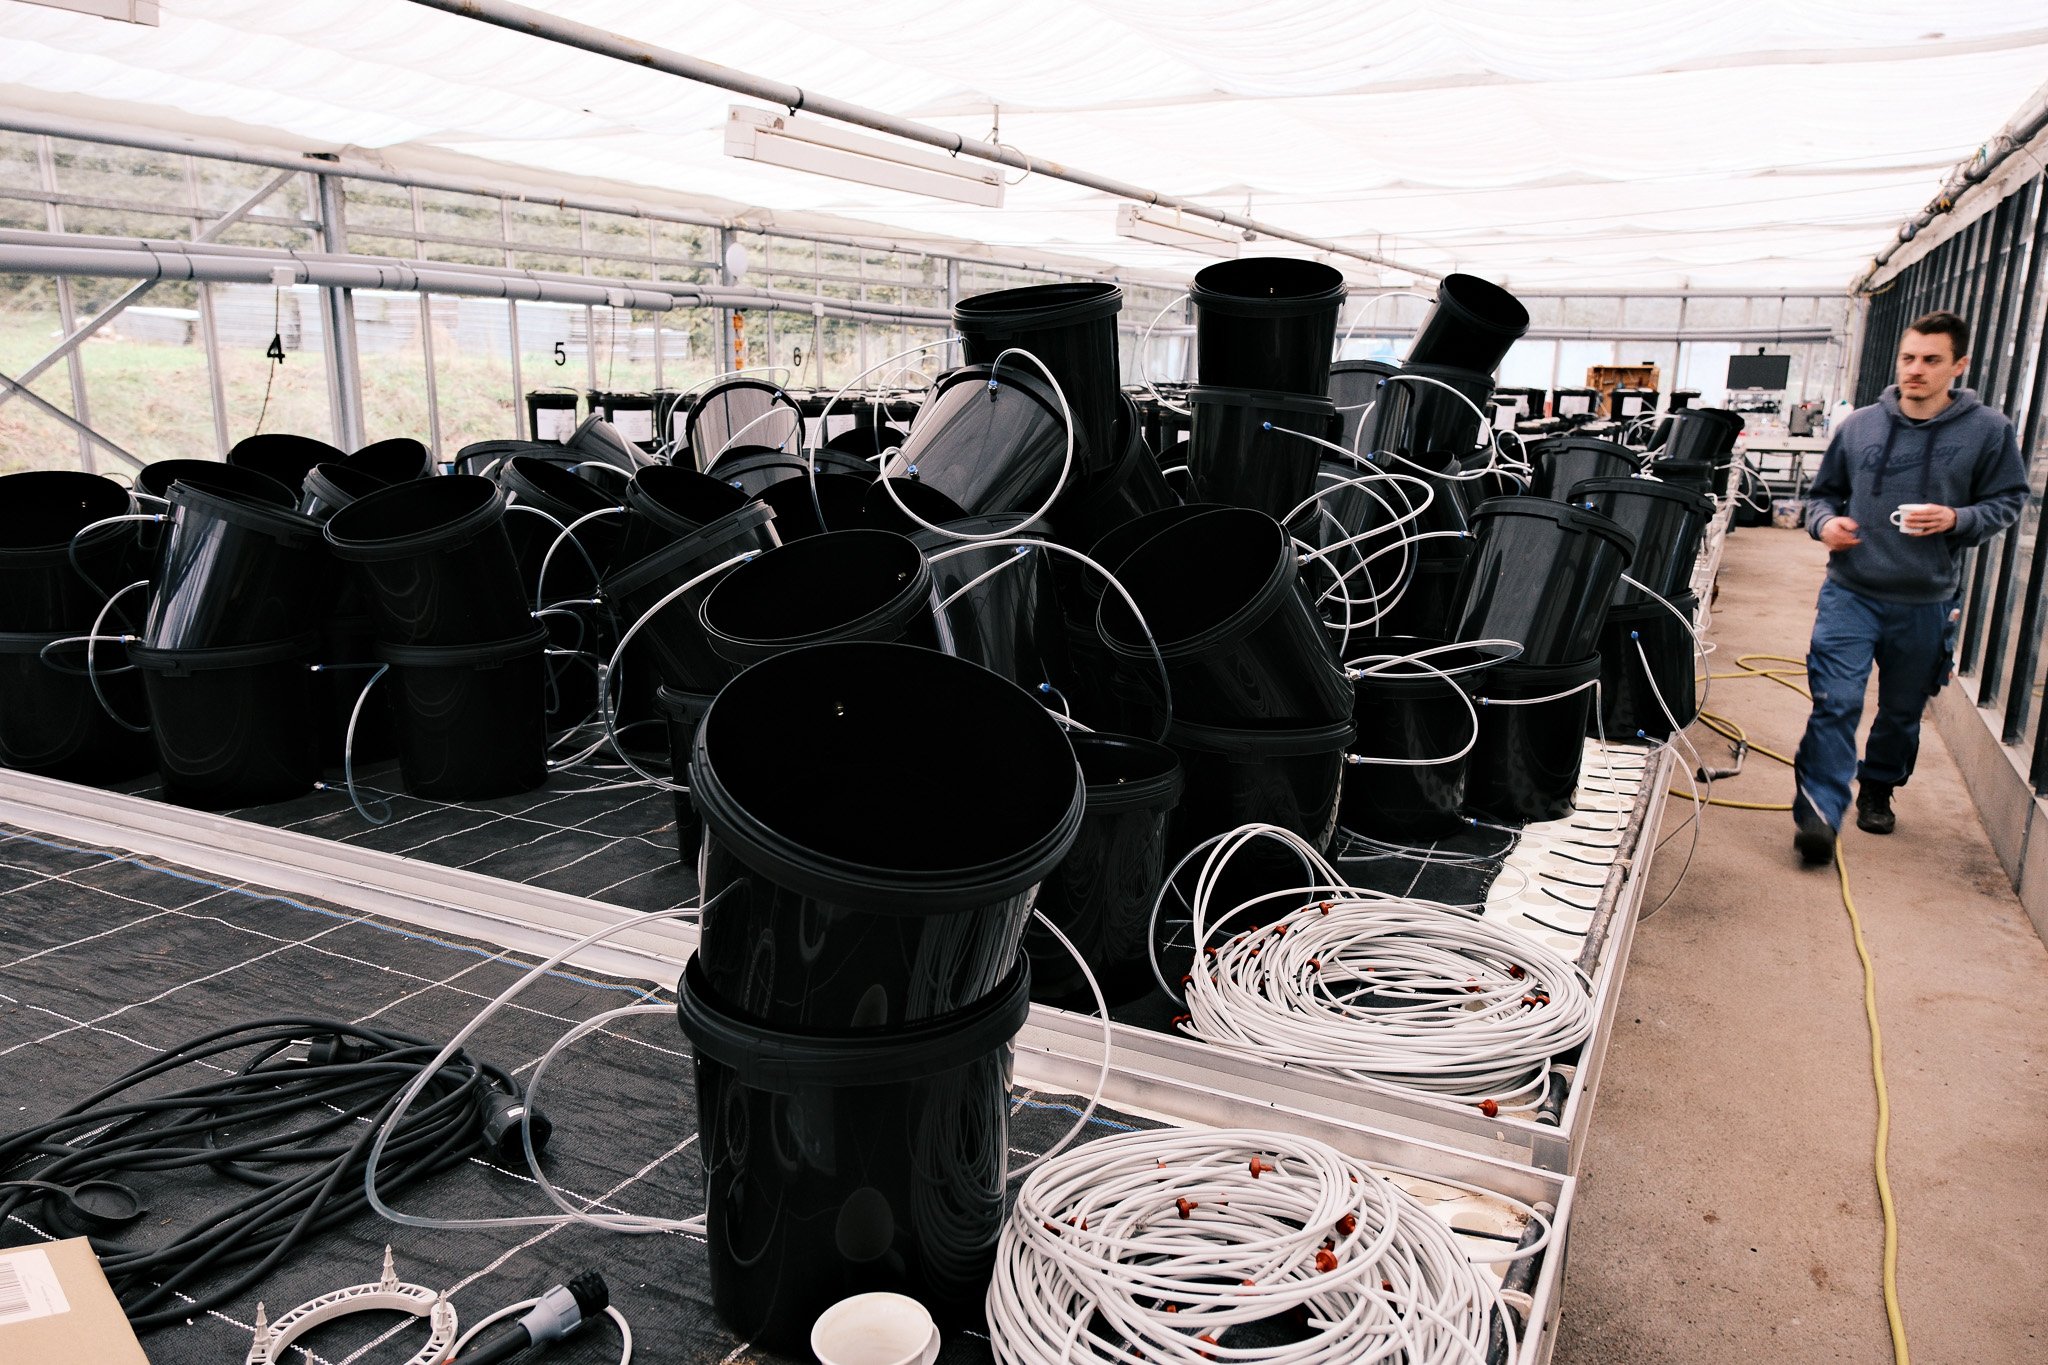
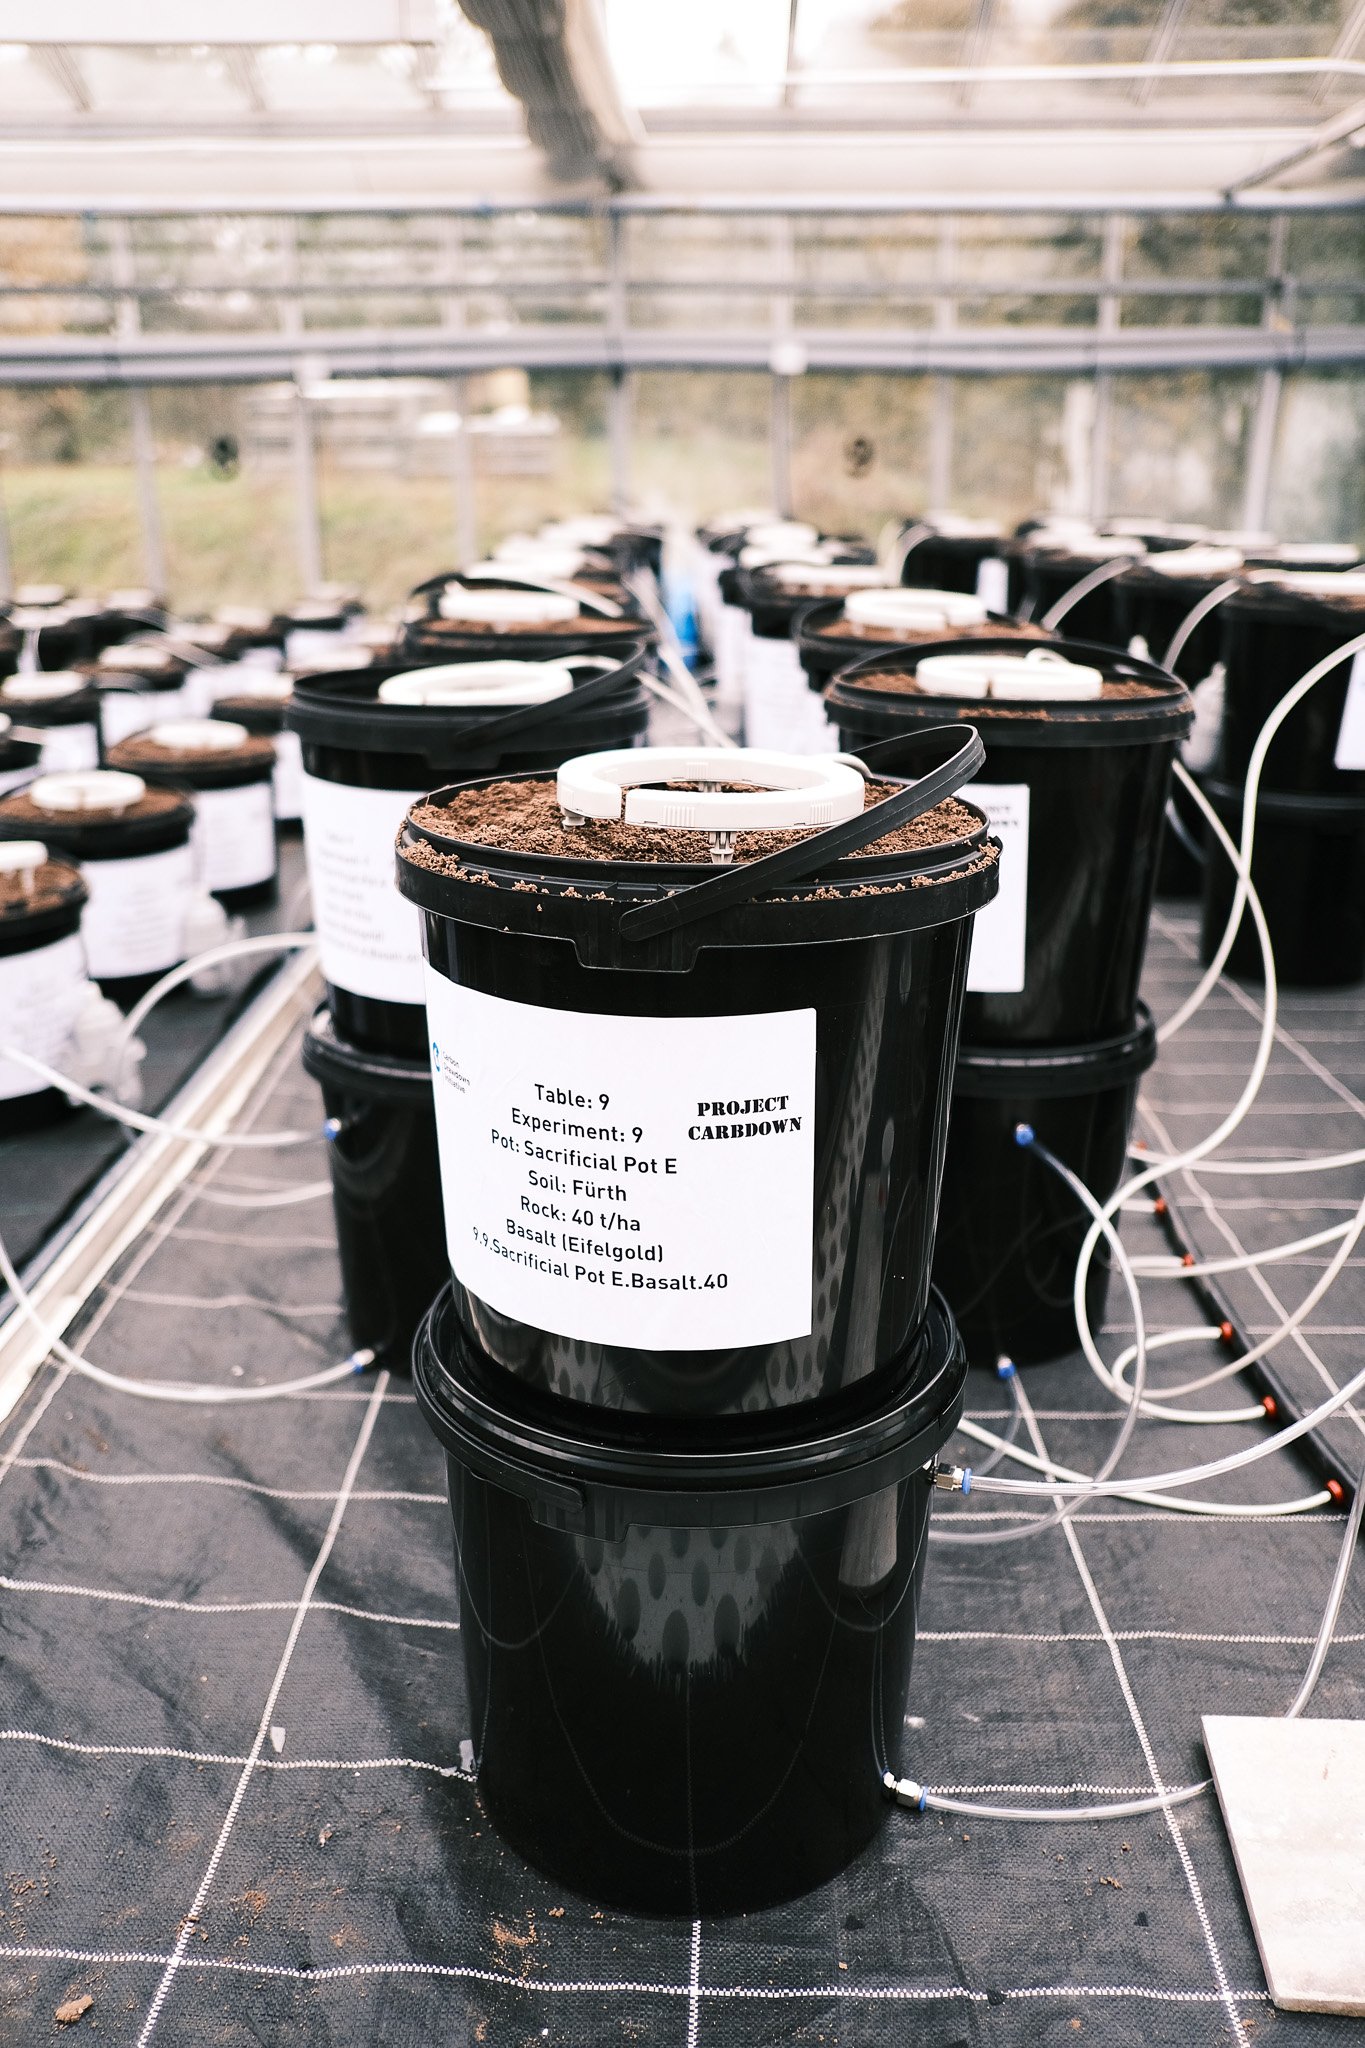
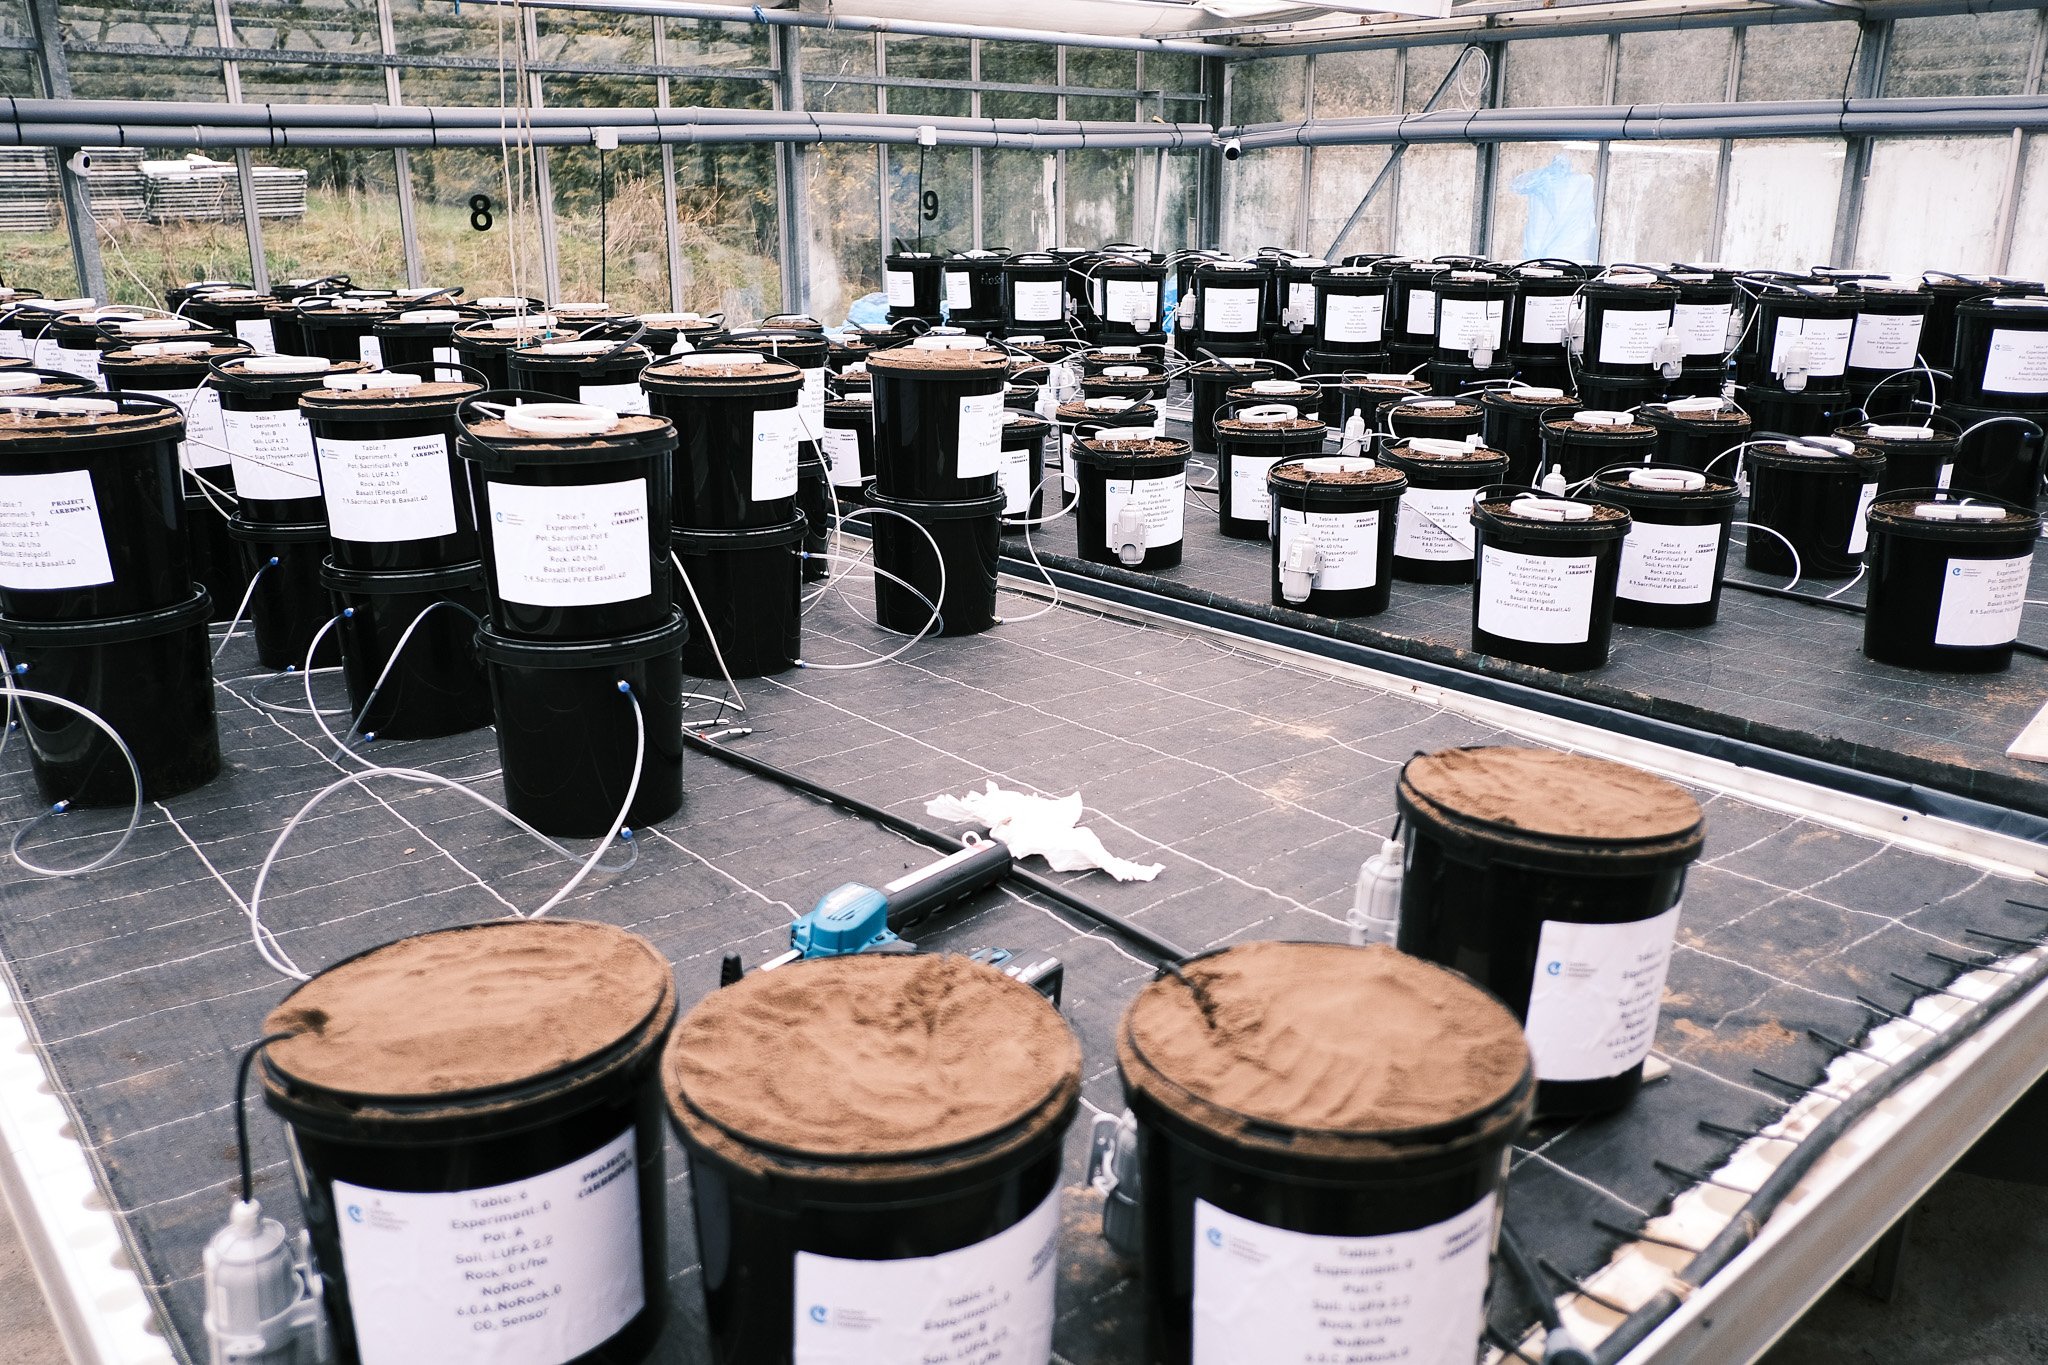
When we started to plan this experiment we quickly realized that we will need to set up hundreds of pots/lysimeters. This meant that we couldn’t use our two previous lysimeters concepts (base costs €150 of the 2021 model and €70 per pot for the 2022 model) for cost and for space/logistics reasons. So we came up with a new lysimeter design that costs less than €6 per pot and contains 10 liters of soil.
We used three food-grade buckets (€1,50 a piece), from bottom to top:
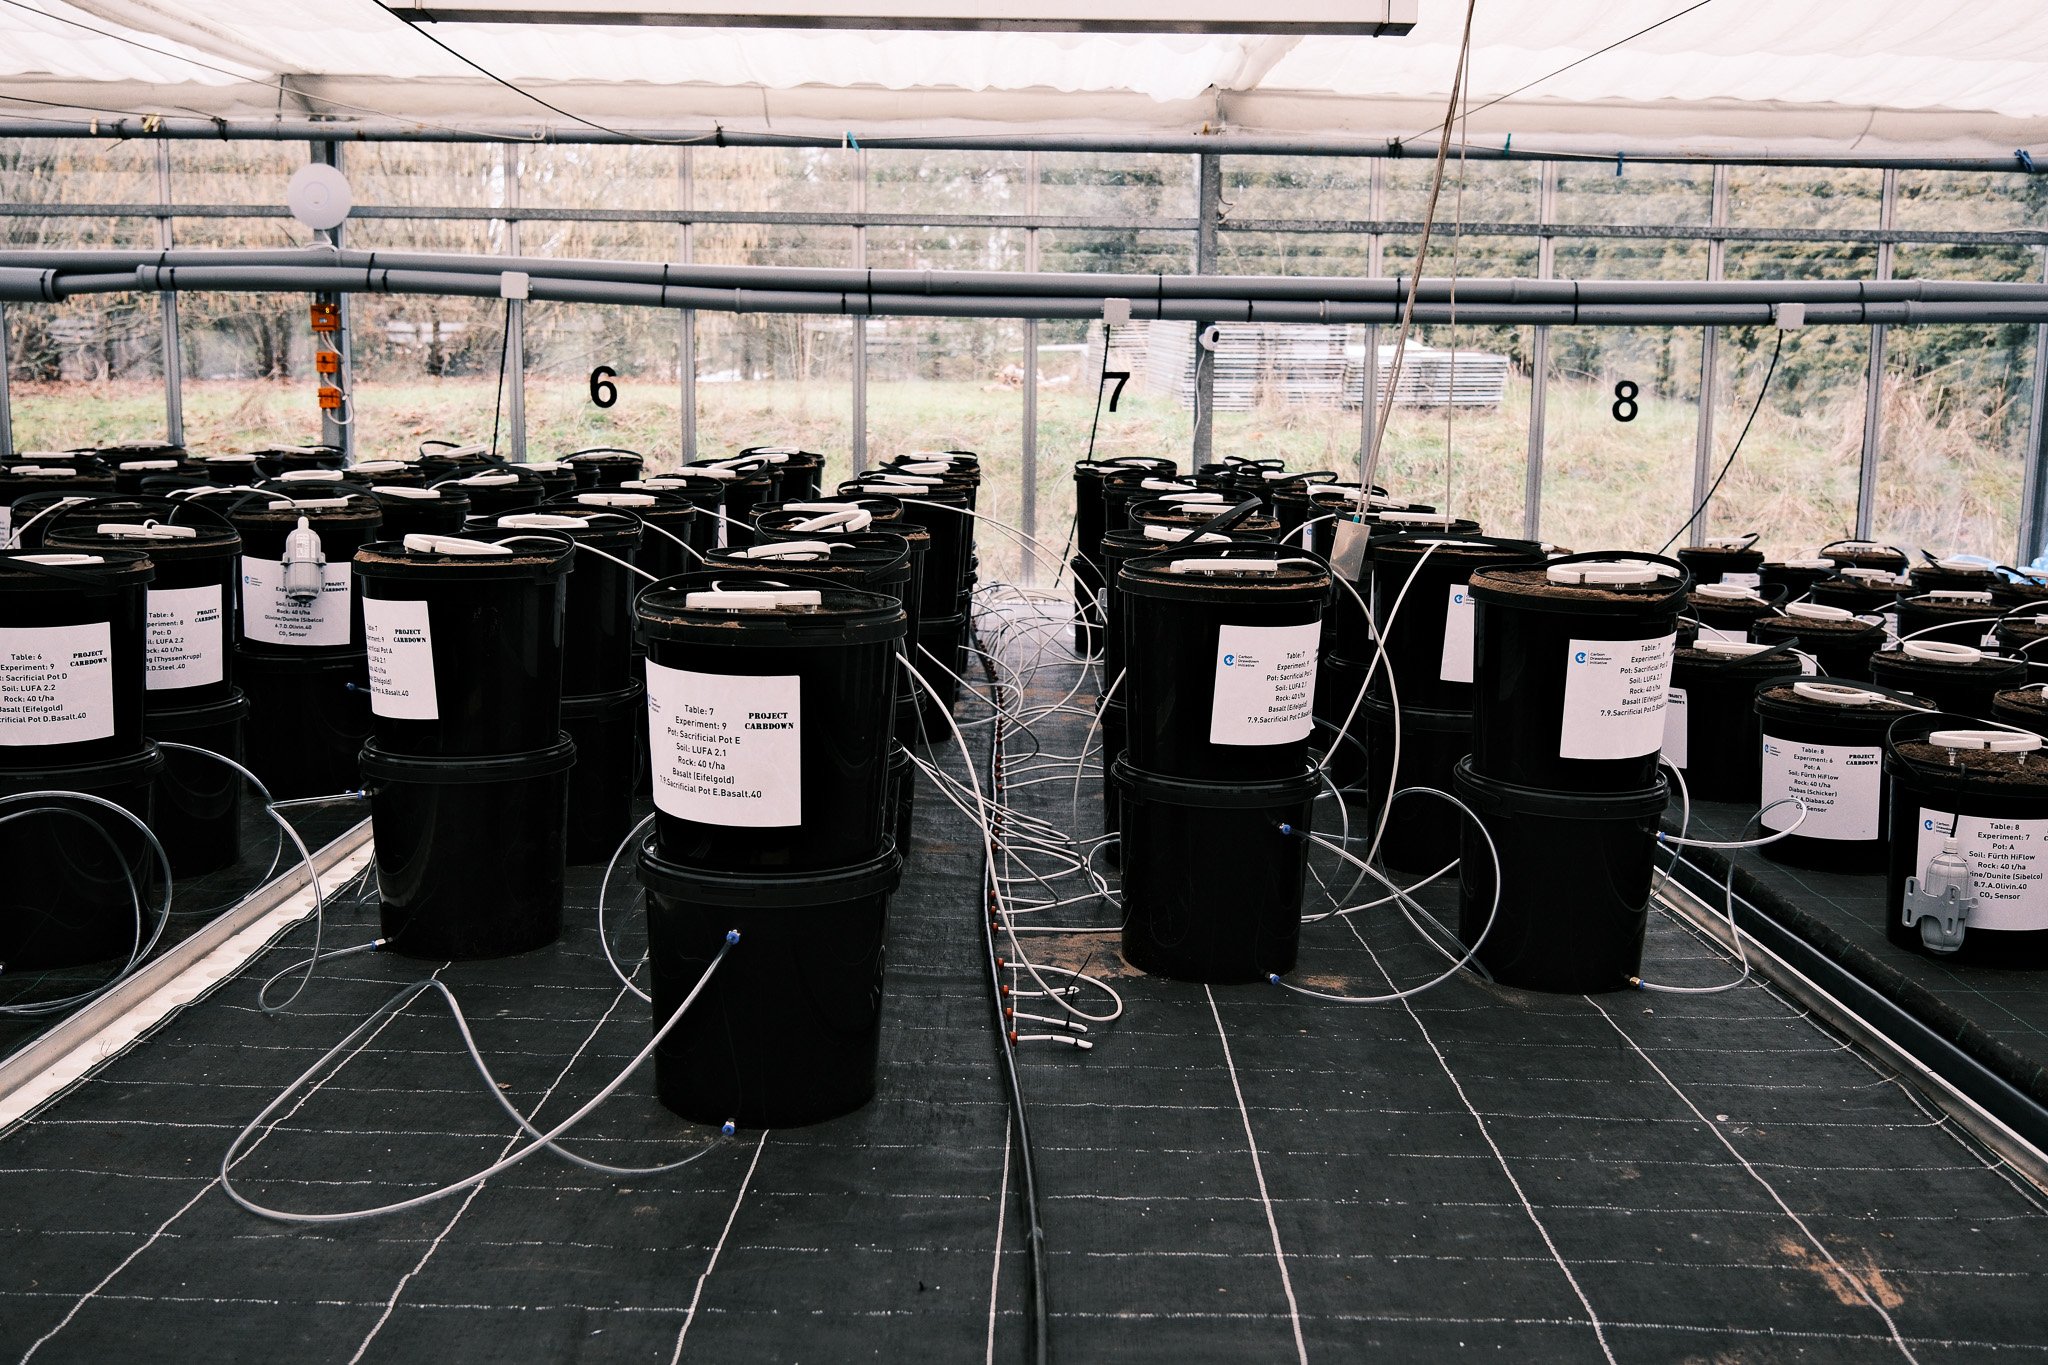
Tank: The bottom, black pot is the water collection tank. It has two pneumatic connectors so we can access the leachate (lower one) and the headspace gas inside the tank (upper one). The transparent pipe between the two connectors allows us to see the current fluid level in the tank and to empty the tank after sampling.
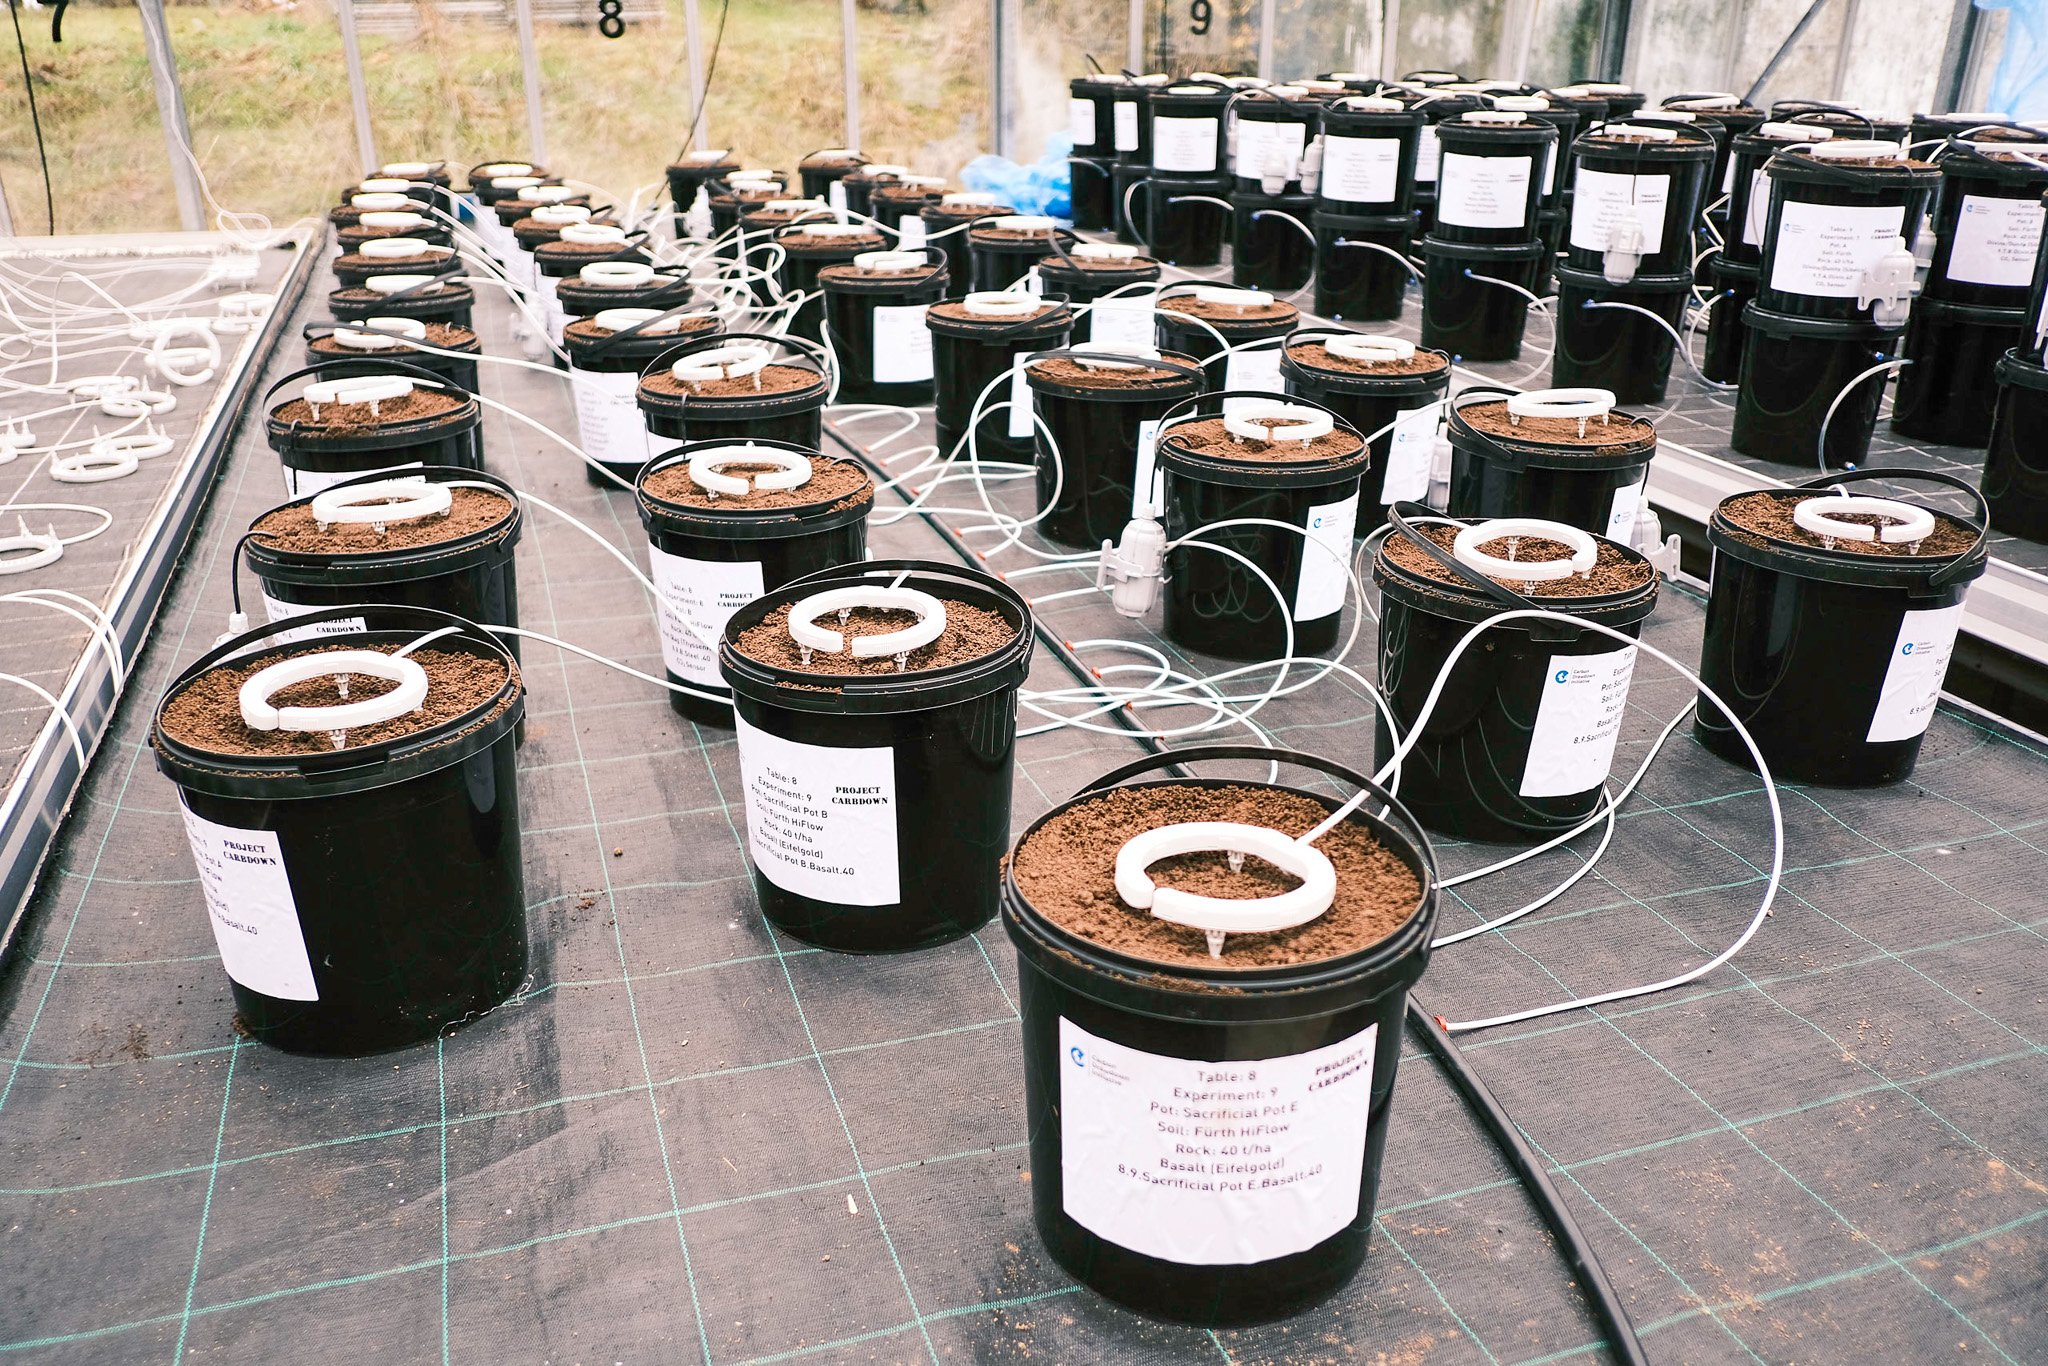
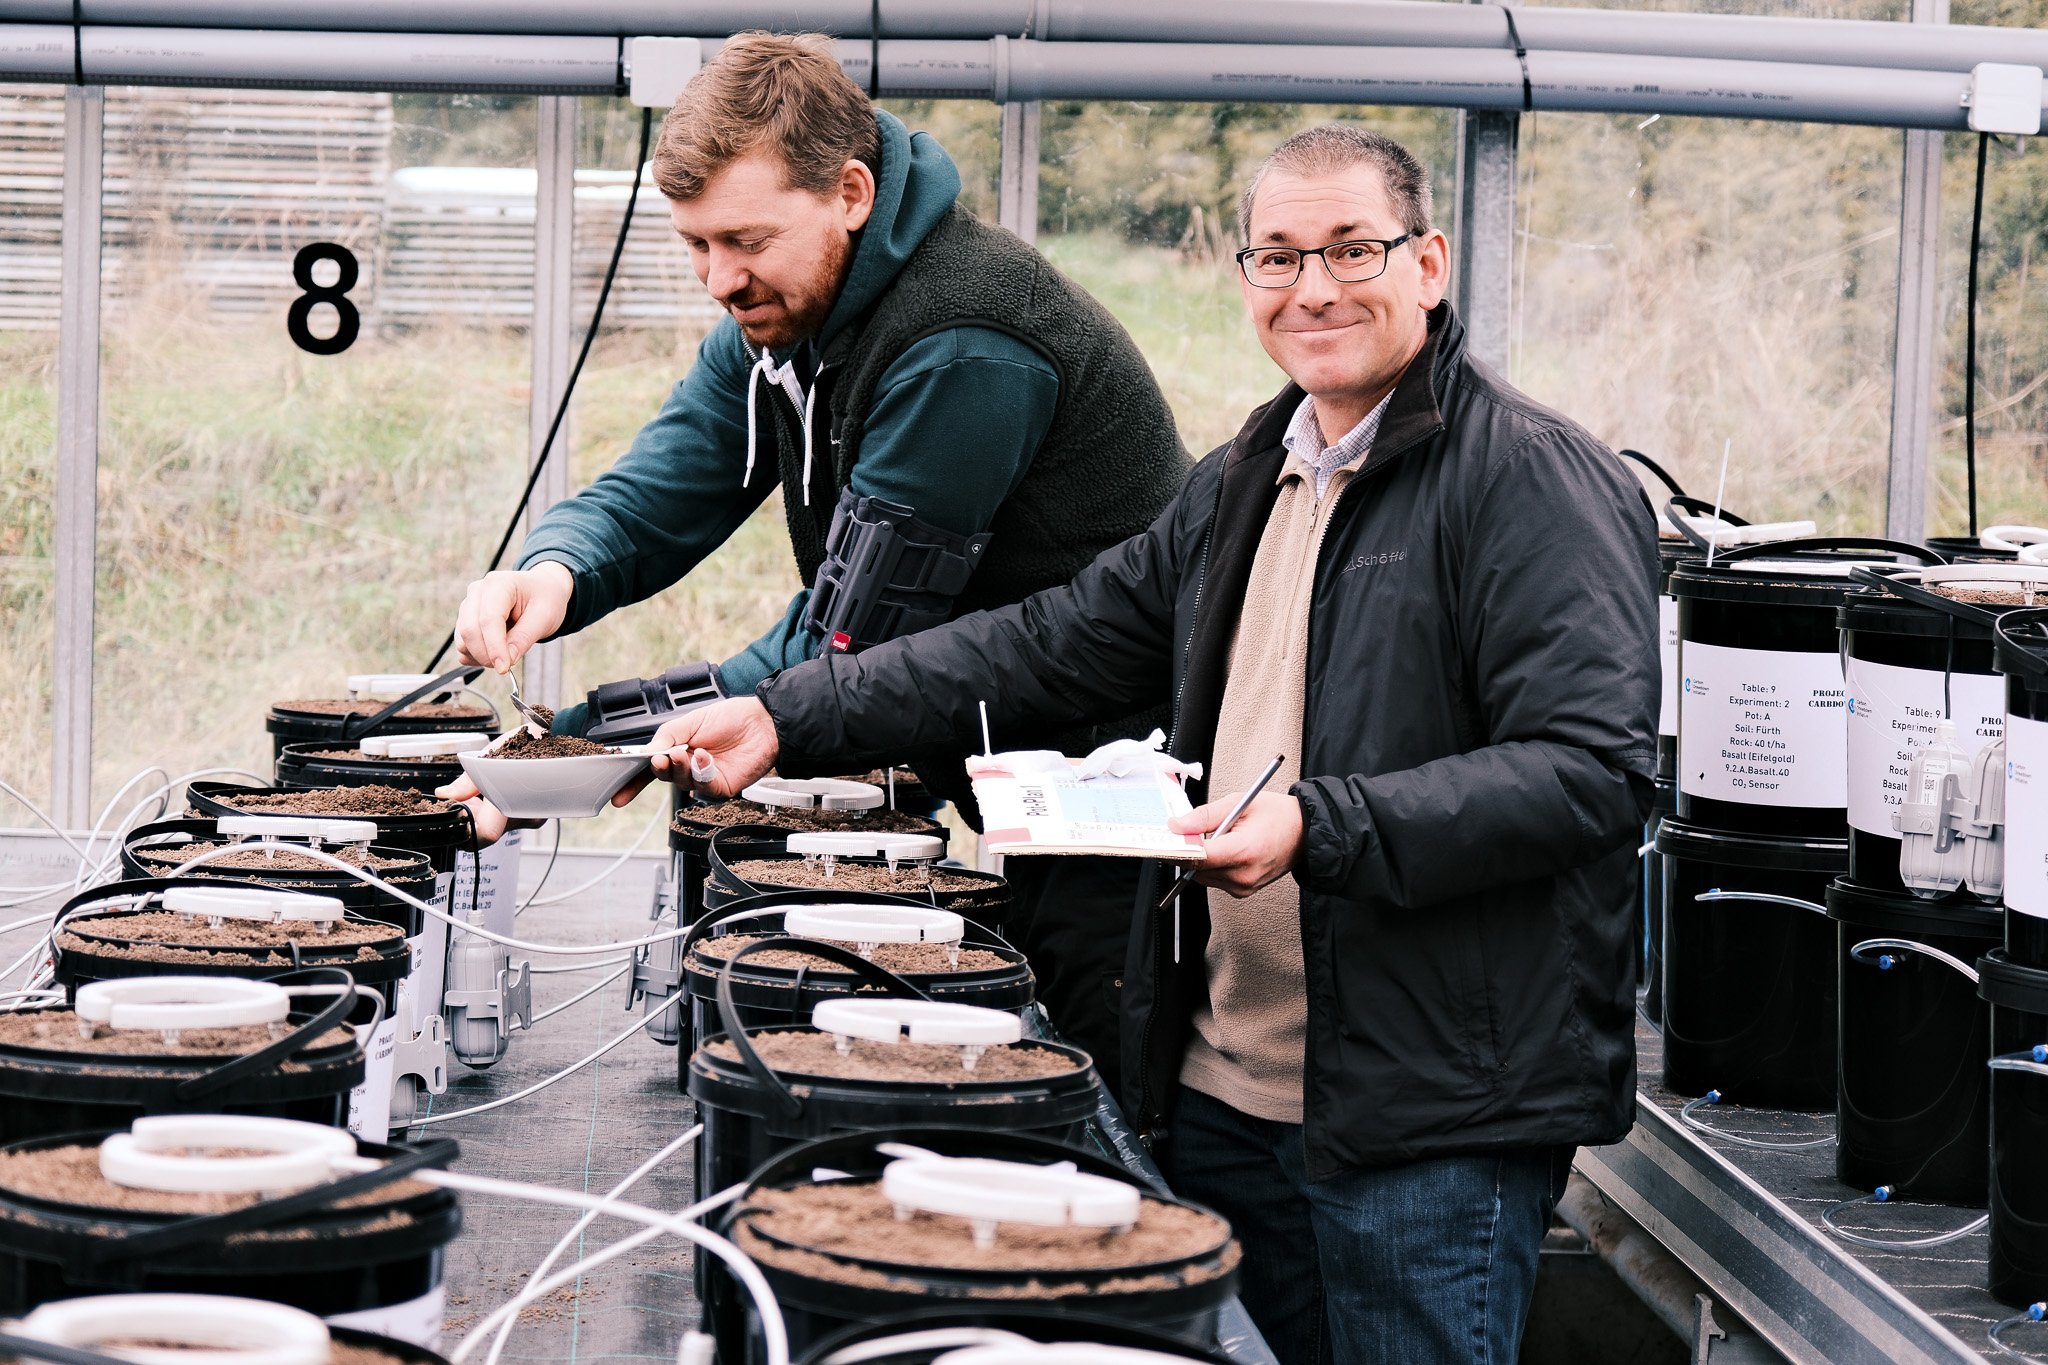
Soil/flora/fauna: The soil pot (also black) stands on the lid of the tank, sealed with silicone. At the bottom a root fleece keeps the soil in the pot, a 3 cm layer of neutral filter sand reduces manual filtering during the sample taking process. On the filter sand there is a layer (~10 cm) of untreated soil and a ~15 cm layer of soil/rock mixture which also includes electronic sensors and tea bags with 5 g rock samples. We added 20 worms to each pot, too. Well, to be exact, the worms immediately, within a few minutes, left the pots treated with steel slag, so not all pots have worms. On the pots we grow grass.
Fluxmeter: Whenever we need to measure the gas fluxes coming out of the pot (gasses can’t escape into the other 5 directions) we put a third, transparent pot on top (up-side-down) with a gas sensor. This is being opened and closed for measurements. Then we can calculate the flux from the change in CO₂ concentration in the pot over time.

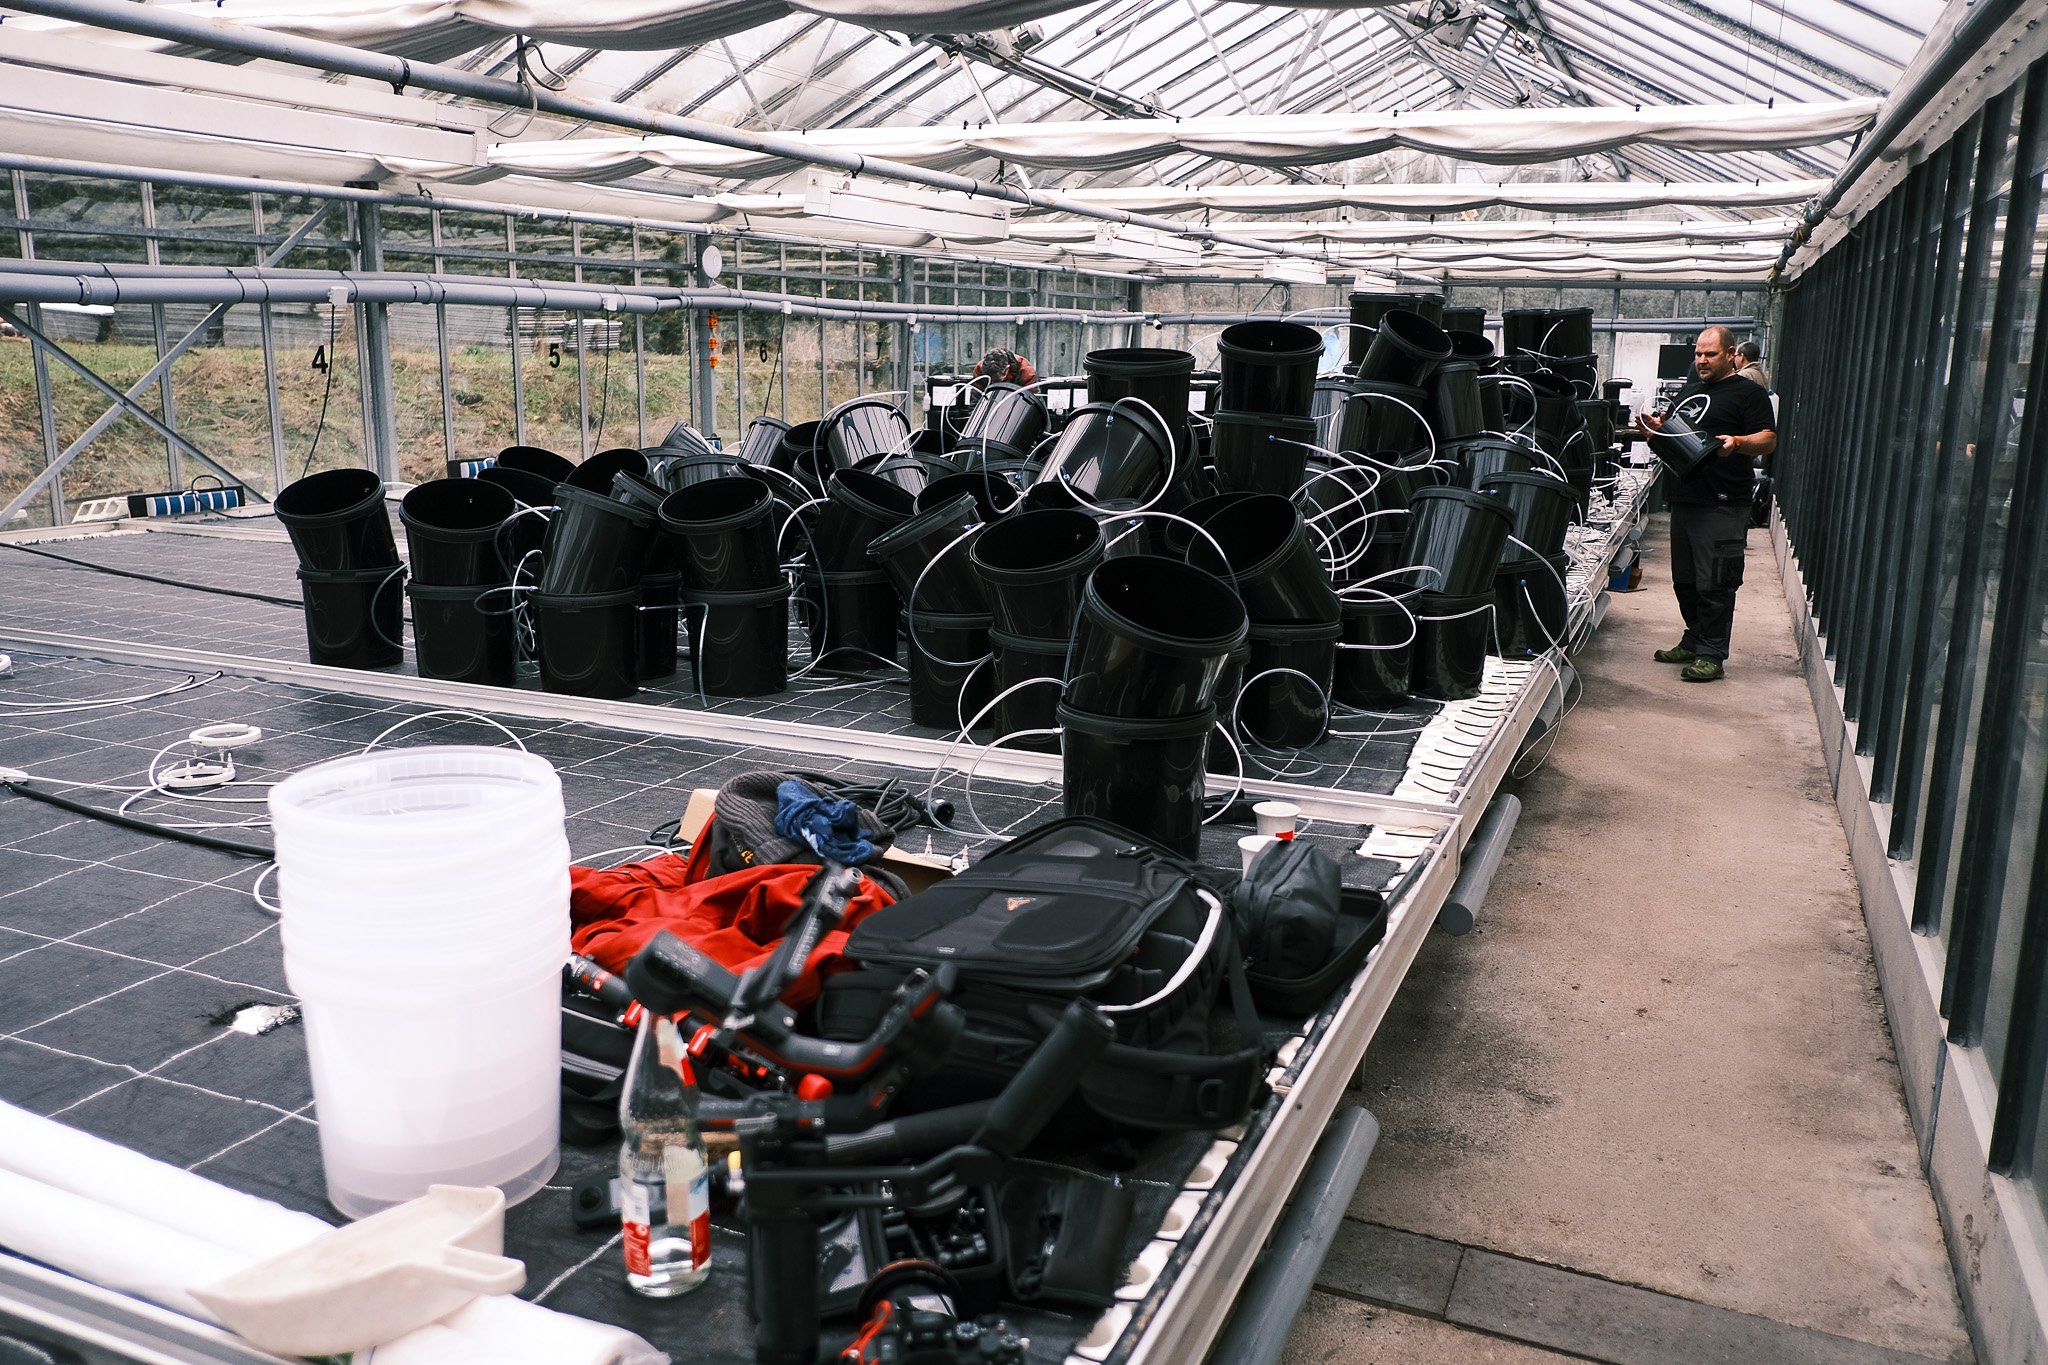
With this design and the building process described below we were able to set up the first 250 pots in 2 days with 25 people and a material cost of €6 per pot (without soils, rocks, sensors) plus ca. €15 per pot for everything else (see shopping list) except for labor cost and greenhouse rent/heating.
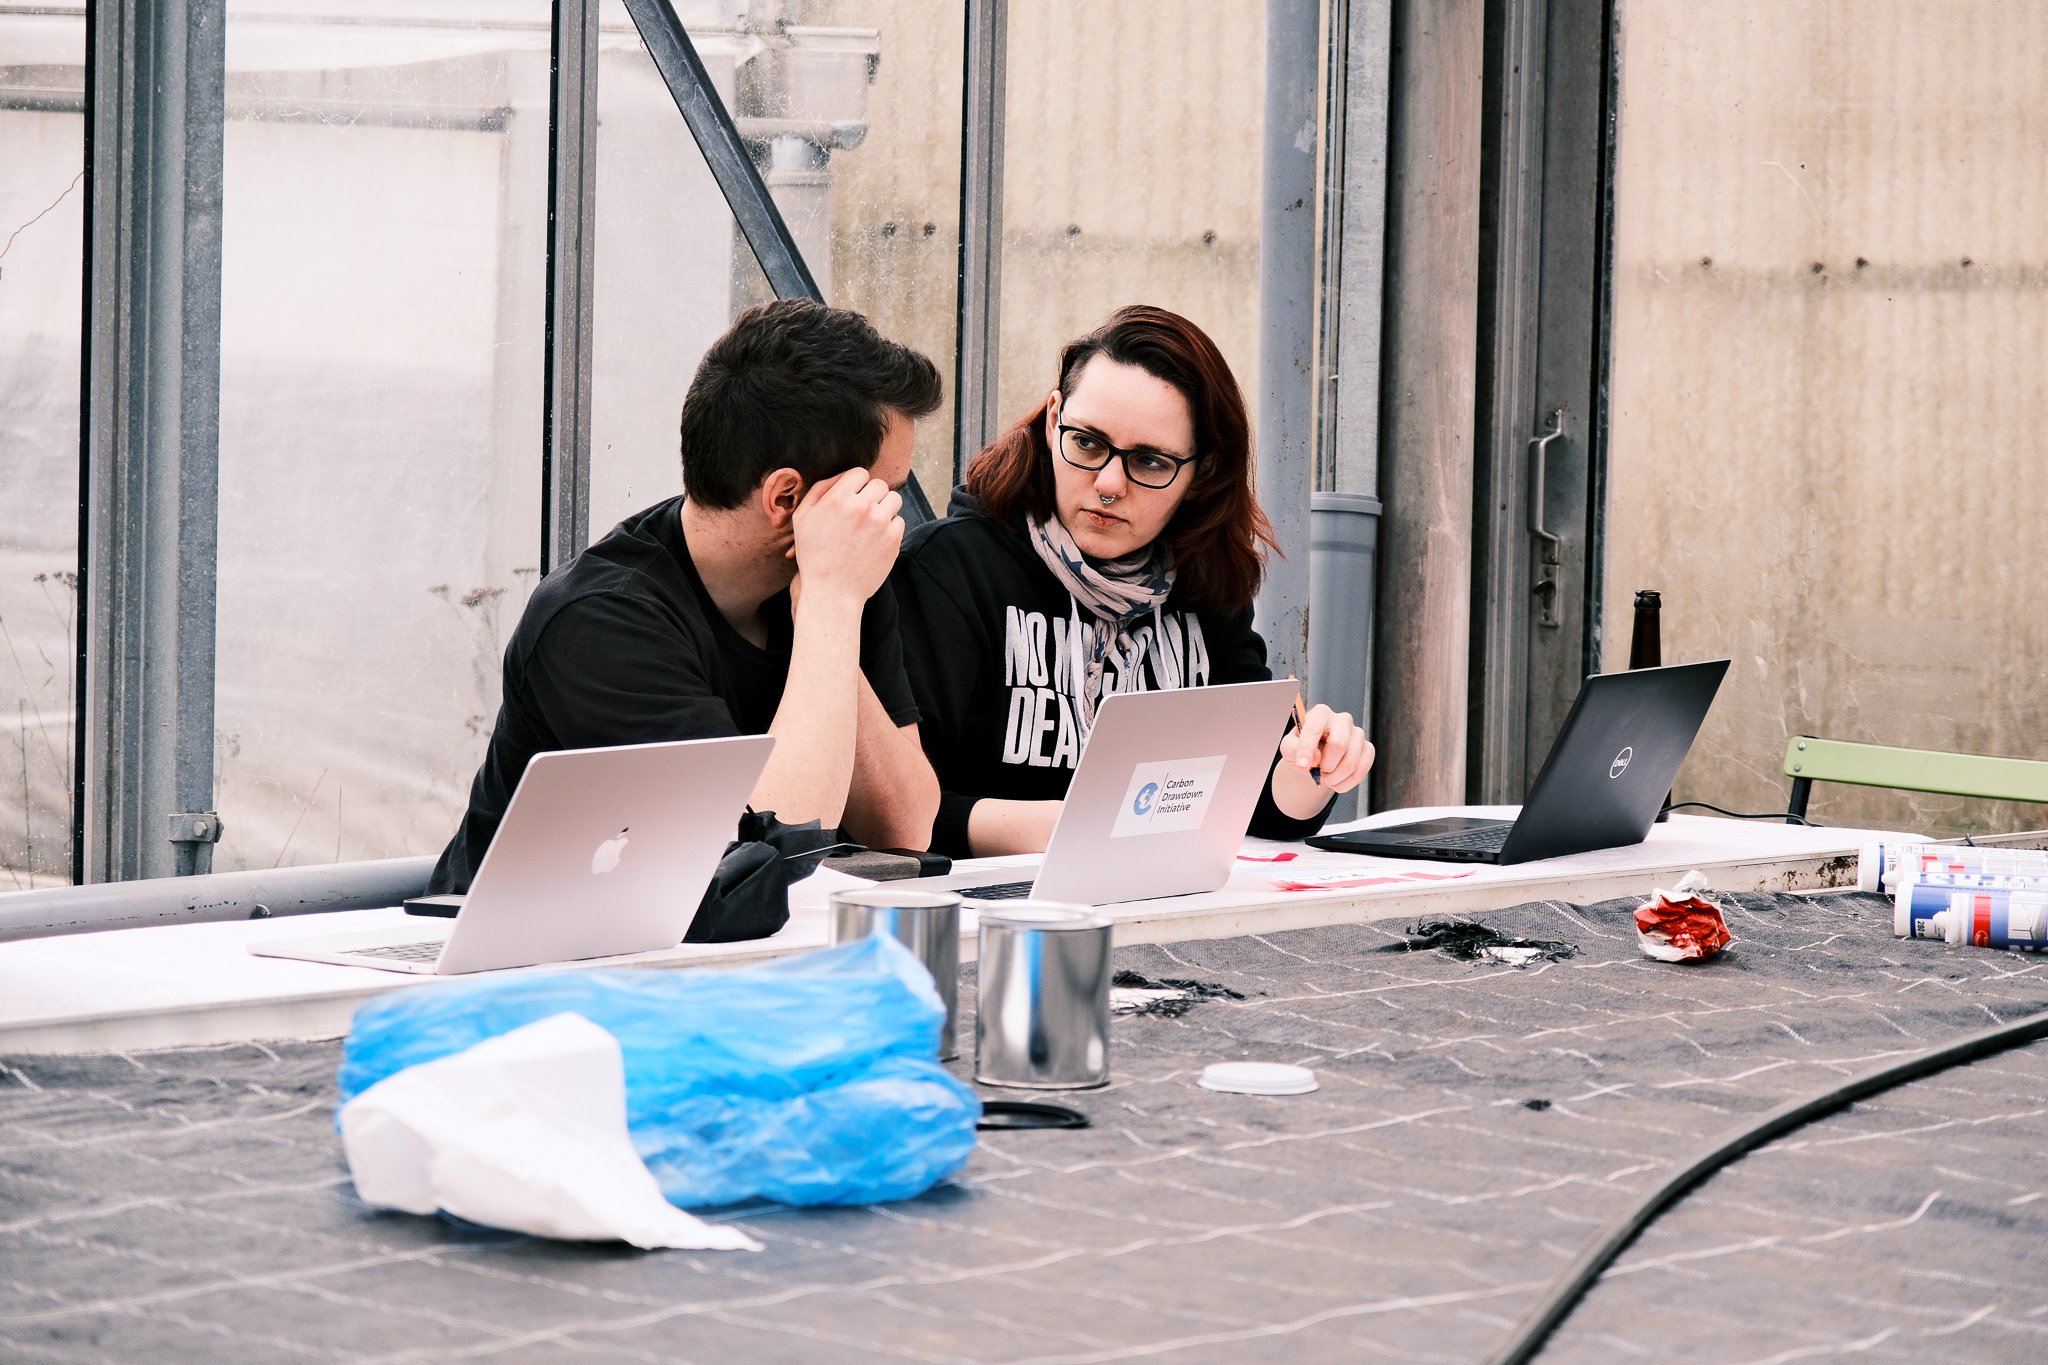
Some 50 pots came a week later., and another set of 32 in mid March. After the setup of the 300 pots the sheer scale of this project requires smart solutions for sample taking and lab work, too. Few organizations will be able to analyze one sample for each pot every month (300 samples/month) or store a monthly sample from each pot for 3 years (10.000 samples). We are in the process of coming up with a smarter analysis approach with just a fraction of this effort.
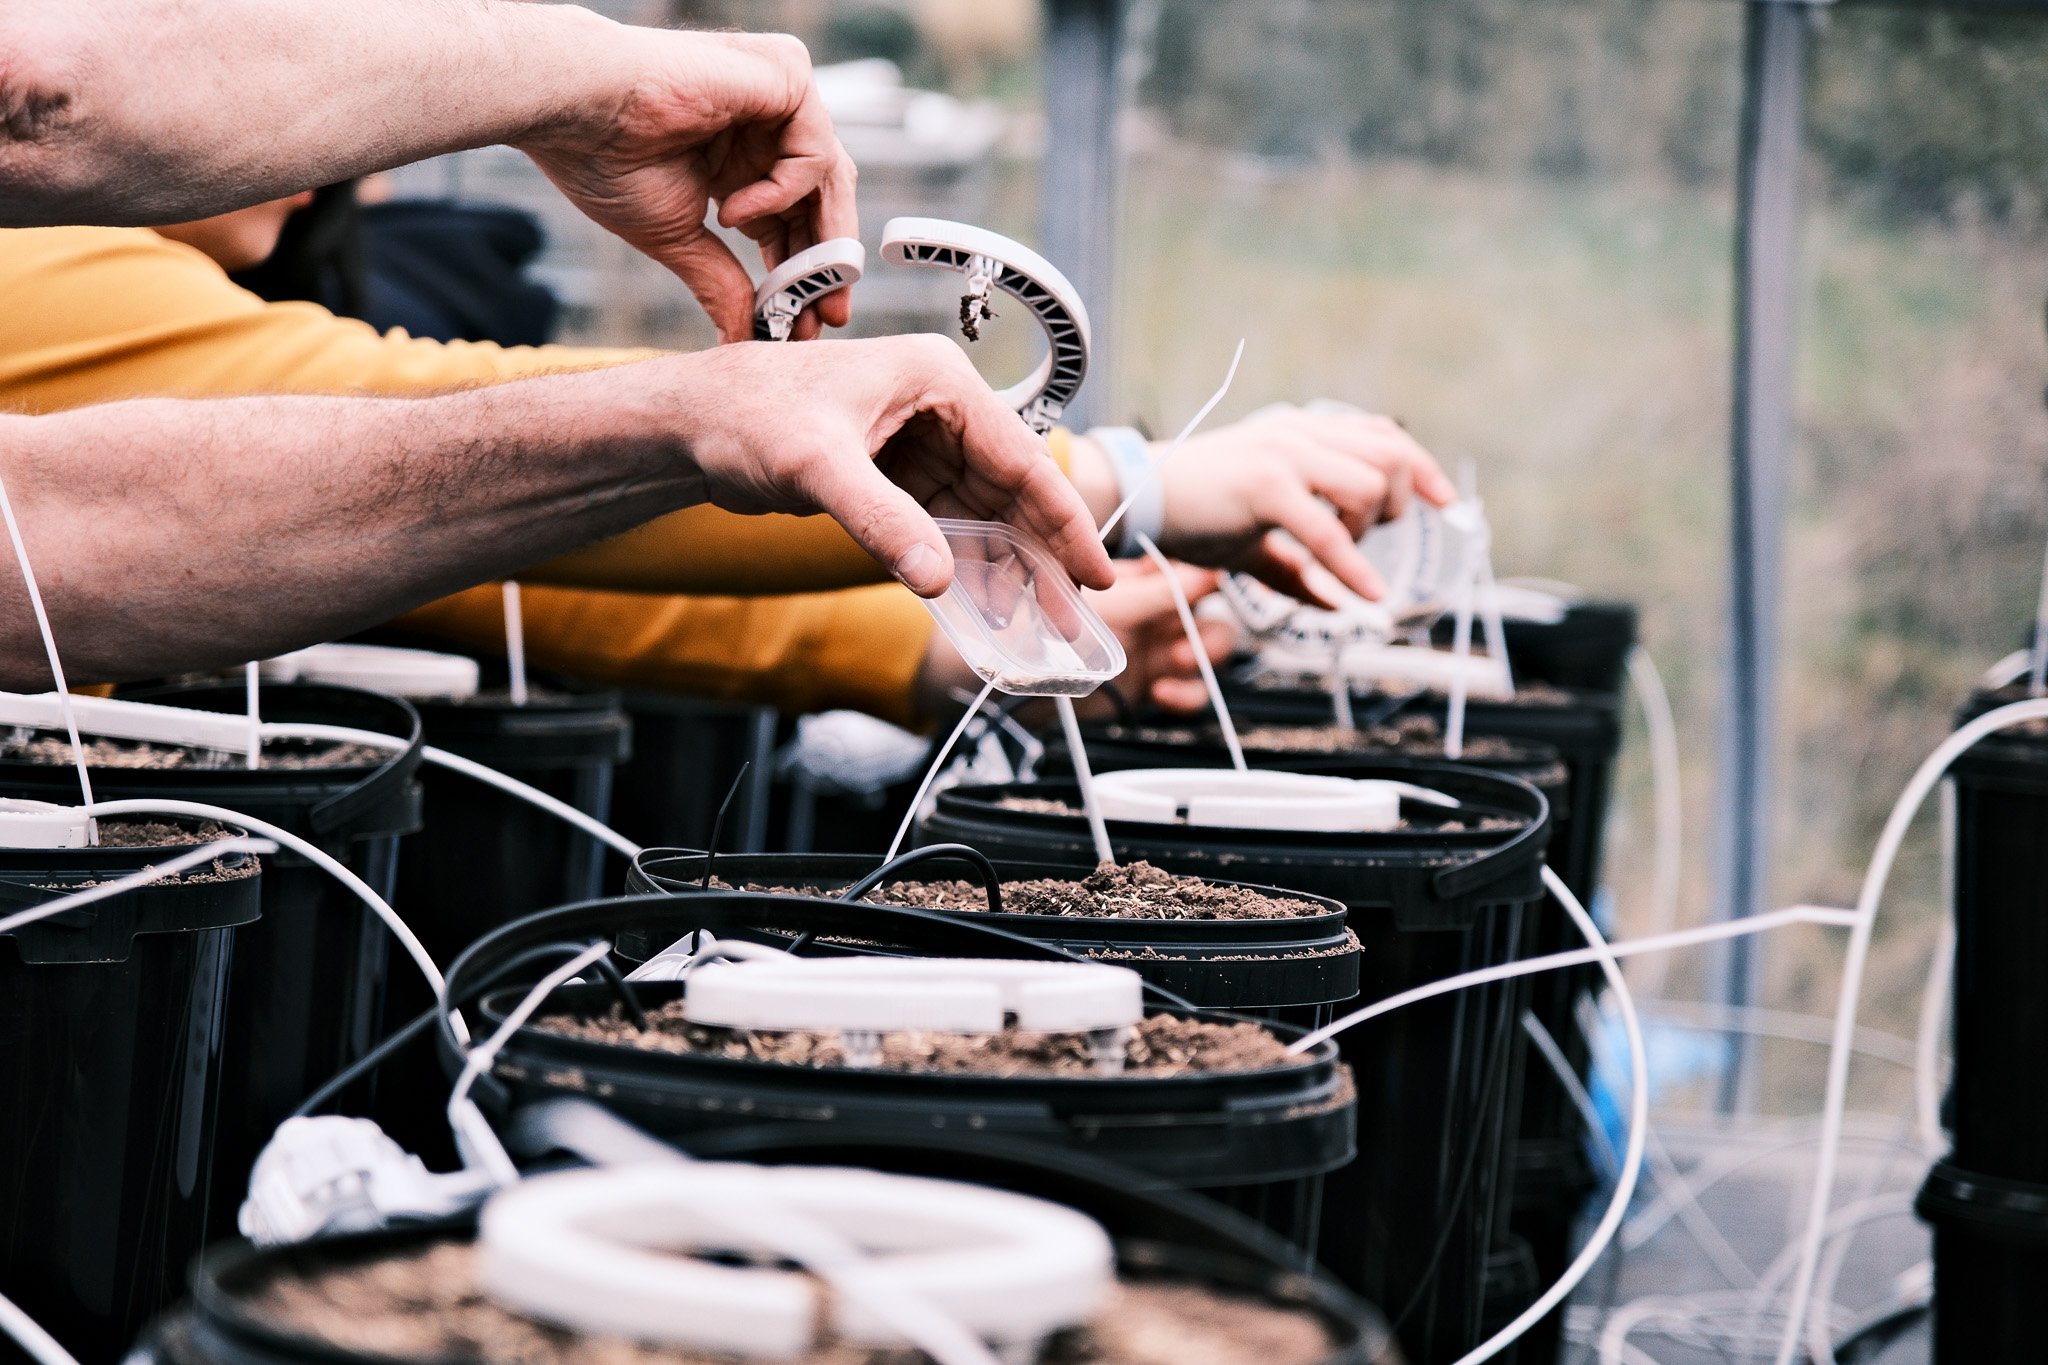
The usage of electronic sensors, which often cost less per piece than one set of lab tests of one single sample while delivering hourly data for years, is a great way to reduce cost and still have an eye on what is going on. We use LoRaWan sensors for moisture, electrical conductivity, pH, water levels (in tanks and the cisterne) and CO₂ in soil and ambient air.
A few thoughts on the “pot plan”
One basic strategic thought about the greenhouse experiment is that we create a set of soils/pots which have been aged under certain controlled conditions. The older such a pot is, the more valuable it becomes as soon as we have a means of measuring the actual CDR (=not just the dissolution of the rock). In 1-3 years from now, when we have identified a measuring approach, it will be invaluable to look at these pots and their soil/leachate and measure their metrics while knowing their exact history and after having made sure we achieve the fastest possible weathering rate that we could. In this context, speed is more important than being close to nature.
The specific design of other experiments’ pot plans is highly dependent on the available soils, rocks, greenhouse space and resources. We think for the pot plan it is important to have a grid of soils vs. amendments/amendment rates so you can compare weathering by soils in comparing the columns' data and you can compare the amendments by comparing the lines of the grid. As our standard amendment rate we used 40 t/ha, but e.g. for Eifelgold we also created variations like 20, 100, 200 and 400 t/ha so we could later plot the differences between them. Only the 4 "main" soils (Fürth plus 3x LUFA) were combined with all amendments. The farmers' soils only received basalt at 40 t/ha.

We use Eifelgold Basalt (Basanit), Schicker Diabas, Sibelco Olivine (Dunite), and Steel Slag (which we wouldn’t use on open fields though). These are the rocks that we could get easily, which would be available at scale and which have already been used in adjacent experiments so some analyses were available. We expect faster and faster weathering in the order shown above. Steel Slag is already doing crazy stuff to the soil on day 0, some worms immediately left the pots.
We used grain sizes <2000 microns (80% are <1000 microns). The larger grain size fractions (>500 microns) make the rock dust easier to handle (doesn’t clump as much when it gets wet, and it is easier to spread at scale).
We use Fürth soil twice, one table with 40 pots gets the experiment's standard with 2000 mm/a irrigation (high value of some of the more moist regions in Europe) and one table of 40 pots with 8000 mm/a annual irrigation (highest annual rainfall on earth), which we call the "HighFlux" experiment which we expect to show the fastest weathering rate, especially with steel slag or dunite.
In March we added 32 more pots with rock dusts from several commercial ERW companies from around the world. We asked Lithos, UNDO, Eion, Silicate, InPlanet and Veolia if they could send us rock dust samples that we could use as a comparison basis to our own rock dusts.
This is our pot plan and sensor plan:
A few thoughts on electronic sensors
EC/pH: We use the soil moisture/EC and soil pH sensors from Dragino. But: Don't expect a CDR signal from these pH and EC sensors anytime soon. We'll share a document which shows that with electronic sensors and lab tests of drainage waters we could not see any signal in the XXL lysimeters even after 10 months. The moisture sensors of course are helpful for us in keeping an eye on our irrigation system.
CO₂: ERW is all about reducing the respiration of CO₂ from the soil into the air, it is an indirect carbon dioxide removal method. So why don’t we measure the CO₂ in the soil and the CO₂ fluxes? With 24/7 sensors this can be done (manually won’t work). Our CO₂ sensors in the greenhouse and in our XXL lysimeters in the field showed an immediate a signal already days after amendment (!). We’ll post a blog article with our preliminary findings from the XXL lysimeters and from the greenhouse soon. The specific Seeed Sensecap CO₂ sensors (1st Gen) we have been running in the field since August and we now have put into the soils of the greenhouse pots are unfortunately out-of-production. We bought the remaining ones from various online shops and could only get 120 of them. The vendor has switched to a newer, 2nd gen version some time ago which only goes up to 10.000 ppm (the old one can do up to 40.000), which makes them useless for our needs, and which we could not get to work reliably in our XXL lysimeters (sensors clogs up after 2-3 days). This is a problem to be solved.

We are also monitoring the liquid levels in some of the tanks with sensors. Also the water in the cisterne is monitored with a sensor. And, finally, we monitor the ambient environment in the greenhouse: air-CO₂, humdity, more than 50 temperature points, and sunlight intensity.
Almost all our sensors, gateway stuff and integration services are from https://iot-shop.de. Thank you!
A few thoughts on the measuring/lab analysis approach
We are looking for a signal, that is a function of time, rock amount and treatment rate and which is hidden by variance and measurement inaccuracies.
Signal = f(time,amount,rock) + variance + inaccuracies
We need a signal which is clearly larger than variance in order to be a trusted hint that the weathering of the rock is the cause (at least in the greenhouse we have a lower variance than in the open field).
Signal >> Variance
By using 4 replicas we postulate that our 4-pot average does not suffer much from inaccuracies.
We expect that the signal becomes
larger over time (rather months than weeks),
faster with more irrigation and/or better draining soil,
larger and „steeper“ with the amount of rock and
faster with basalt, diabas, olivine and steel slag (in that order due to increased reactivity).
Soil type/parameters also have an effect, but we don't know in advance which one.
This means that we can exploit the several steps of increasing rock amount and of increasing rock reactivity in our variants while looking for our signal. It is likely futile and a waste of time & money to look for a signal with lower rock amount/less irrigation/less reactivity until we can actually see a significant signal (signal >> variance) with the next higher performing variants. From our previous experiments we know that it can take months to see a signal even at 400 t/ha.
To keep the amount of measuring and (expensive) lab tests low it is likely a smart idea to select a set of base experiments (with high likelihood of an early signal) that are followed more closely while applying a more relaxed scheme on the slower pots (while maintaining a baseline establishment). Then we move down the likelihood ladder as soon as any signal becomes visible.
We know that the variance of the pots is very high in the first weeks and then quickly drops (e.g. when the disturbed soil settles). We have seen this in the other experiments already. Which means that in the first 4-8 weeks a high investment in measuring doesn’t make too much sense.
Finally one important aspect is that for MRV in the field we cannot use a signal that needs to be monitored every month in an ongoing manner (too complicated and expensive to be done on many fields, this won’t scale). Ideally we need something that works with one or two samples per year at max.

A few thoughts on “harvesting”
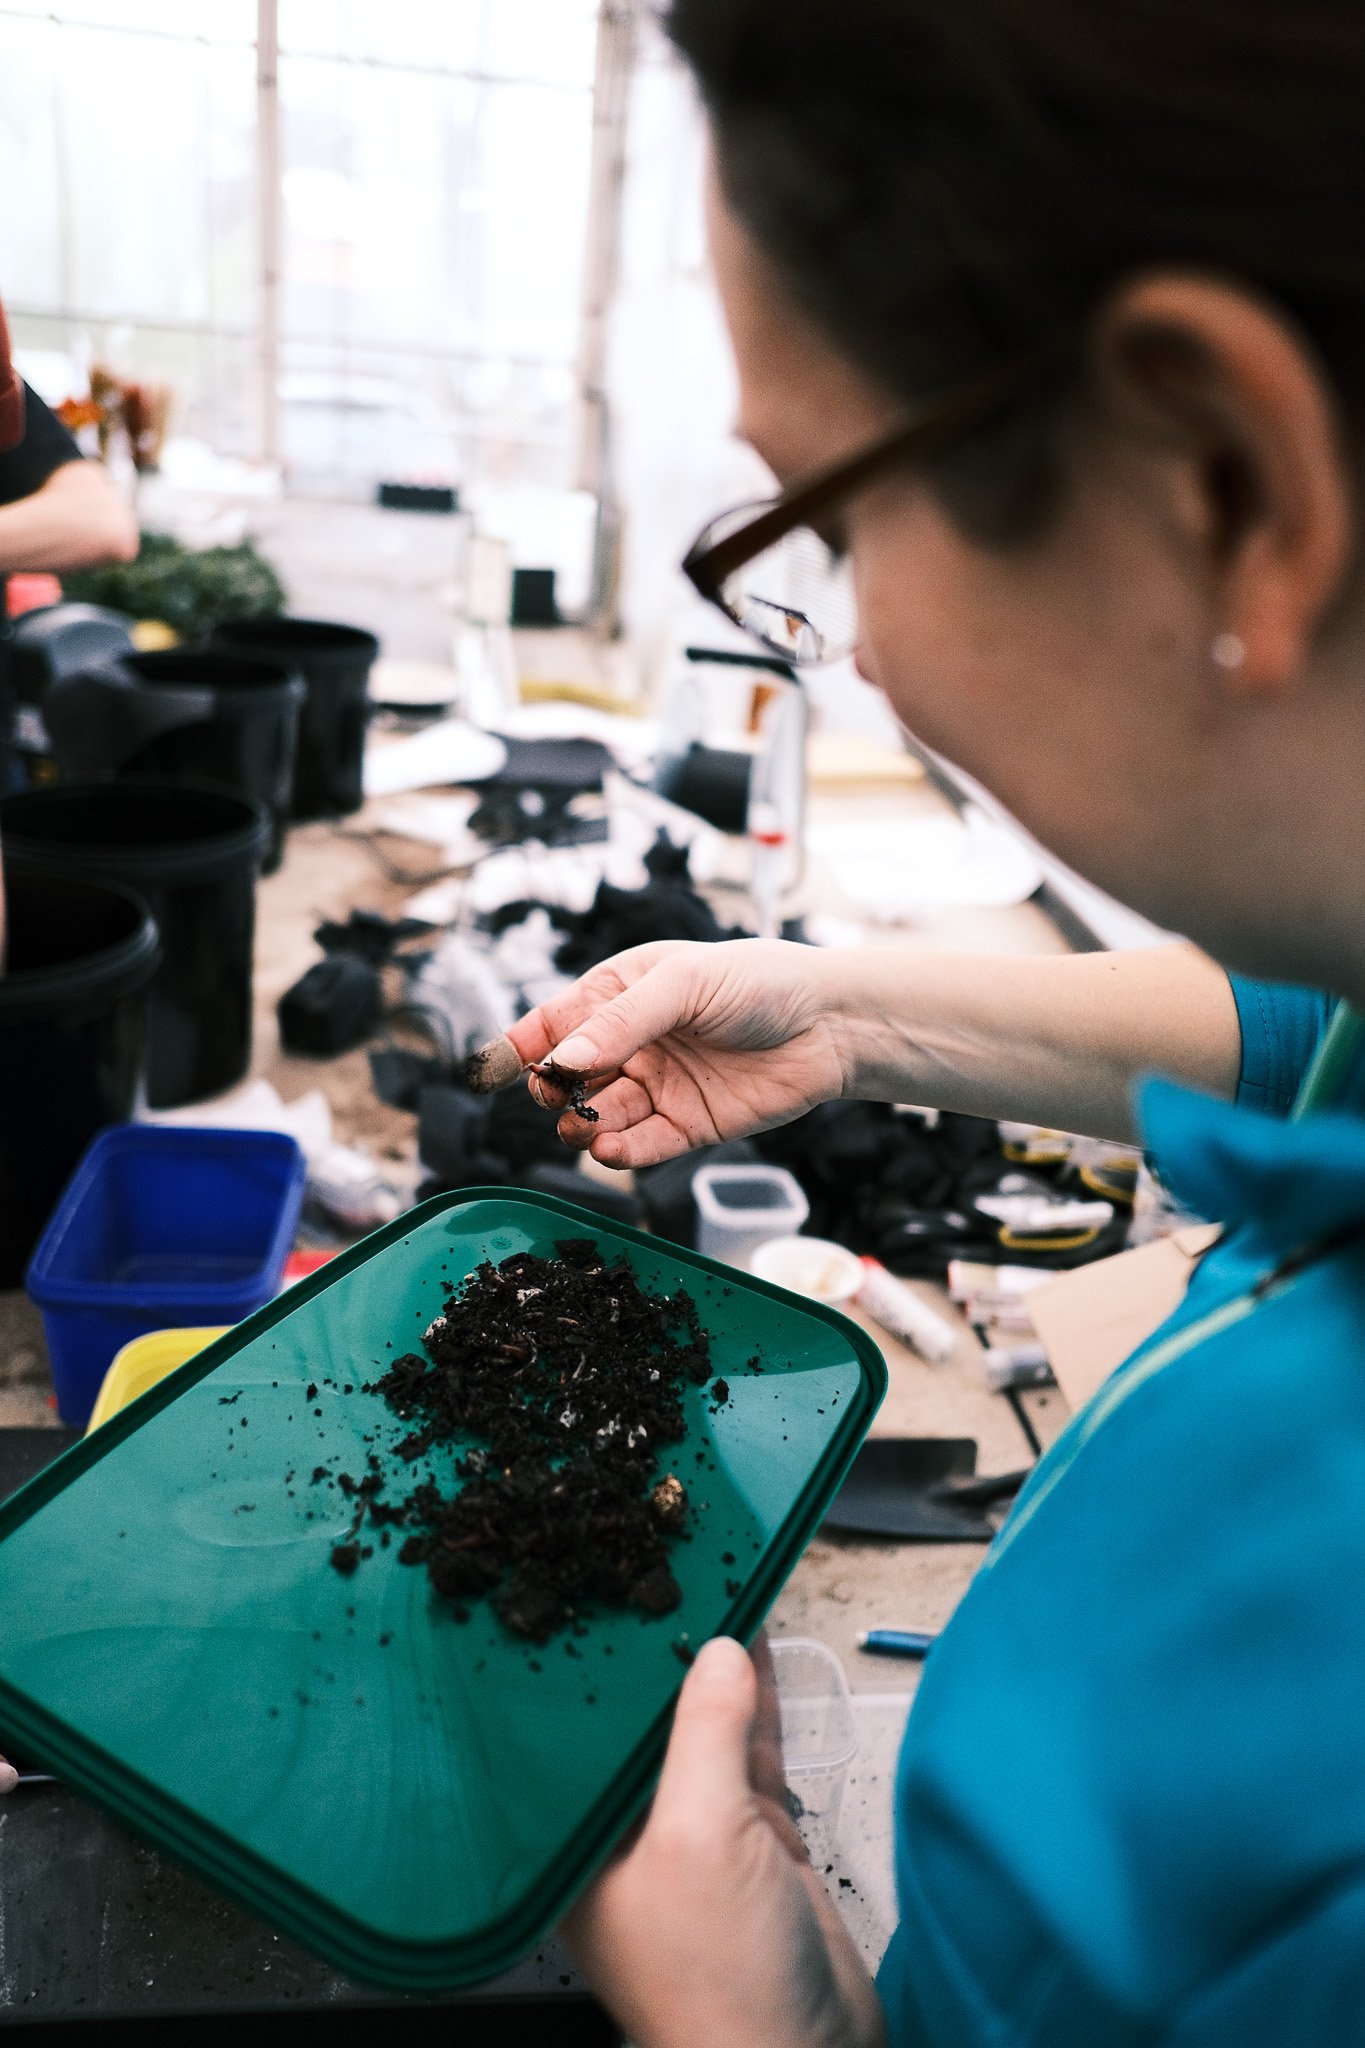
In a greenhouse project we should be able to do a proper mass balance, i.e. we should be able to look for the dissolved rocks’ elements in the soils, leachates and plants. It is important to know how much Ca, K, P, etc. have gone where and this would be much harder to do on a field. Our approach is to cut off the grass for each pot of our base pot set every few weeks, dry it in a drying oven and store it cumulatively on a pot-by-pot-basis (one small bag per harvest). This way we can weigh and analyze the biomass after 1-3 years.
Recipe Instructions: Building a manufacturing pipeline for pots/lysimeters
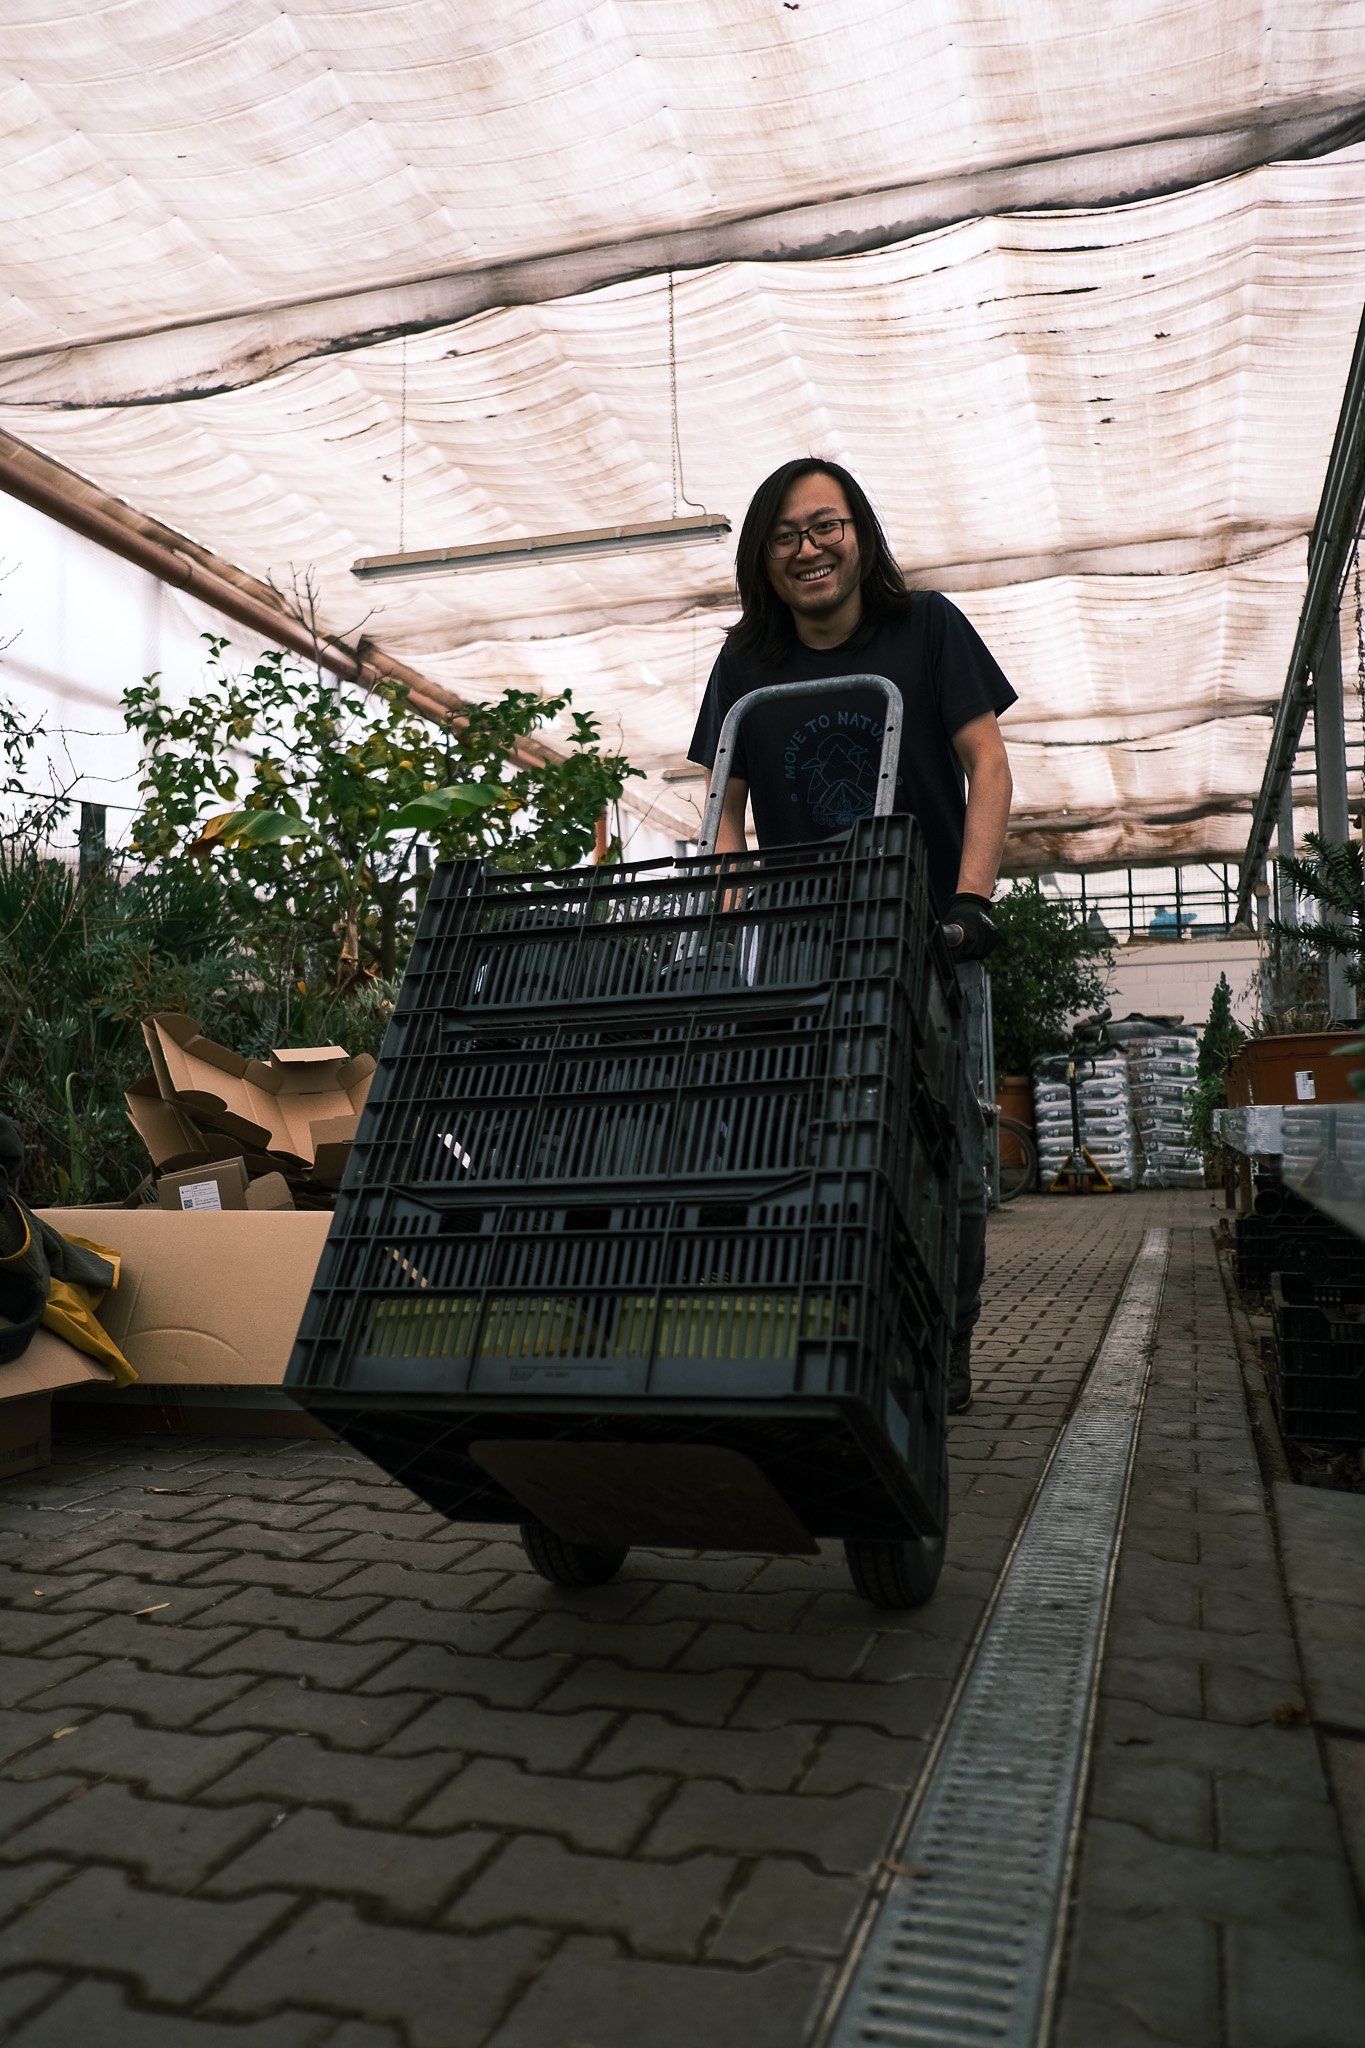
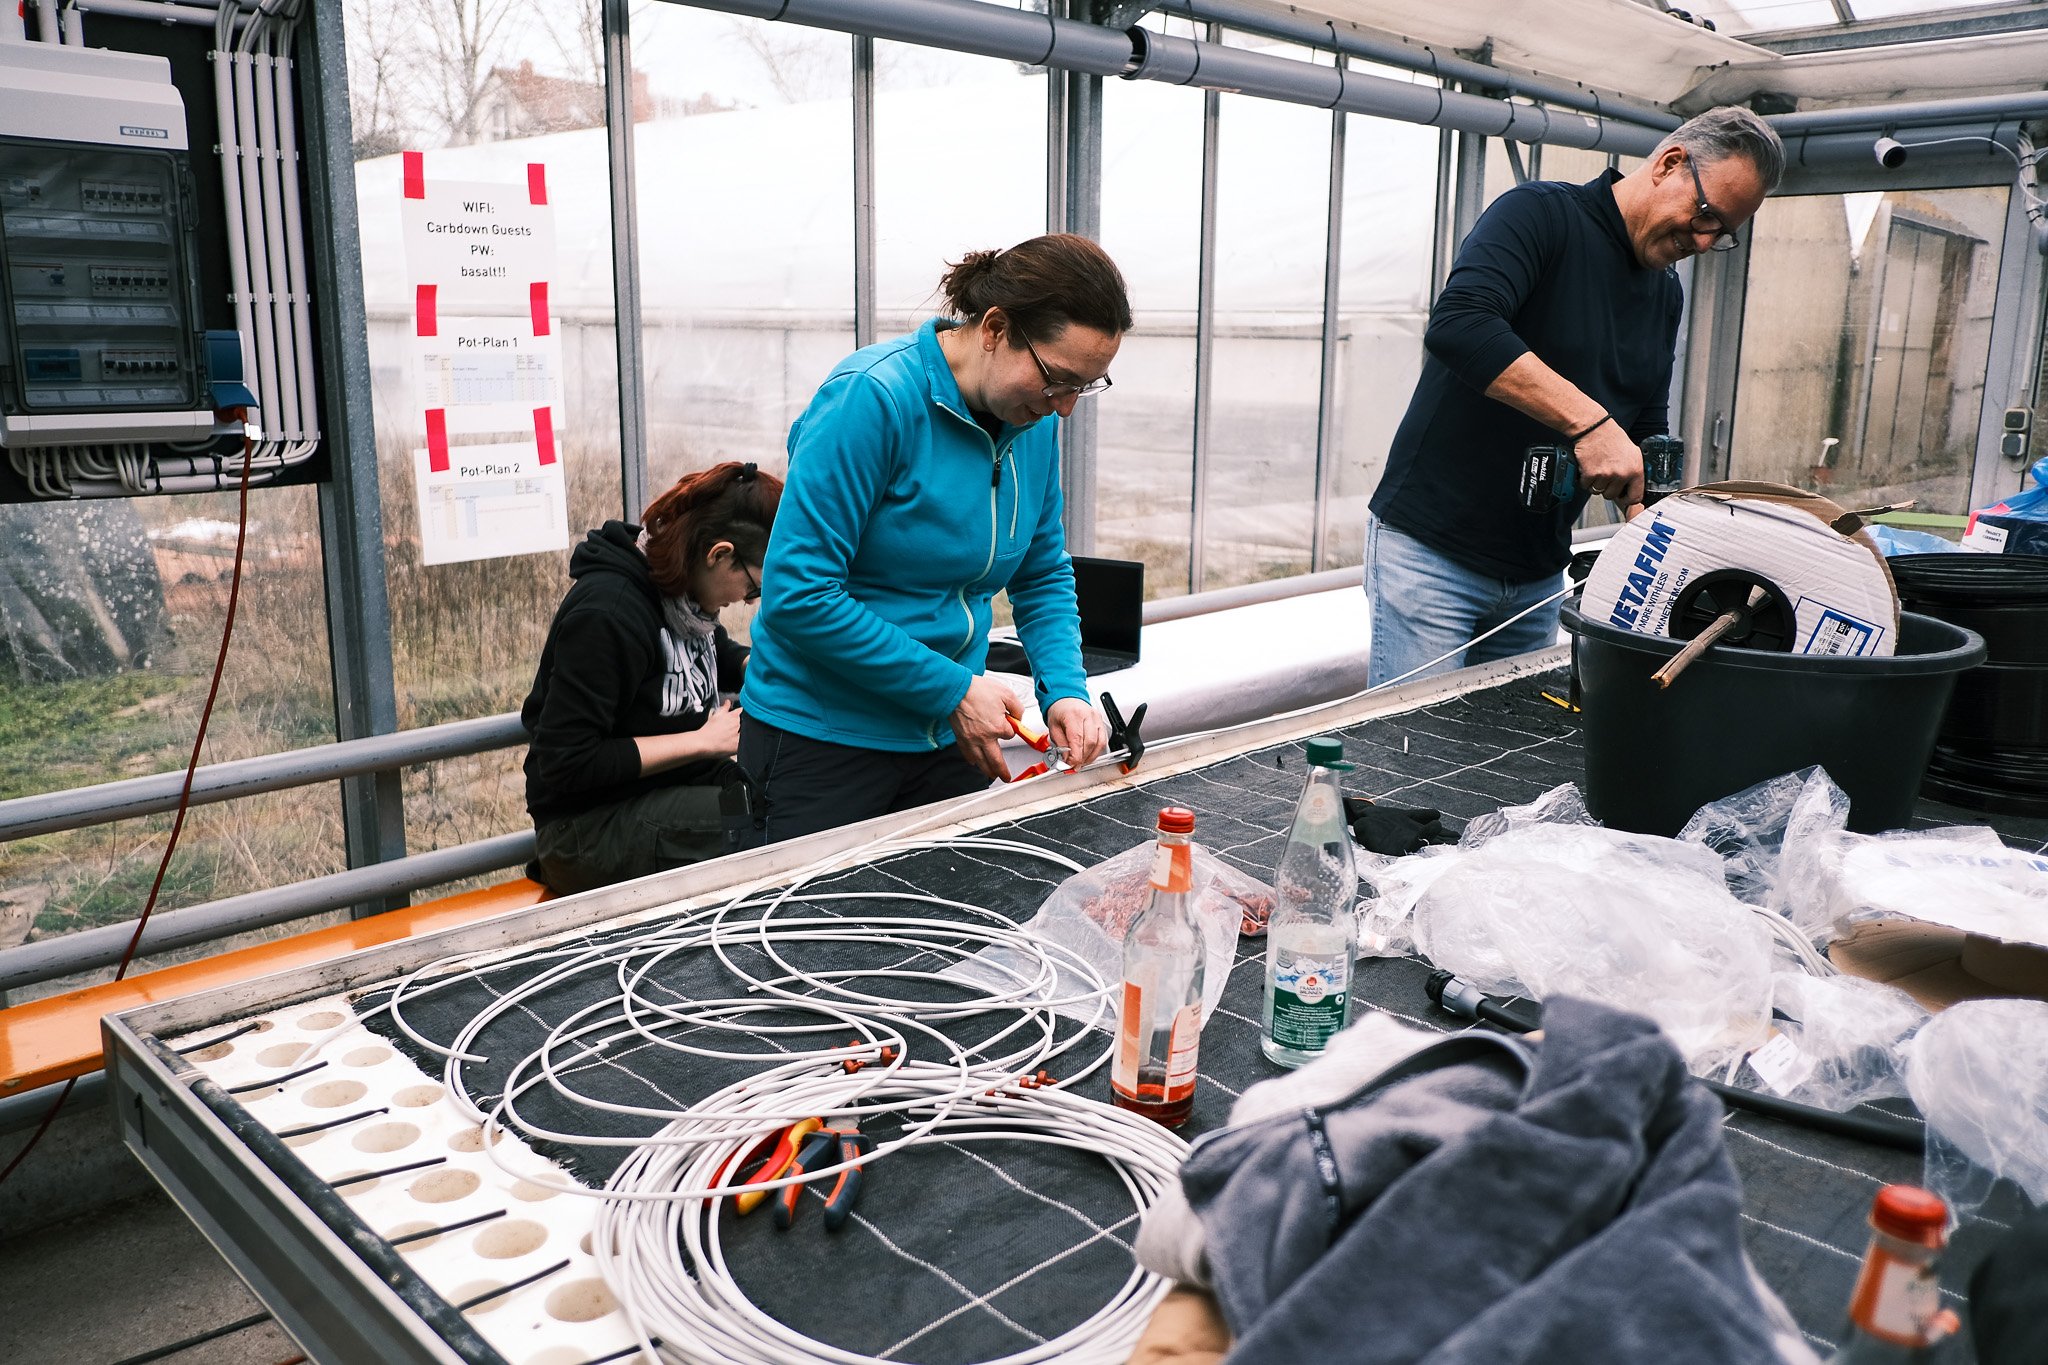
For our experiment we planned to put up to 300 pots into our greenhouse. In order to finish this process in a reasonable time we streamlined the concept and partitioned the process into a number of building steps with a focus on being able to perform several steps in parallel with the 25 helpers that we had. By using this approach we were able to set up 260 pots in 2 days after extensive preparations. Our record was finishing 16 pots from start to finish in 30 minutes, less than 2 min per pot. The bottleneck is the final build process (putting ingredients into the pots) which we did not want to parallelize to make sure the pots were all created equally.
You will notice that we did not weigh soils and filter sand, but used volumetric measurements (specific pot/scoop sizes) instead. We chose this approach to speed up the building process (weighing everything would have slowed the process down massively) and because we wanted to fill each pot to the maximum height possible, i.e. use as much volume as we had available. In an open field we also wouldn’t care about the weight of the soil, but we would measure the rock amendment in t/ha, which we mimicked by weighing the rock for a pot diameter of 0.256 m = 0.0514 m² surface area (r²π), i.e. 40 t/ha equals 206 g per pot.
Finally, a note on accuracies: Our strategy is to measure all pot ingredients with an accuracy of <1% in order to keep things simple. This may sound unscientific, but it is a practitioner's perspective. Why? Because the inherent heterogeneity of all things that go into the pots is surely higher than 1%, the irrigation and plants will have a higher variance anyway, and the signal that we need to find is also much higher than 1%. Also, later on open fields the heterogeneities are at least one order of magnitude higher, too.
With that said, here is our list of processes for the pot manufacturing pipeline:


Station 0: Sieving the soils at least two times
Station A1: Preparation 1a: Lysimeter top pots (300 x)
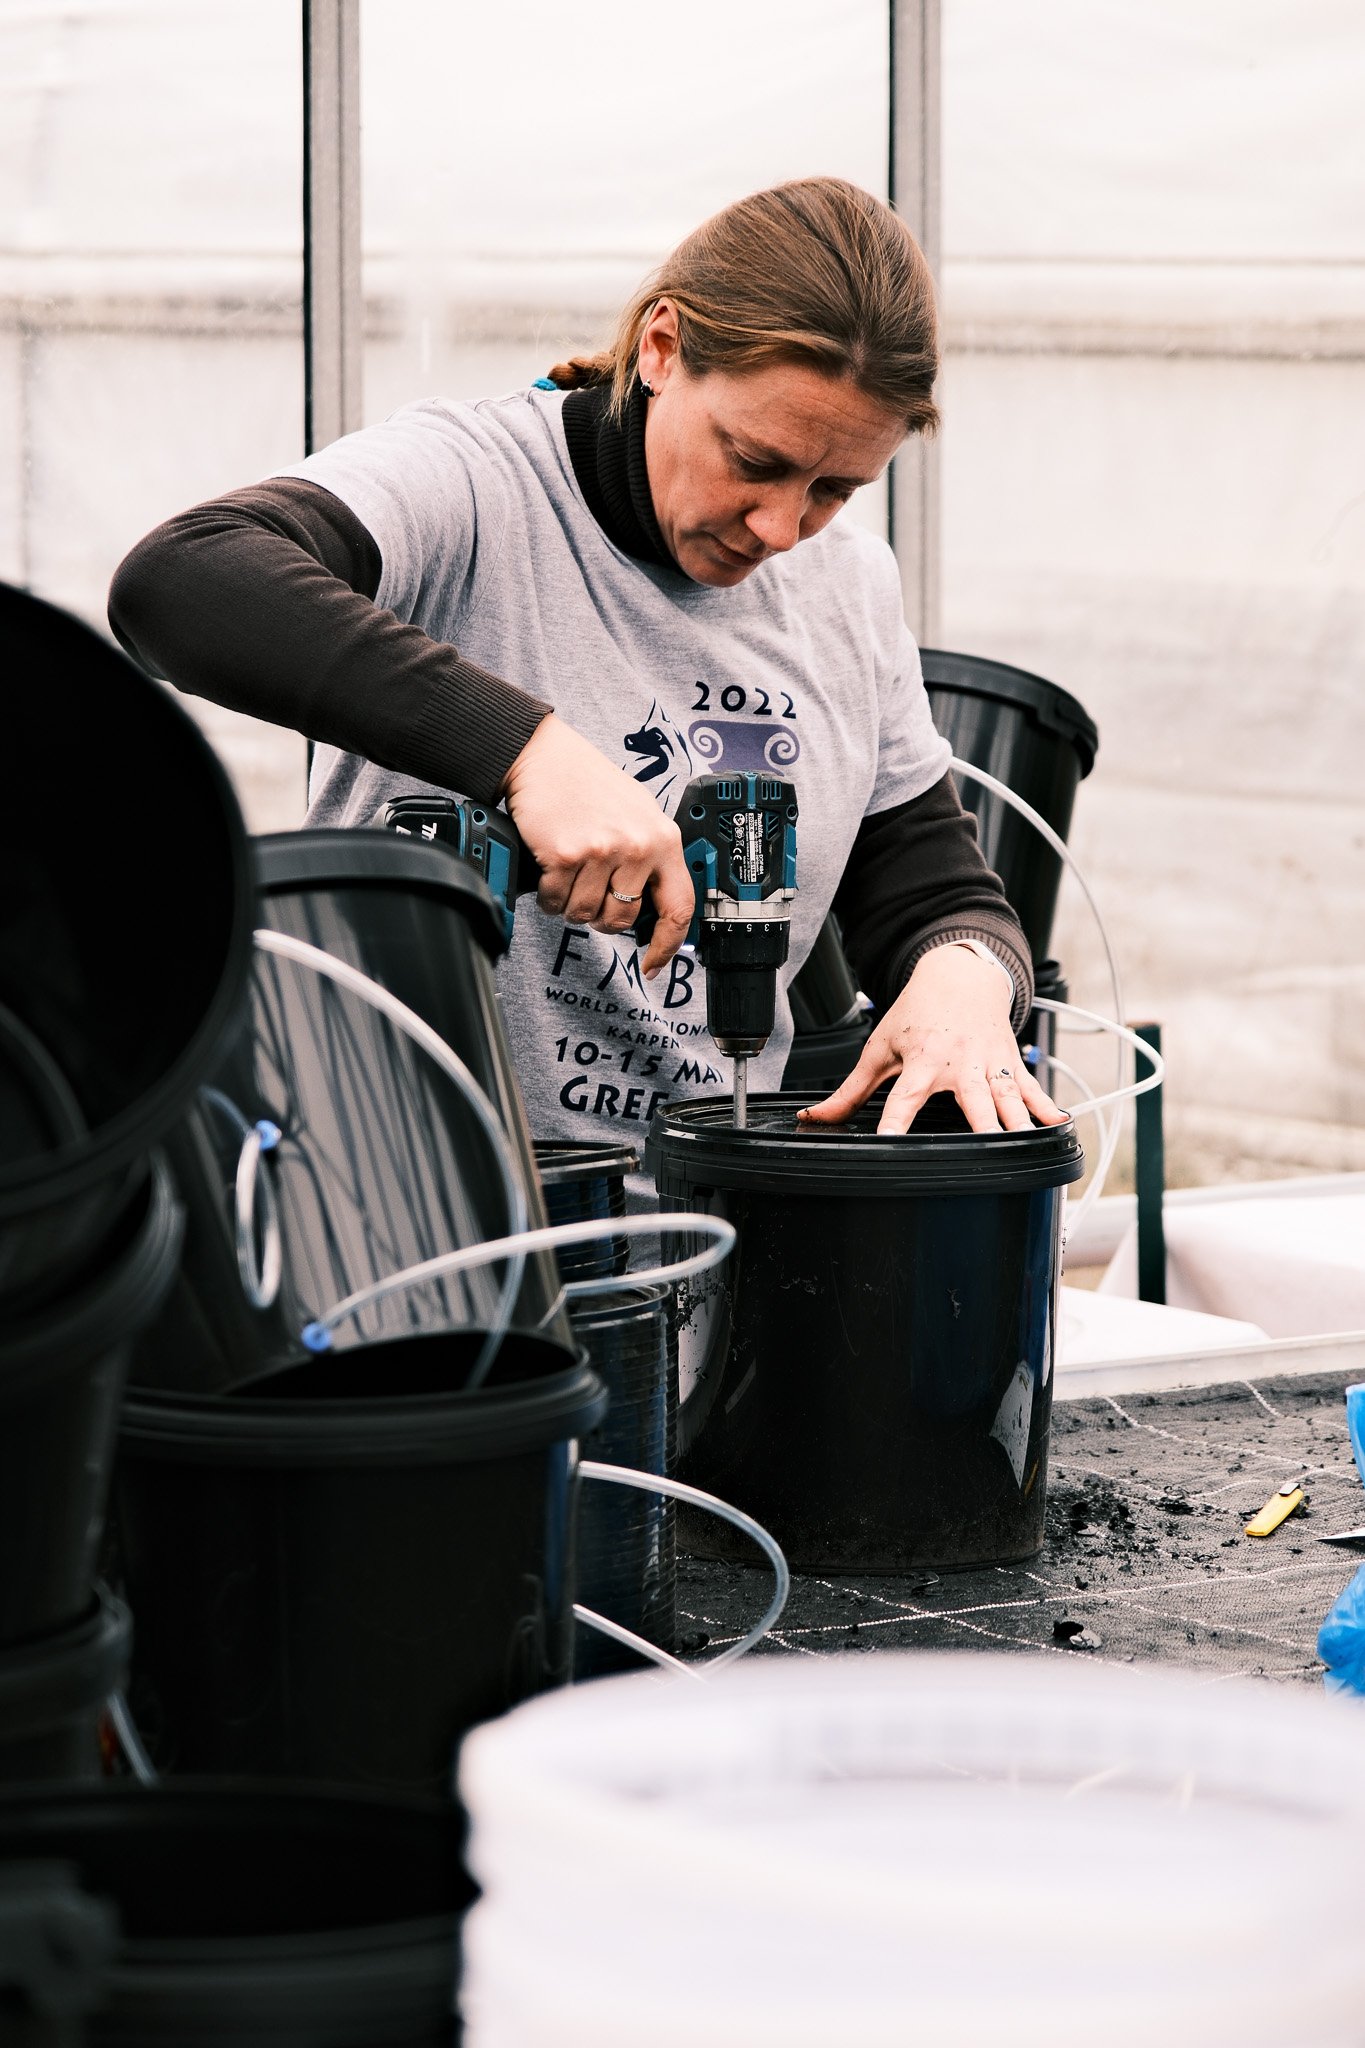
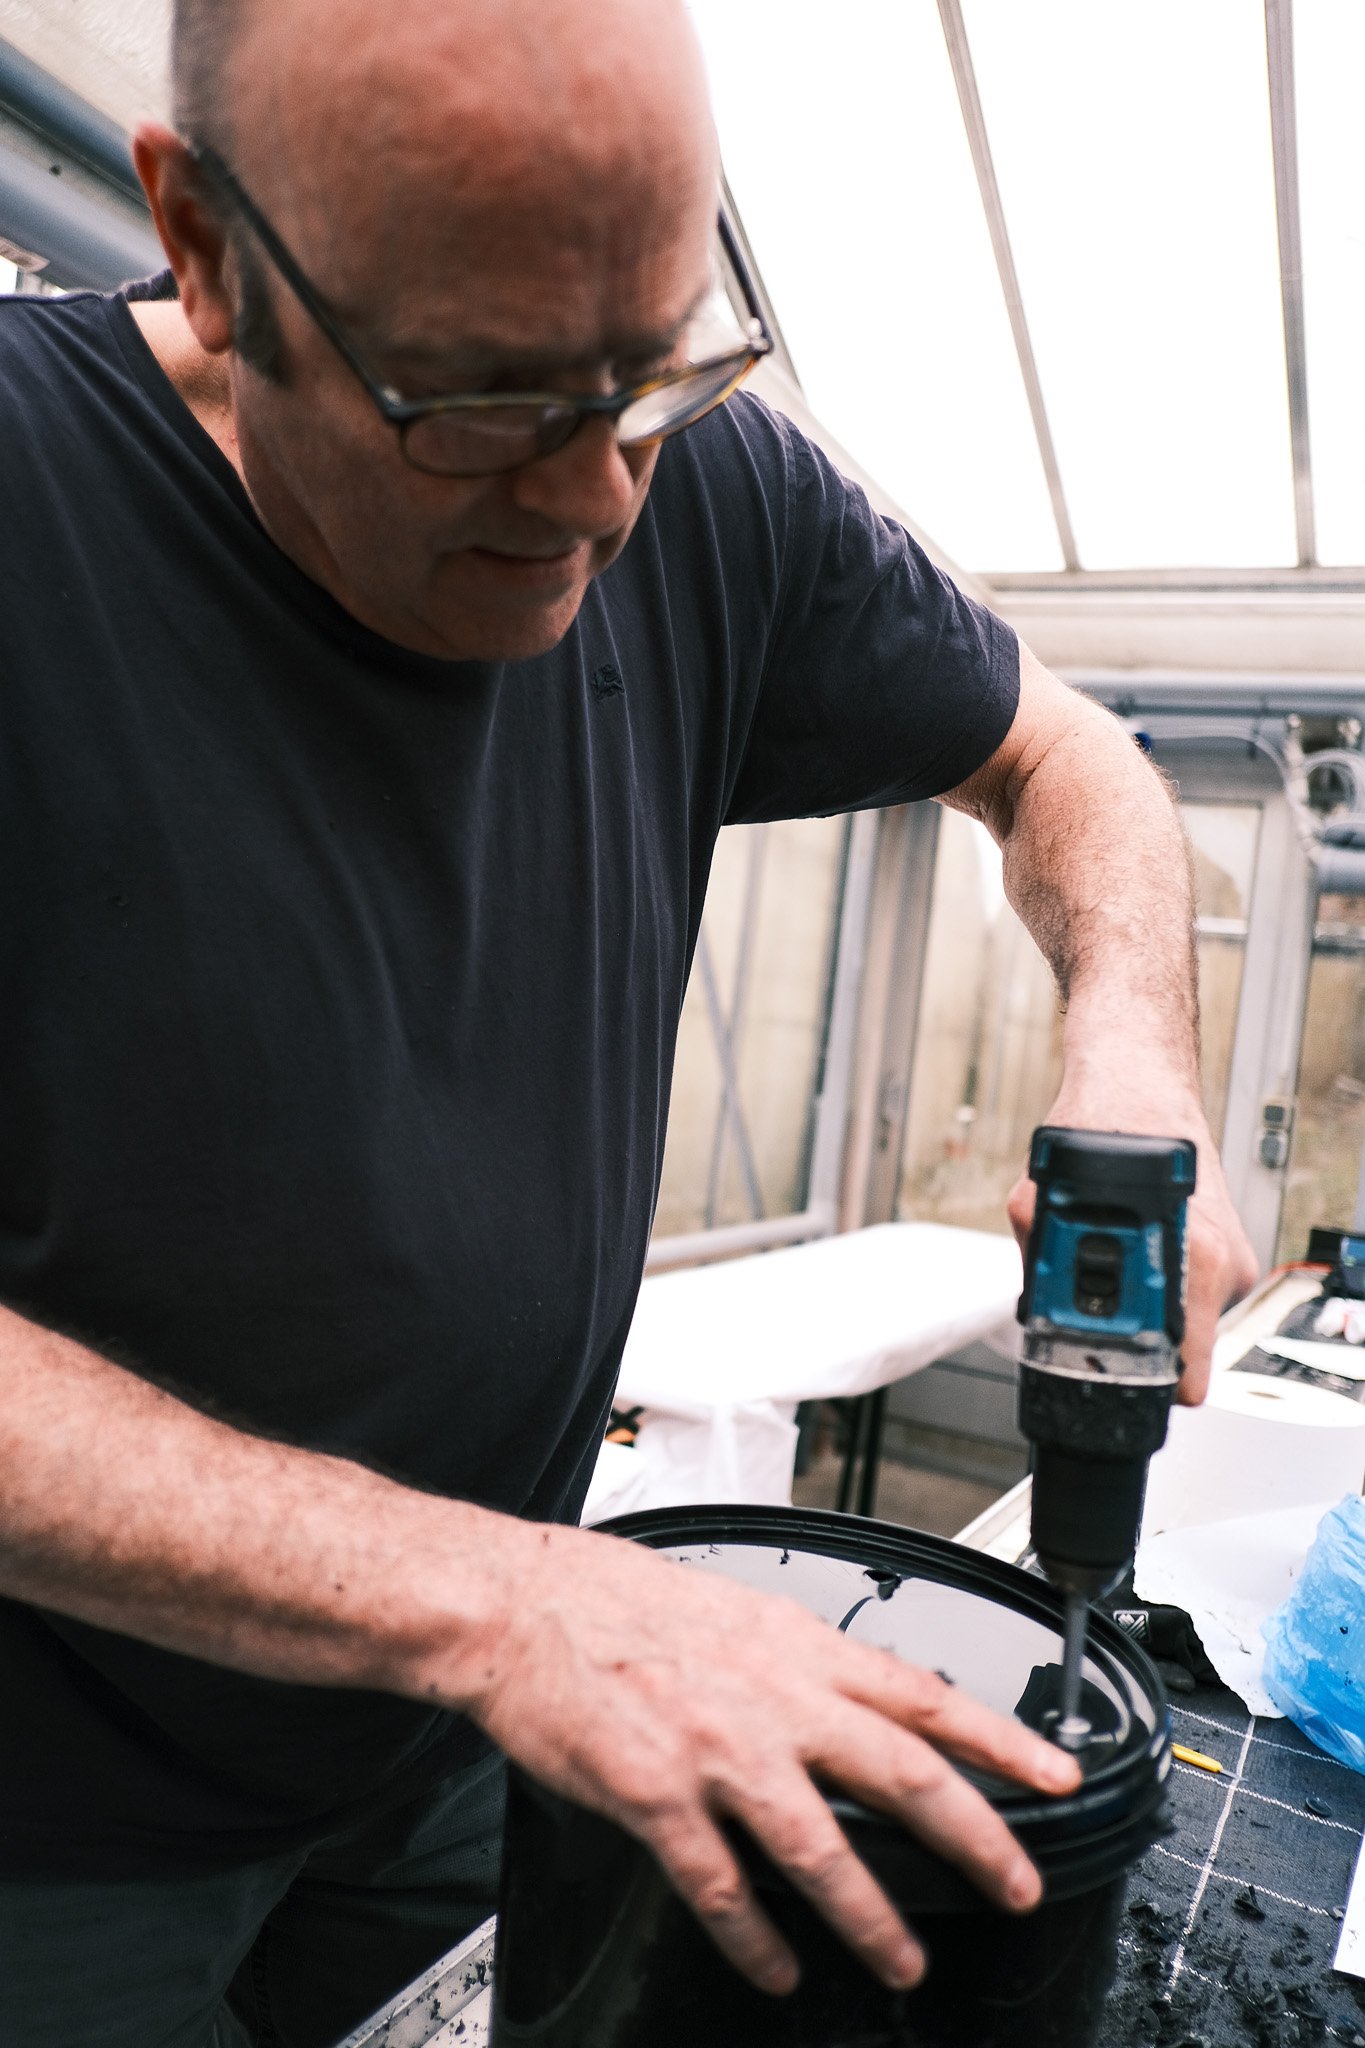
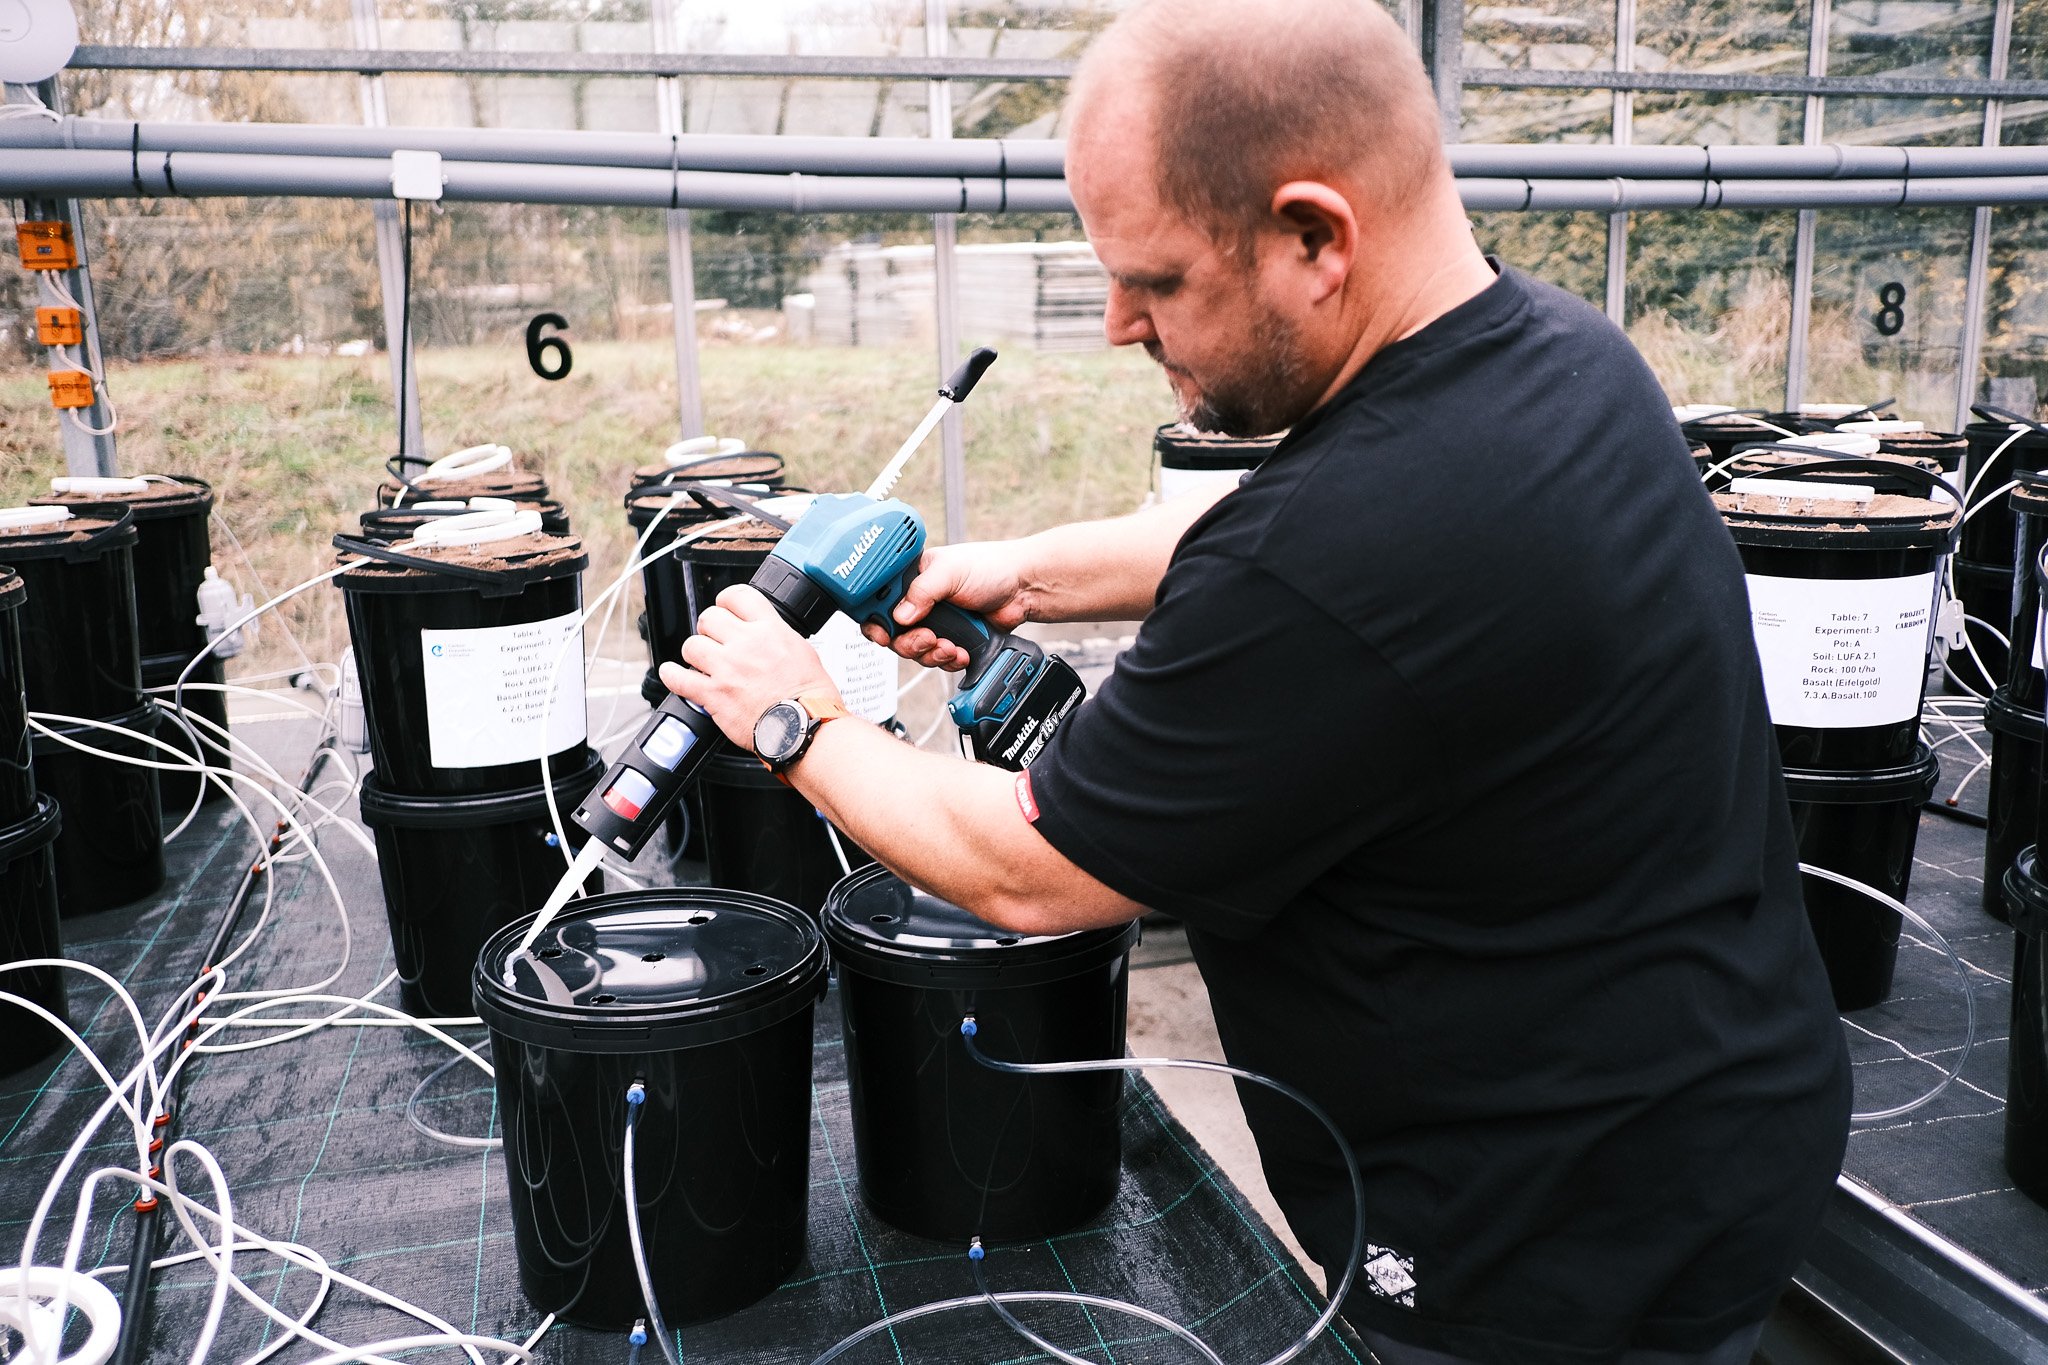
Make 5 holes (diameter 18 mm) into bottom (power drill)
Required: desk, drill
Station A2: Preparation 1b: Lysimeter lids (300 x)
Make 5 holes into lids (power drill, 18 mm)
Note: Holes in lid and bottom of pot don’t have to be in matching positions
Required: desk, drill
Station B1: Preparation 2a: Lysimeter pipes (300 x)
Measure and cut pipes, we needed 150 pieces of 90 cm and 150 pieces of 150 cm (longer ones for the pots further away from desk’s edge, this needs to be adapted to the specific setup. Tip: you want to be able to use the pipe to empty the pot below the table)
Required: desks, folding rule, knife, pipe cutter
Station B2: Preparation 2b: Lysimeter bottom tanks (300 x)
Drill 2 holes, one as far at the bottom as feasible (use a caliper to mark the height so it is the same for all pots)
Screw in pneumatic connectors, fasten with nut on the inside
Put the lid on with 5 holes on top
Connect pipes
Distribute 300 lysimeter bottoms onto tables to wait for upper pots
Required: desks, drill, caliper
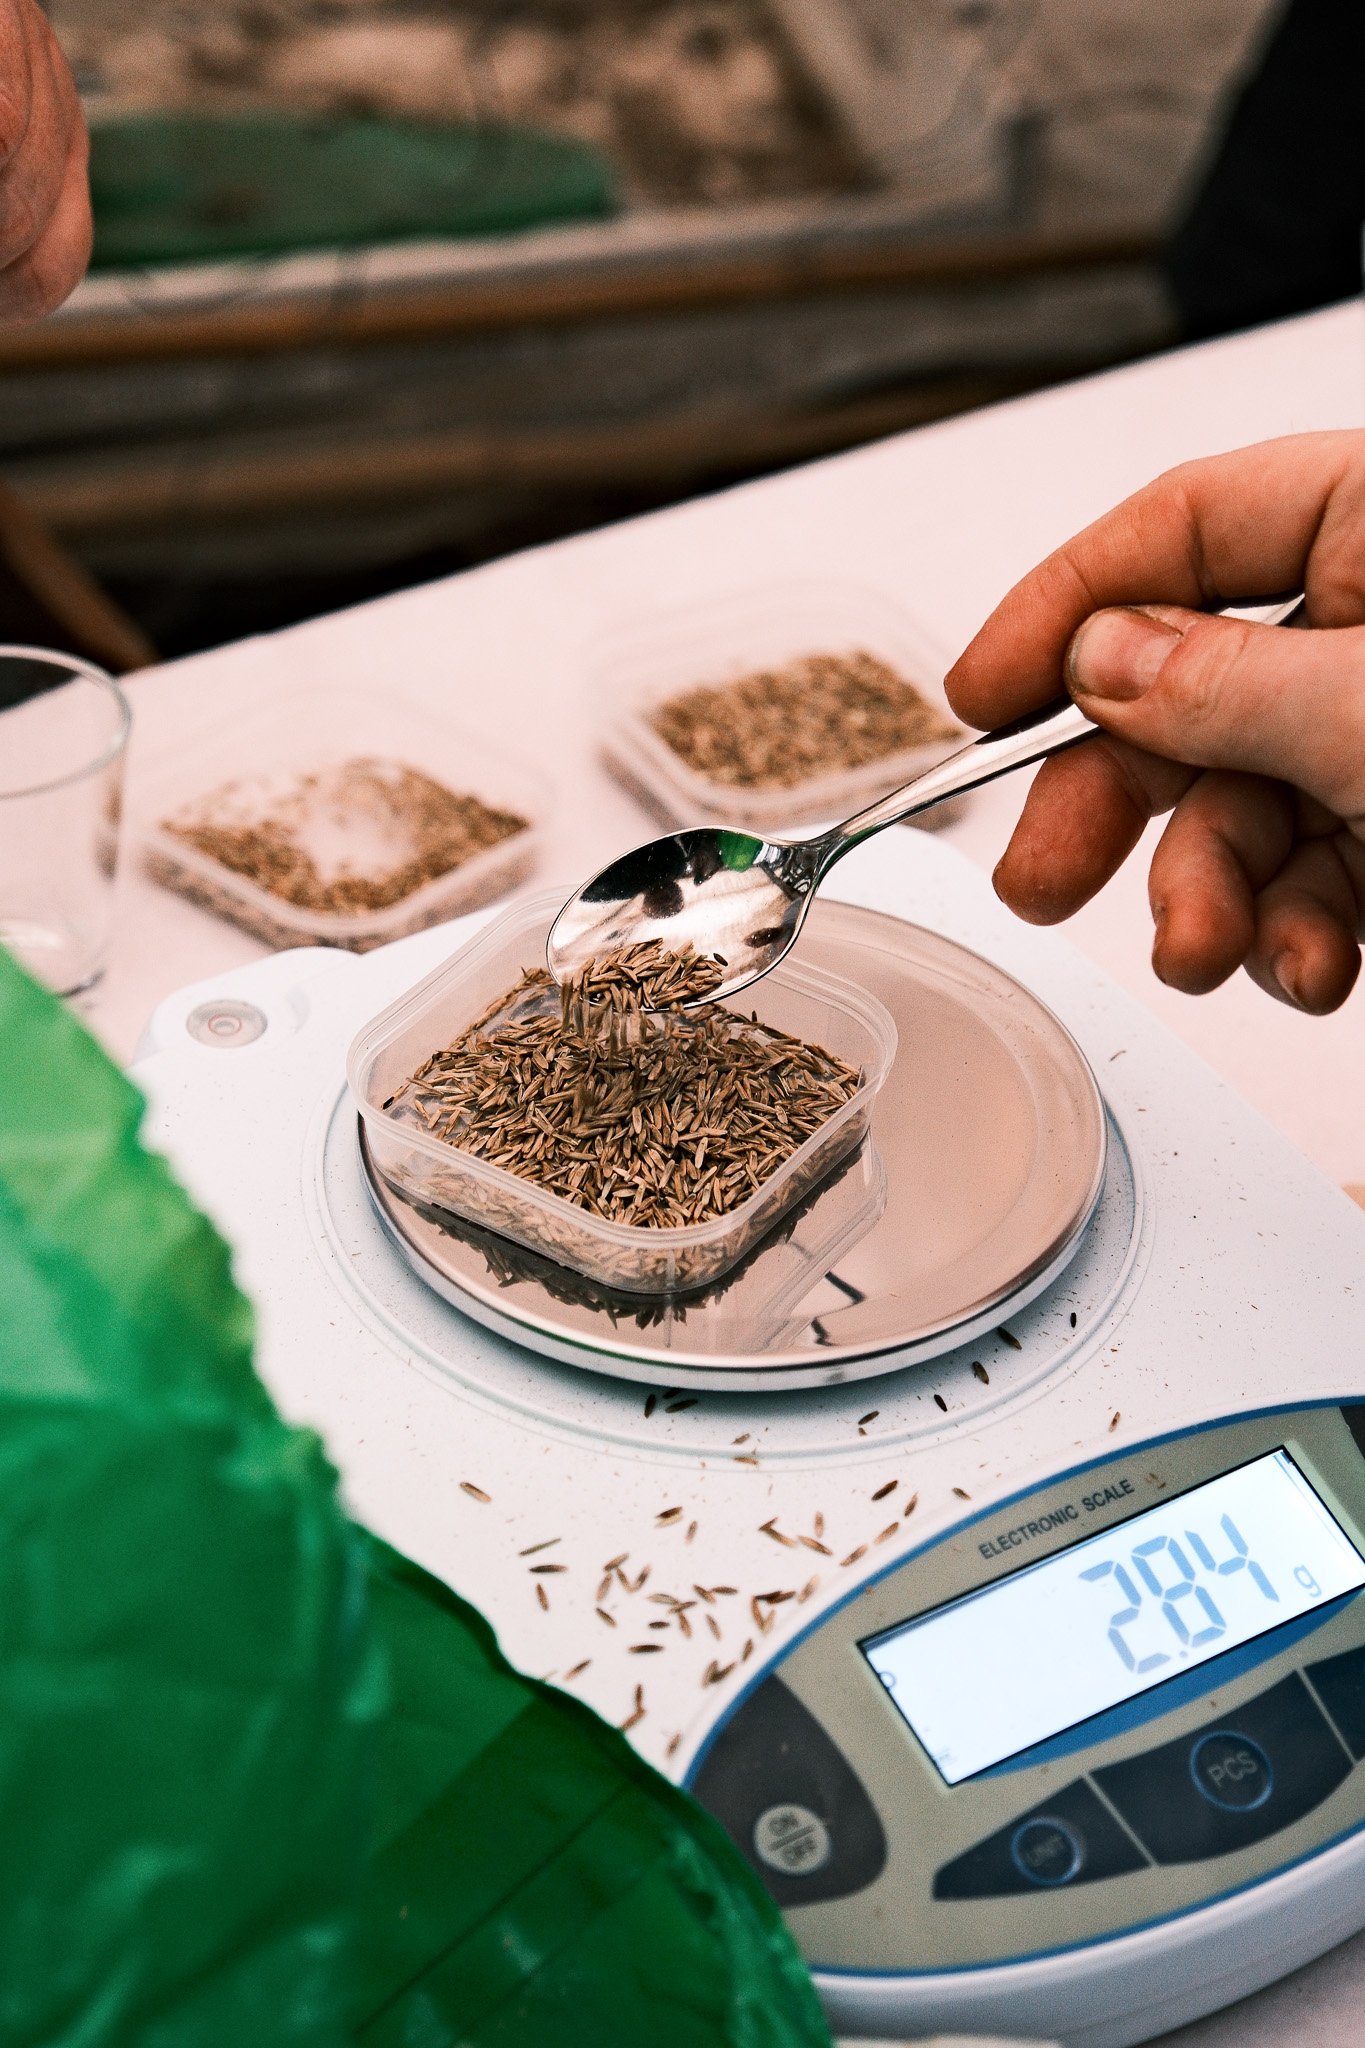
Station C: Preparation 3: Tea Bags (200 x)
Create 200 tea bags of 5 g for all rock types
Close with zip tie, don’t cut zip tie, the tie will be used to find and pull out the bag later
Required: desk, scissors, zip tie, exact scale, spoon
Station D: Preparation 4: pre-cut root fleeces for CO₂ sensors and pots
Required: desk, scissors, folding rule
Pots need: 25 x 25 cm (300 x)
Sensors need: 40 x 40 cm (120 x)
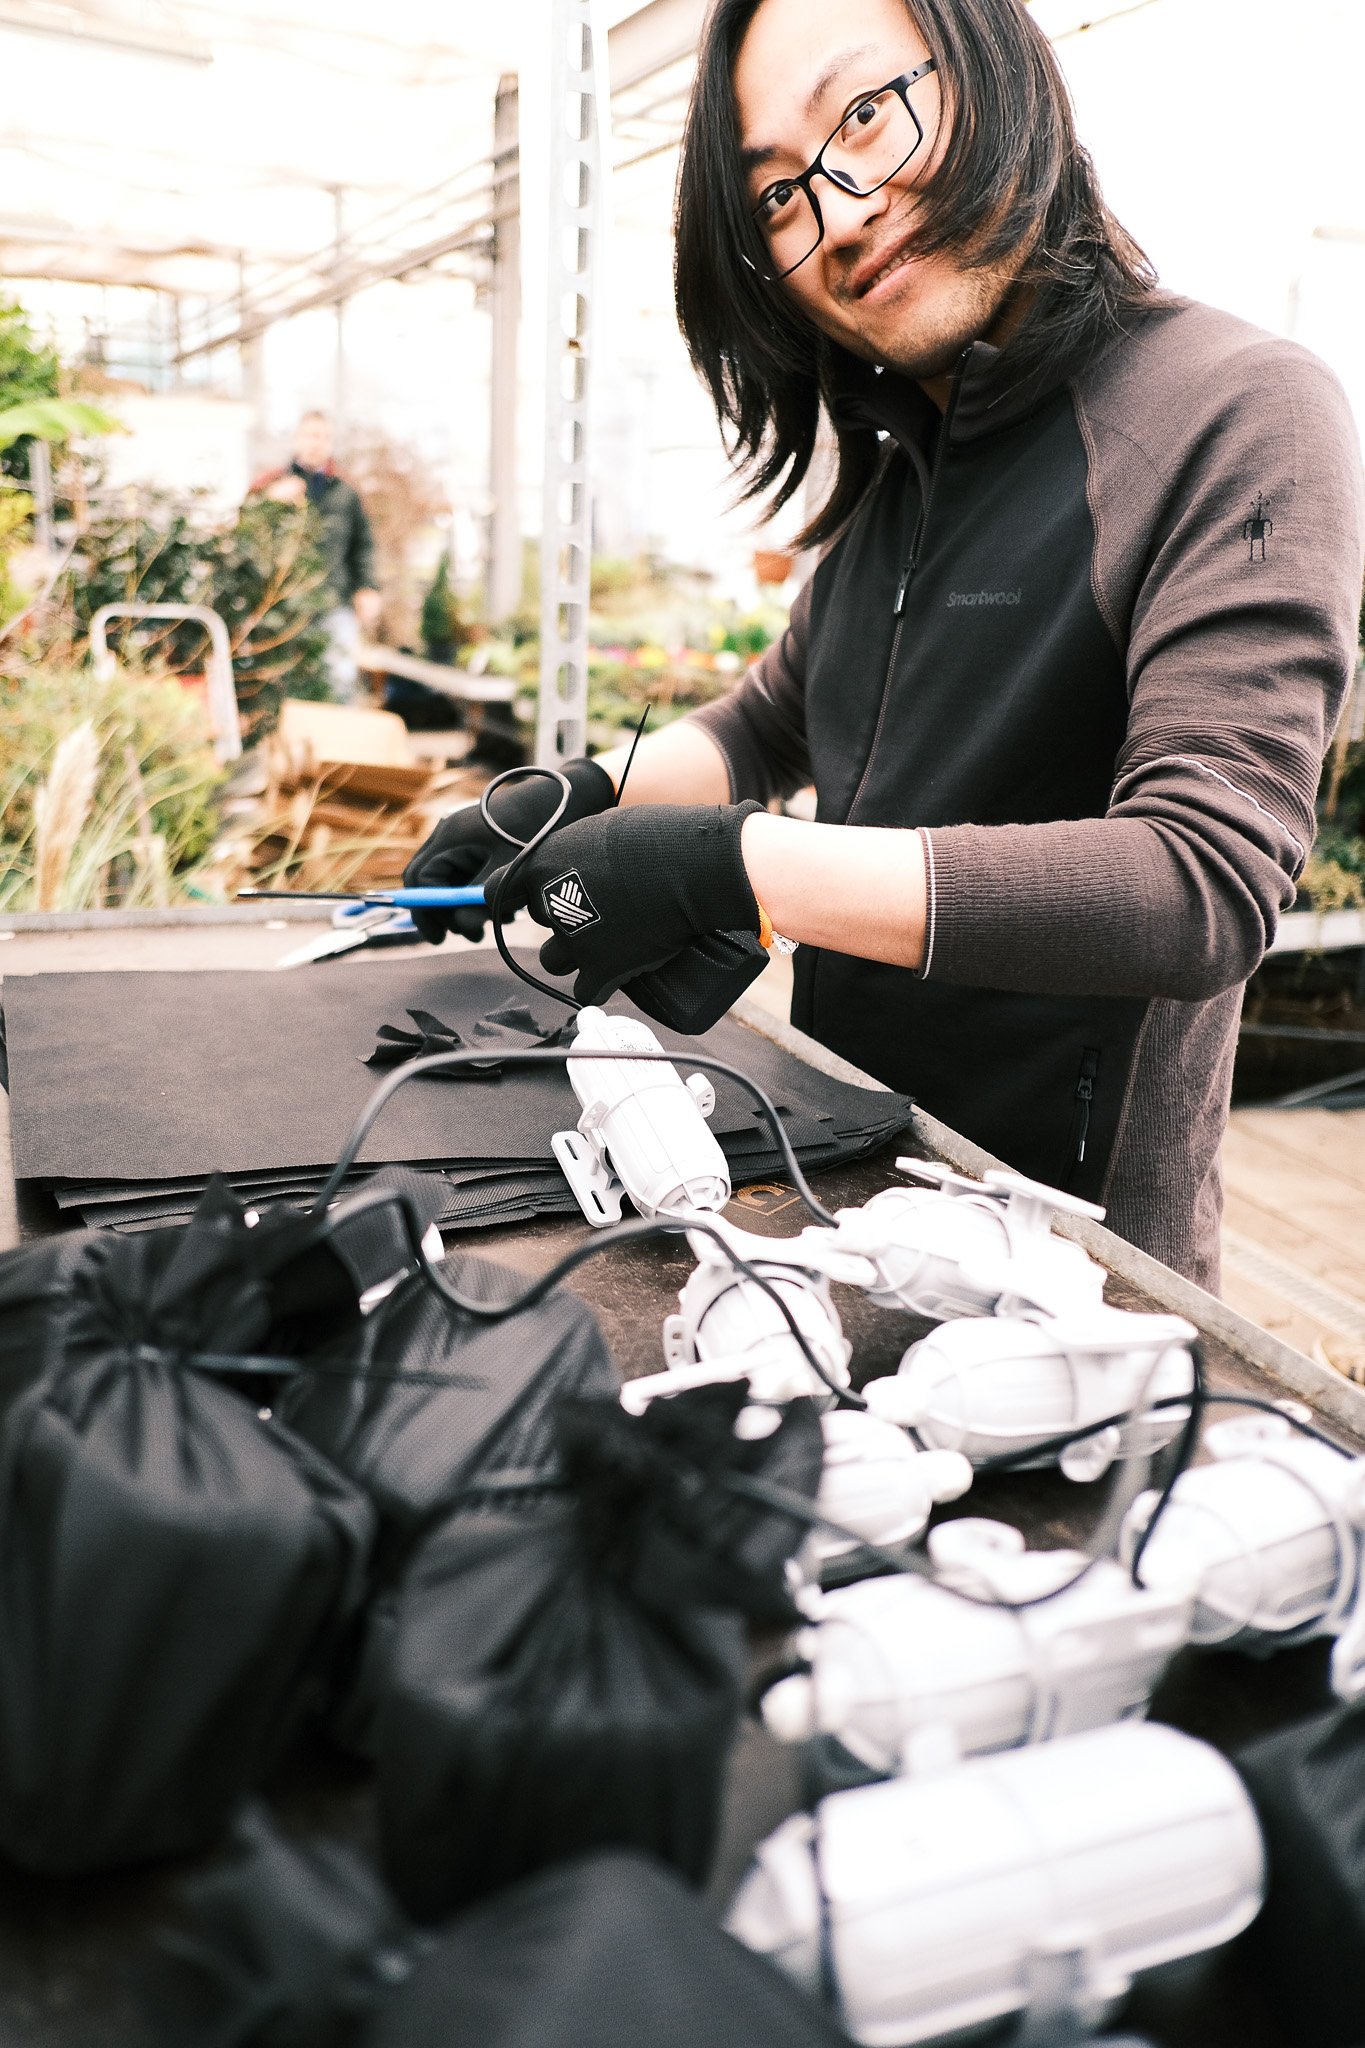
Station E: Preparation 5: CO₂ soil sensors (120 x, we couldn’t purchase more)
Unpack
Put sensor into gas-box-container
Wrap in root fleece, close with Kabelbinder
Required: desk, scissors, cable ties,
Station F: Preparation 6: Subscribe >120 x CO₂ sensor to LoRaWan system
Activate
Get UID code
Enter UID code into vendor portal
Copy access keys into our portal
Rename sensor to pot name/variant
Required: PC/laptop, desk
Station G: Prepare pot stickers
We printed stickers on sticky paper, one sticker per pot, with the pot number, soil type, rock amount, etc. During the setup these stickers were our guide on what kind of mix to do next and where to put the pot, without the need for one person to keep track of everything. When all stickers were used we knew we were done. This is less error prone than using lists with checkmarks.
Now the actual building process starts.
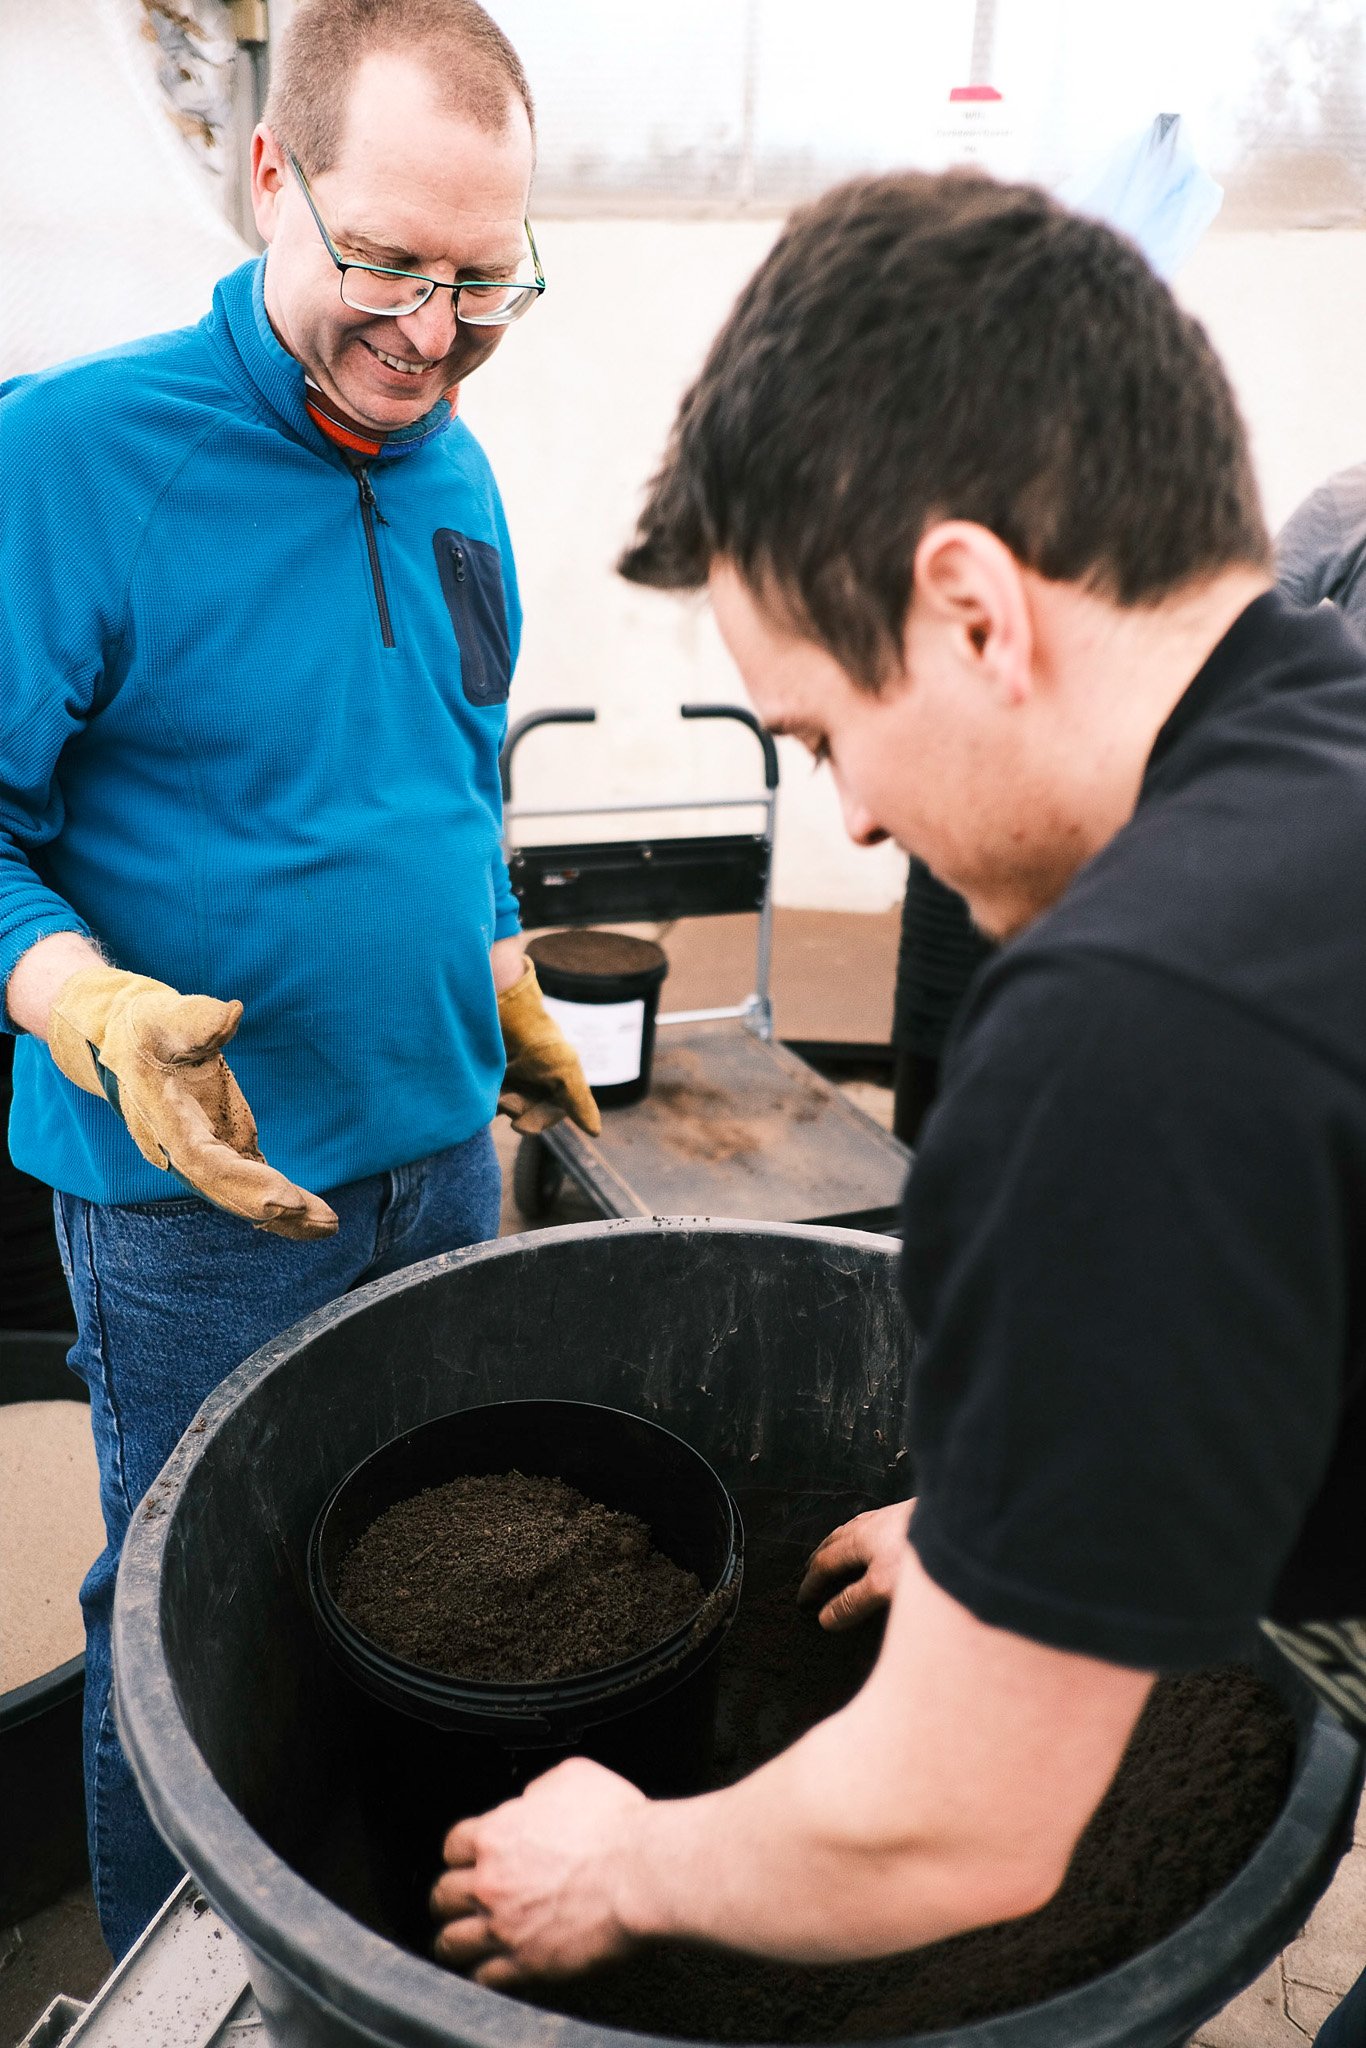
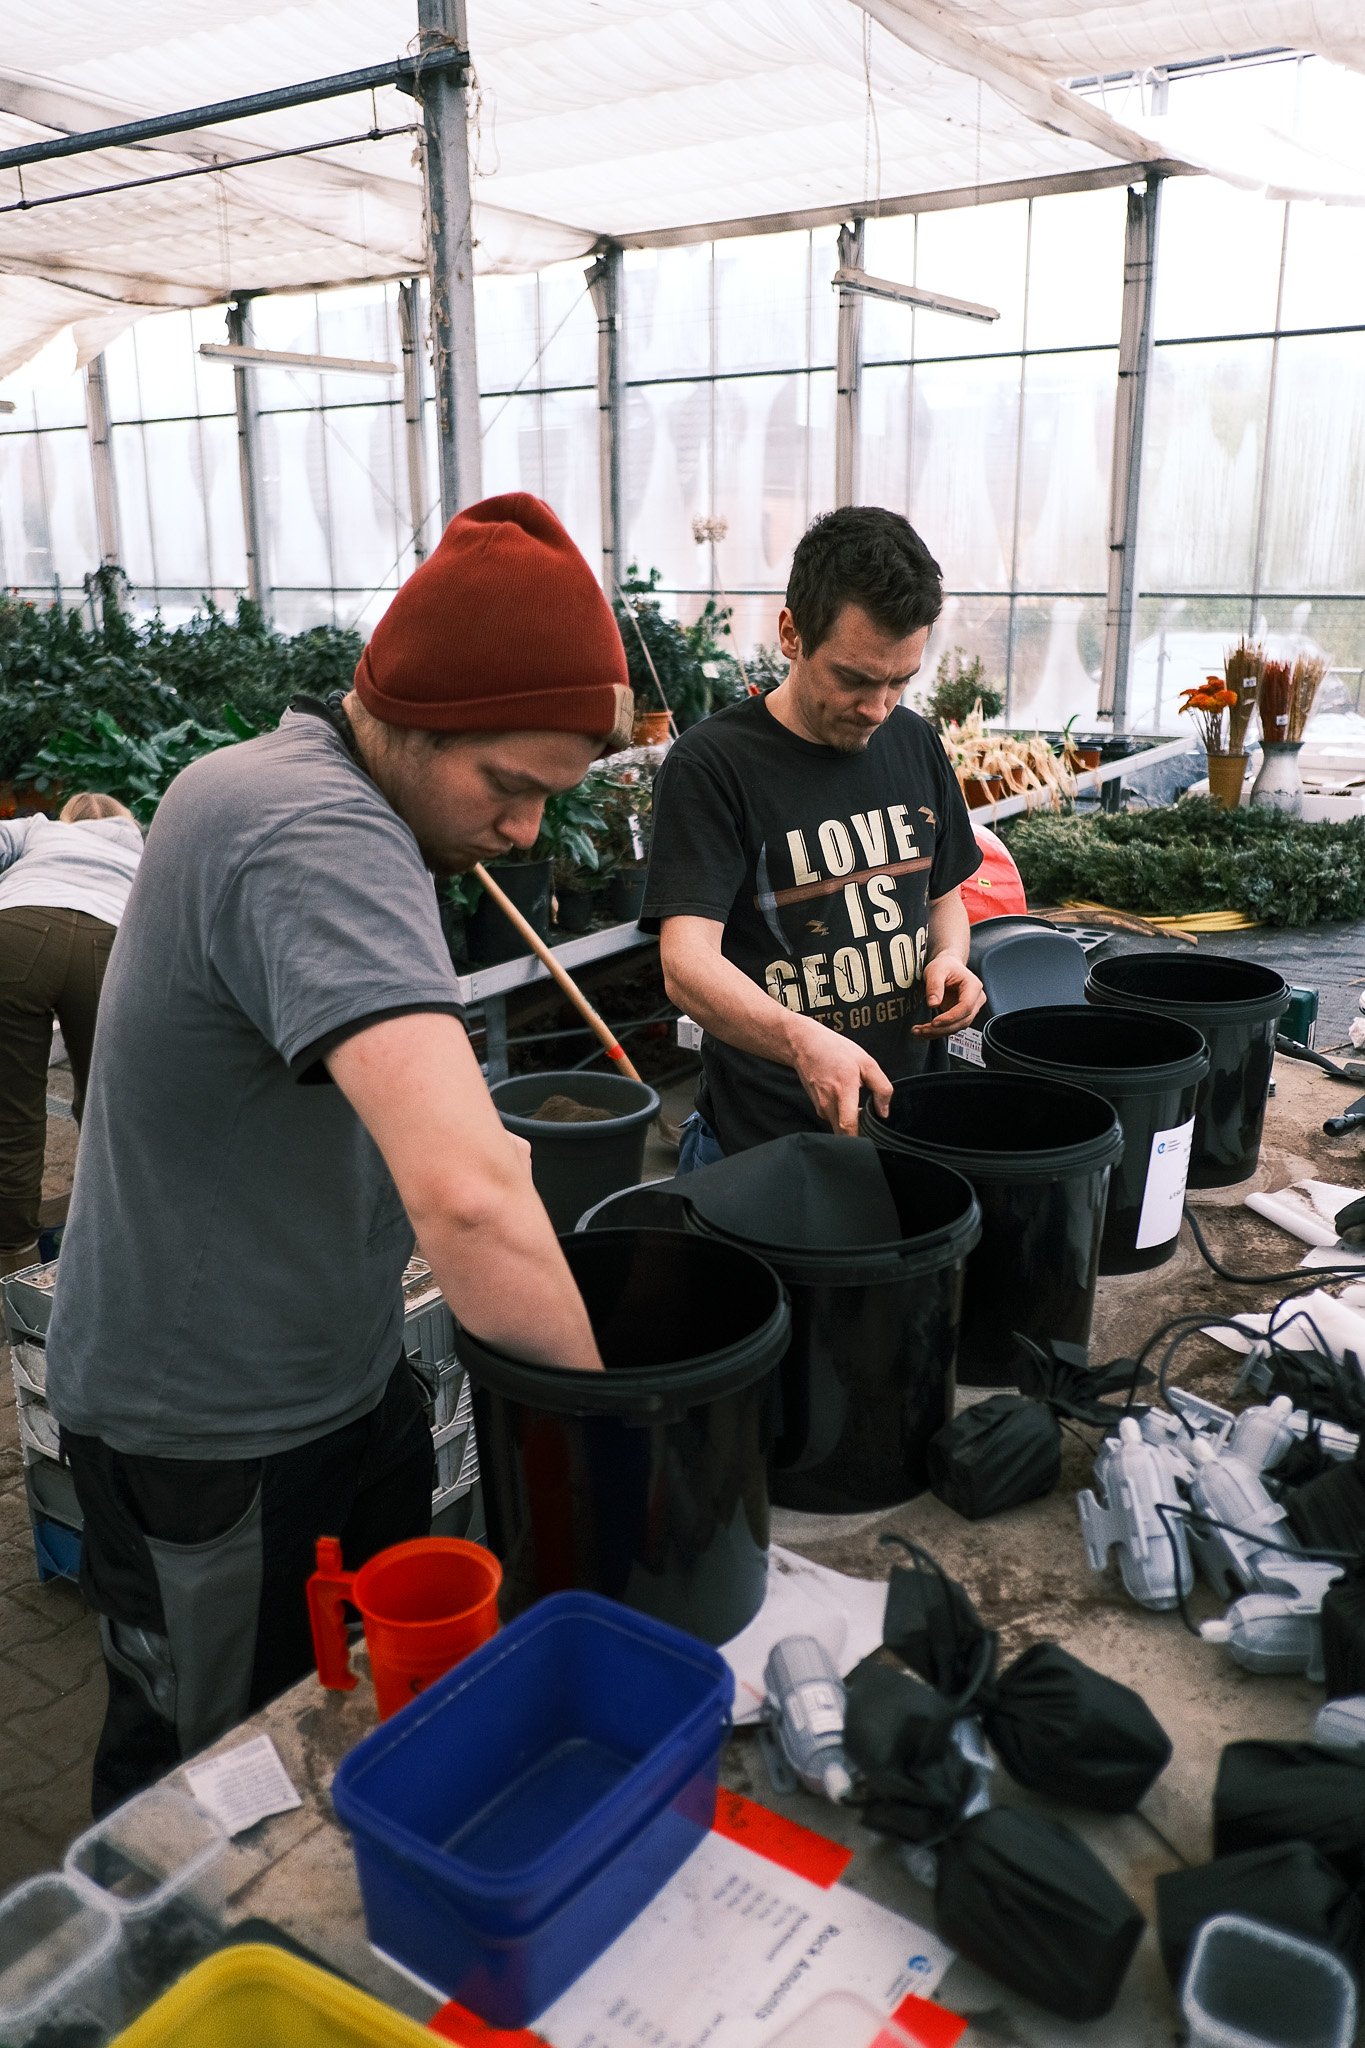
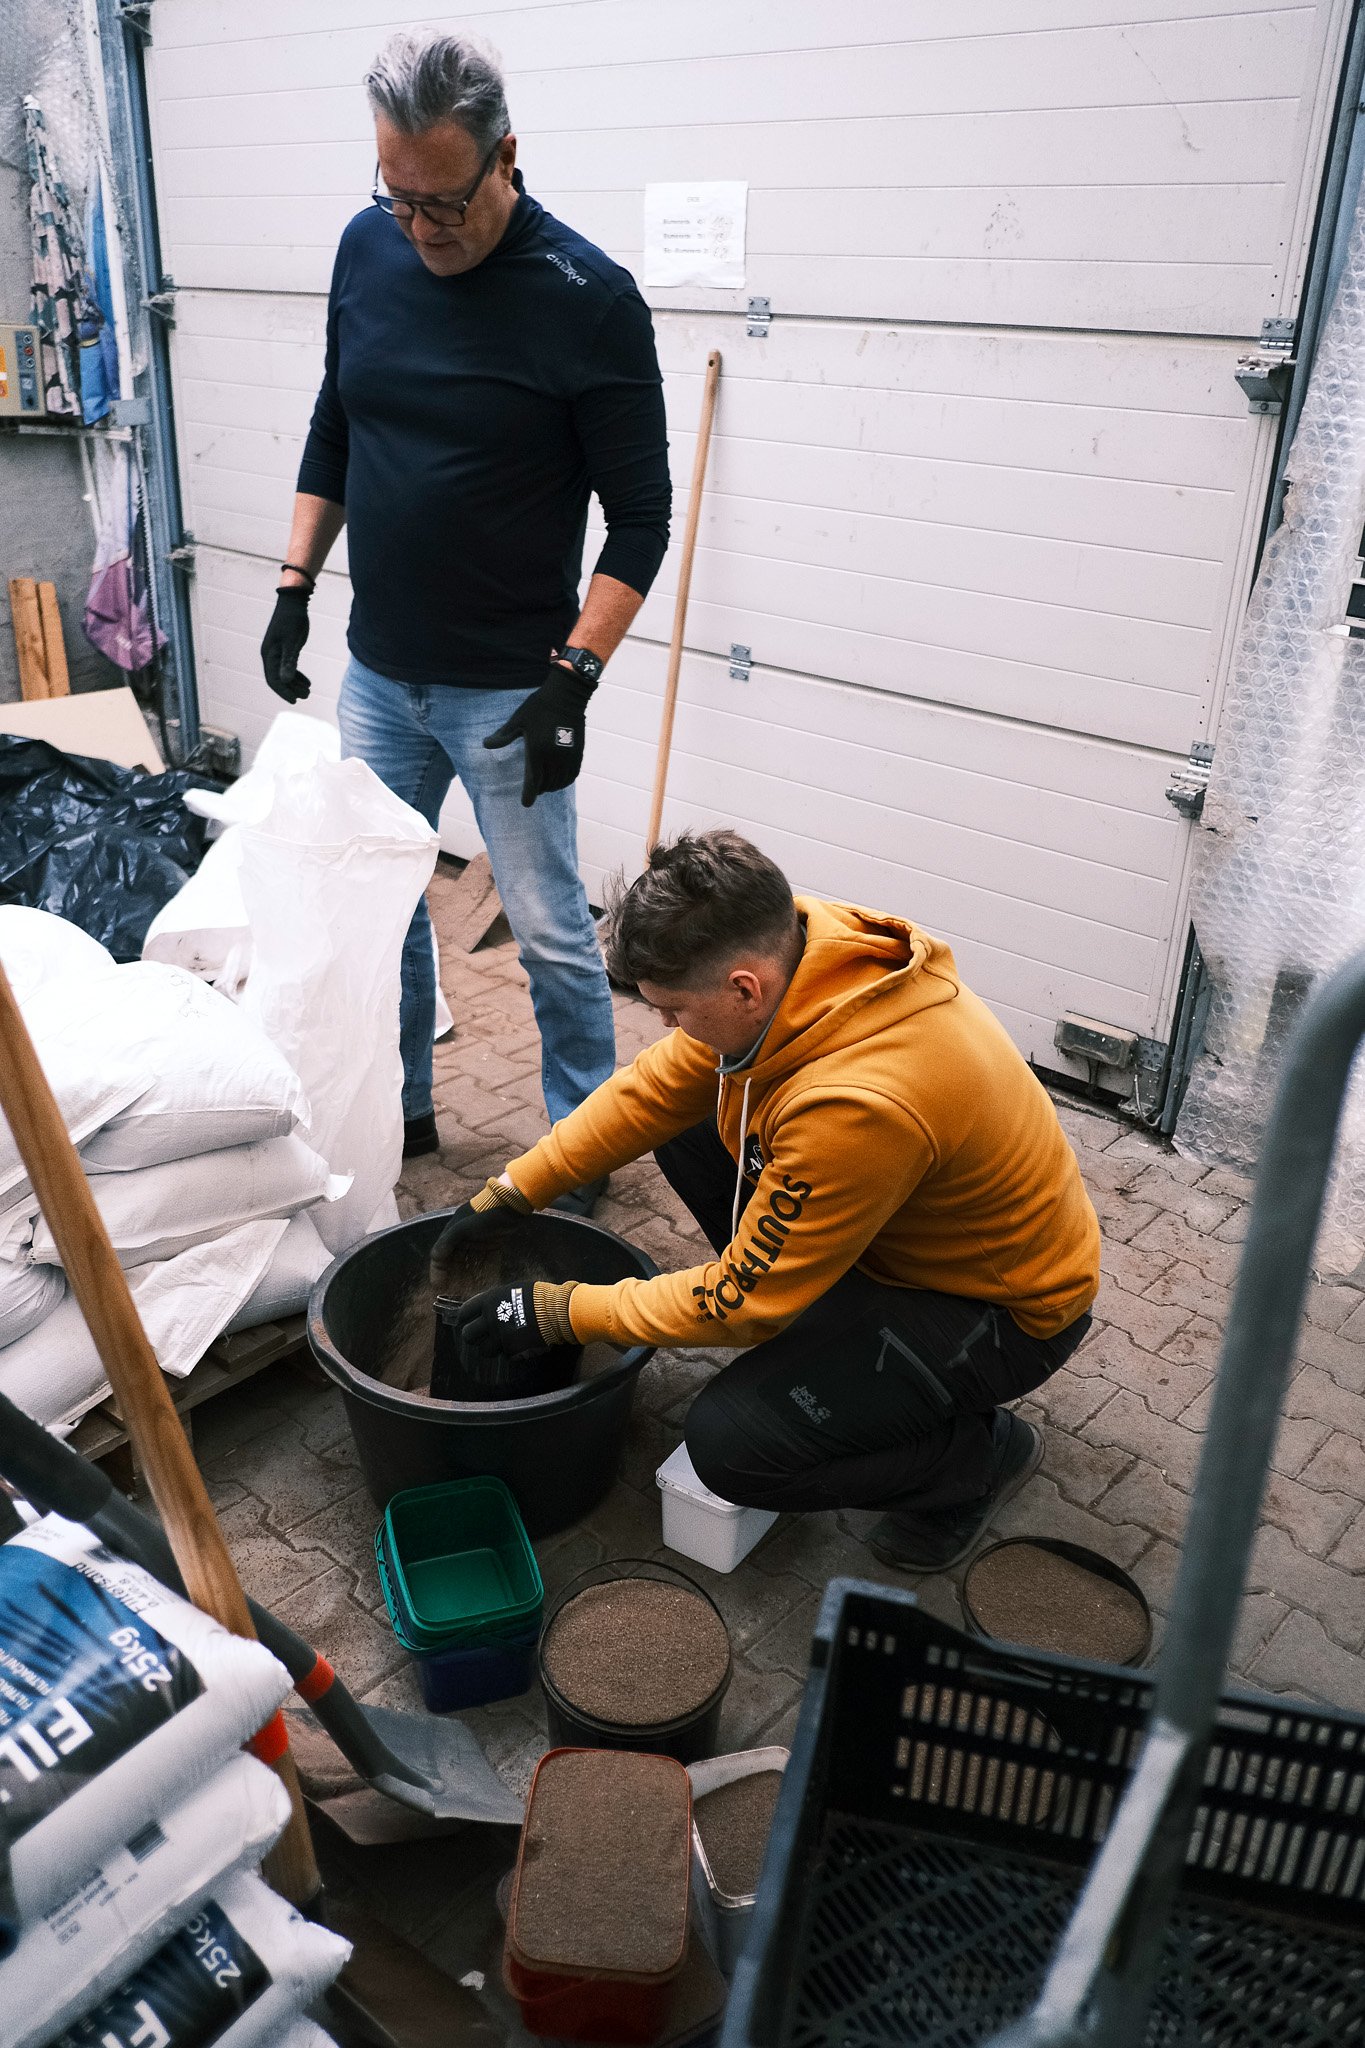
Station 1: prepare rock and worms (weighing)
Step 1a: Prepare amendment for one variant (62 x)
Weigh amendment rock for 4 pots (4 x 10³-2059 g per pot) and put into small tray, 206 grams are 40 t/ha
Count worms (20 worms) and put into 2nd small tray
Required: desk, small shovel, scale (0-3000 g), small trays
Station 2: Prepare pots of soil (soil sourcing)
Step 1b: Fetch soil for one set of 4 replicas with same content (62 x)
Get 4 x 5 liter and 4 x 3,5 liter pots of soil (will become 4 x 10 liter buckets)
Required: shovel, gloves, hand truck
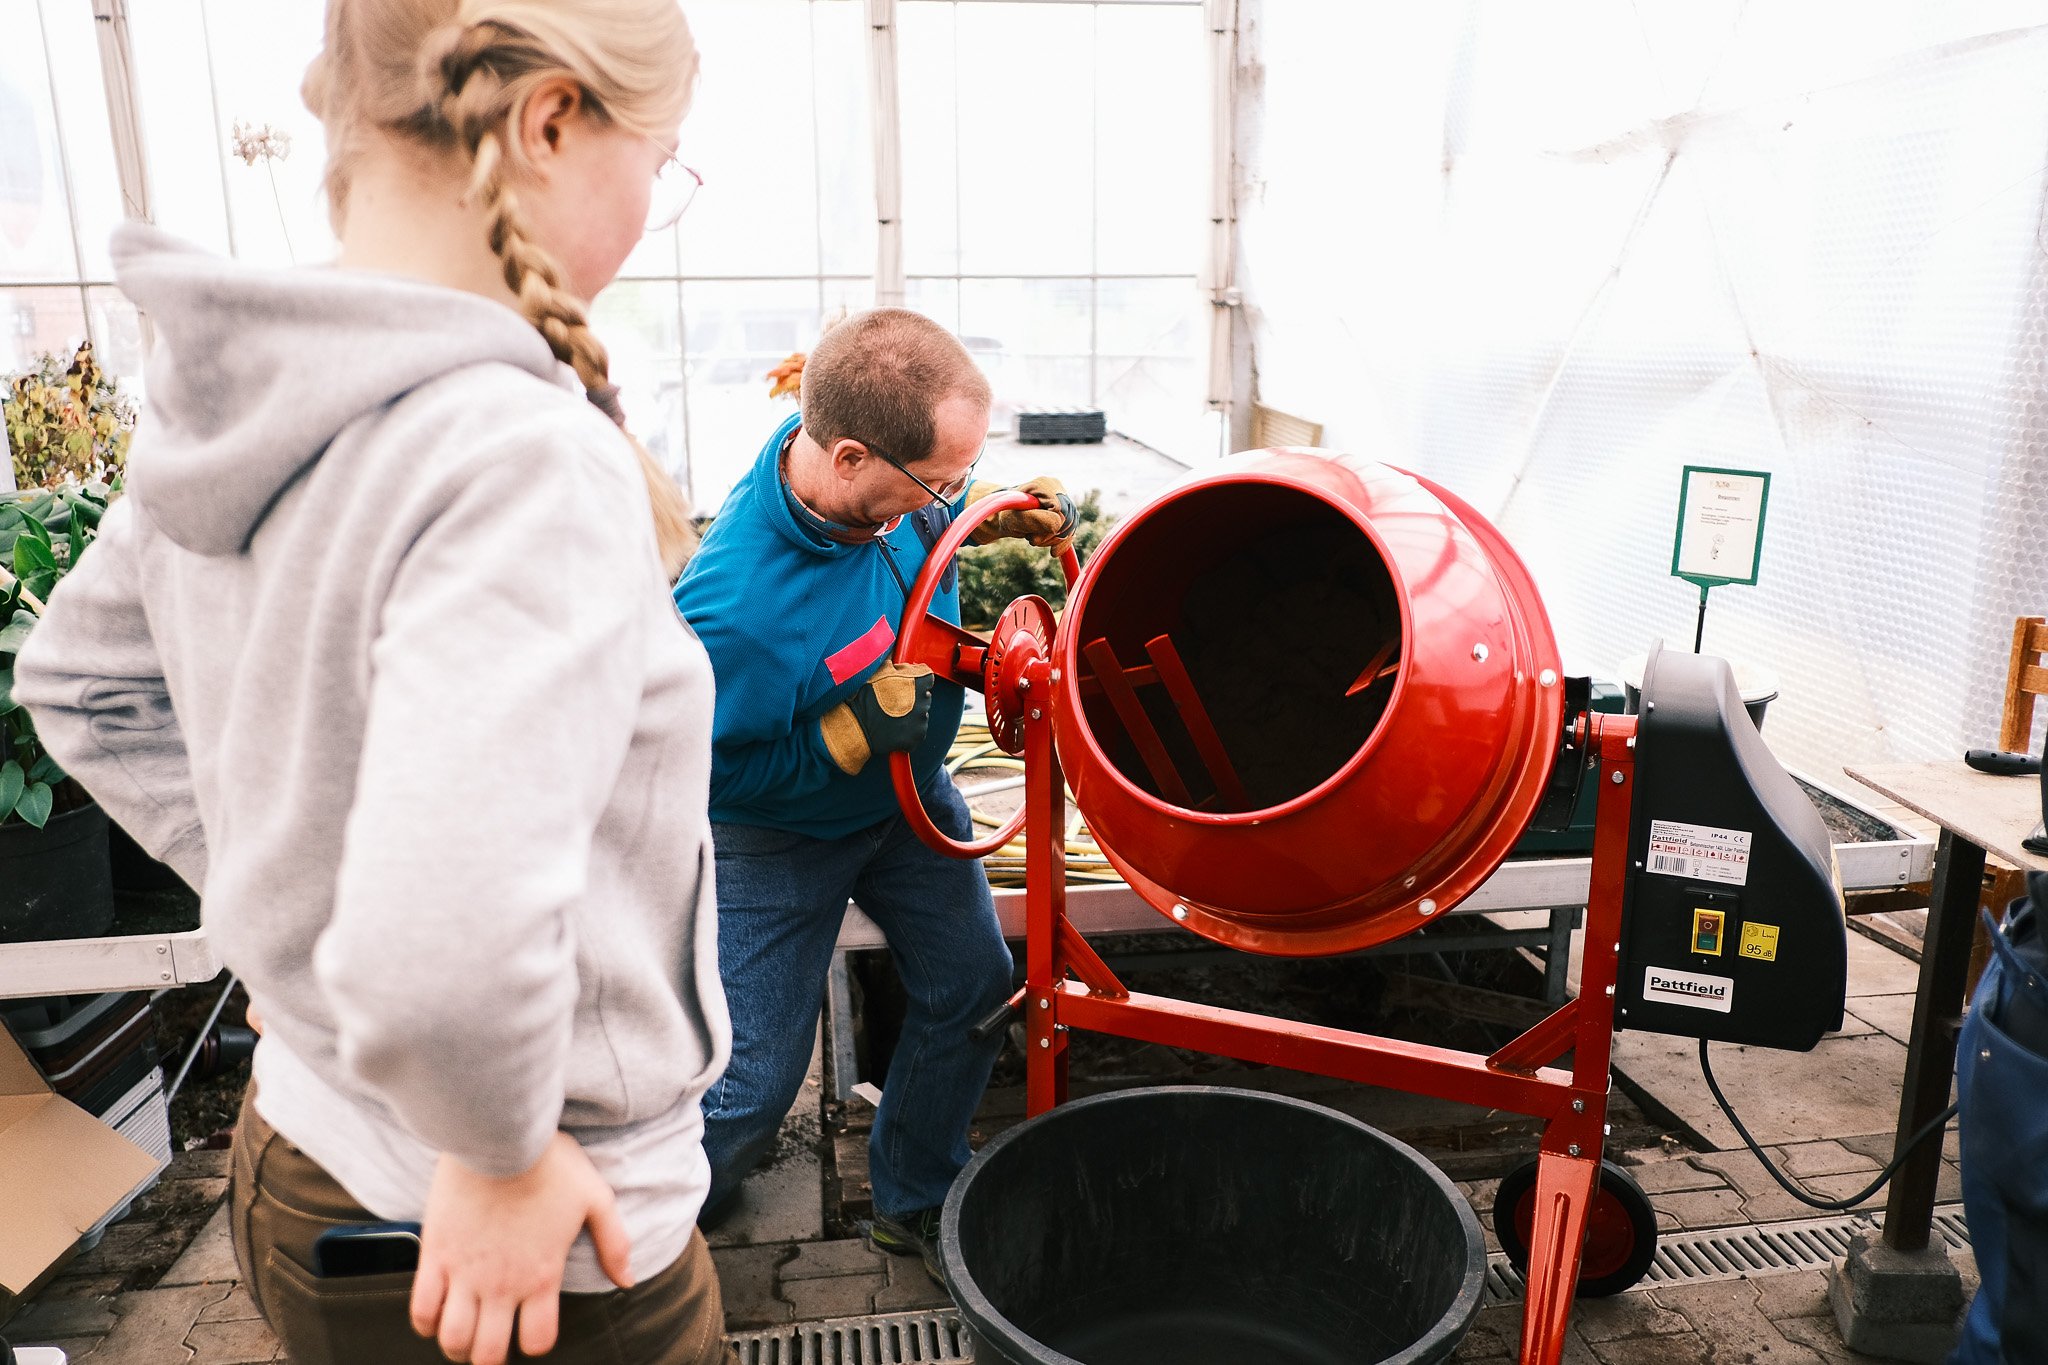
Station 3: Mix rock and soil
Step 1c: Prepare soil for one set of replicas with same content (62 x)
Put all four of the 5 liter pots into concrete mixer (clean/new), mix with 4 x amendment rock (e.g. 4 x 10³-2059 g per pot) => mixing also necessary for controls so soil has been treated the same
Run mixer for 60s (not longer, clumping will happen)
Pour amendment quickly but in a continuous stream just after starting the mixer (avoid dust but also avoid to create clumps)
After 60 seconds empty mixer into big bucket quickly
Take 20 g of mixture and store it in labels container (zero-day sample for storage)
Required: bucket, shovel
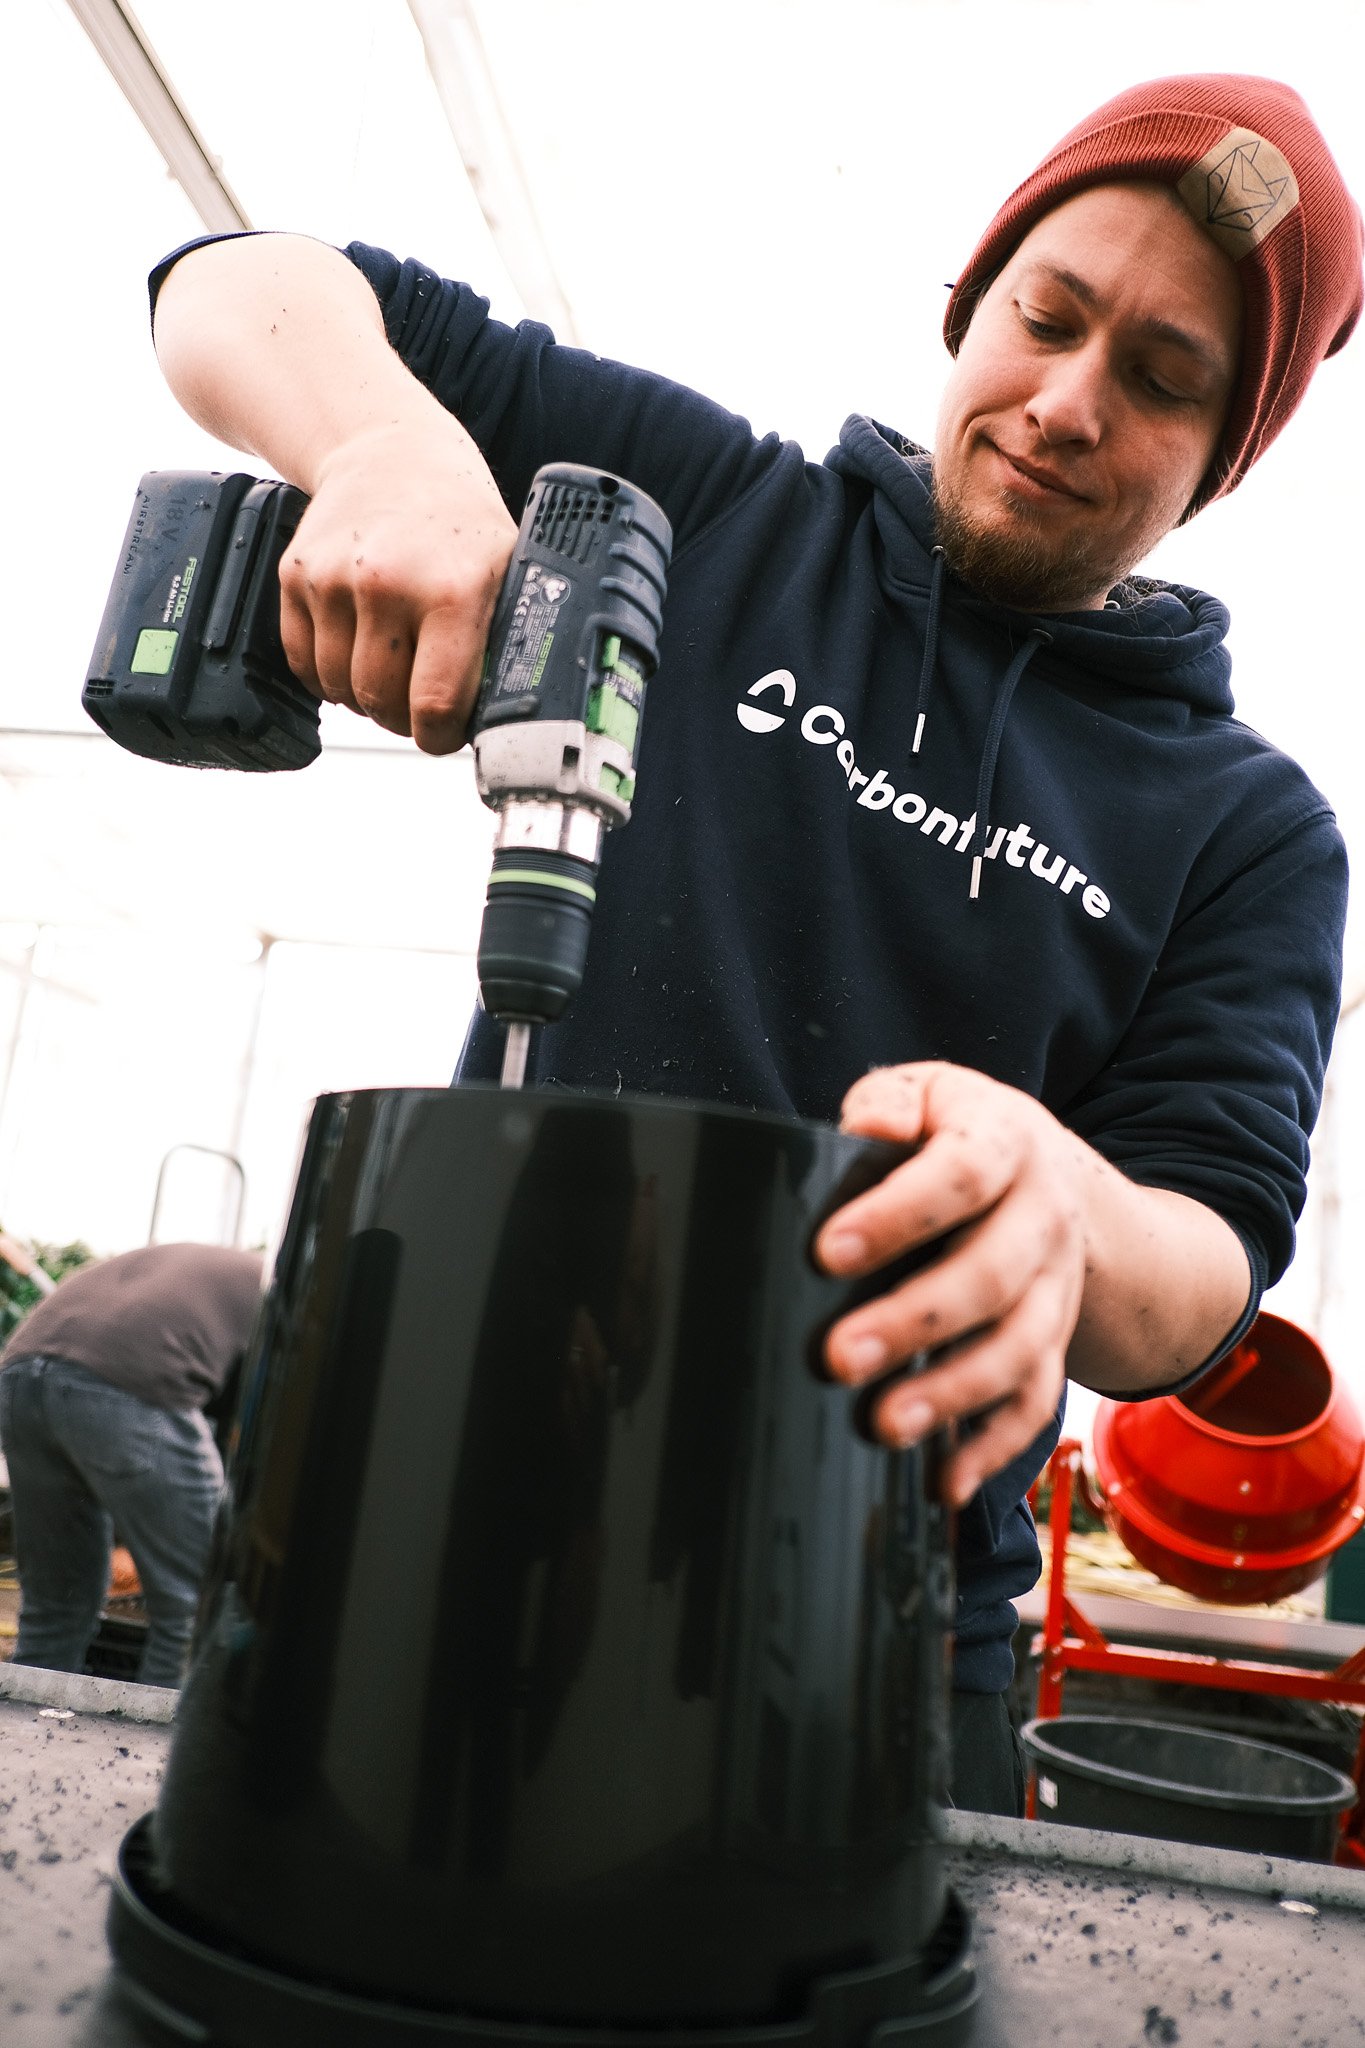
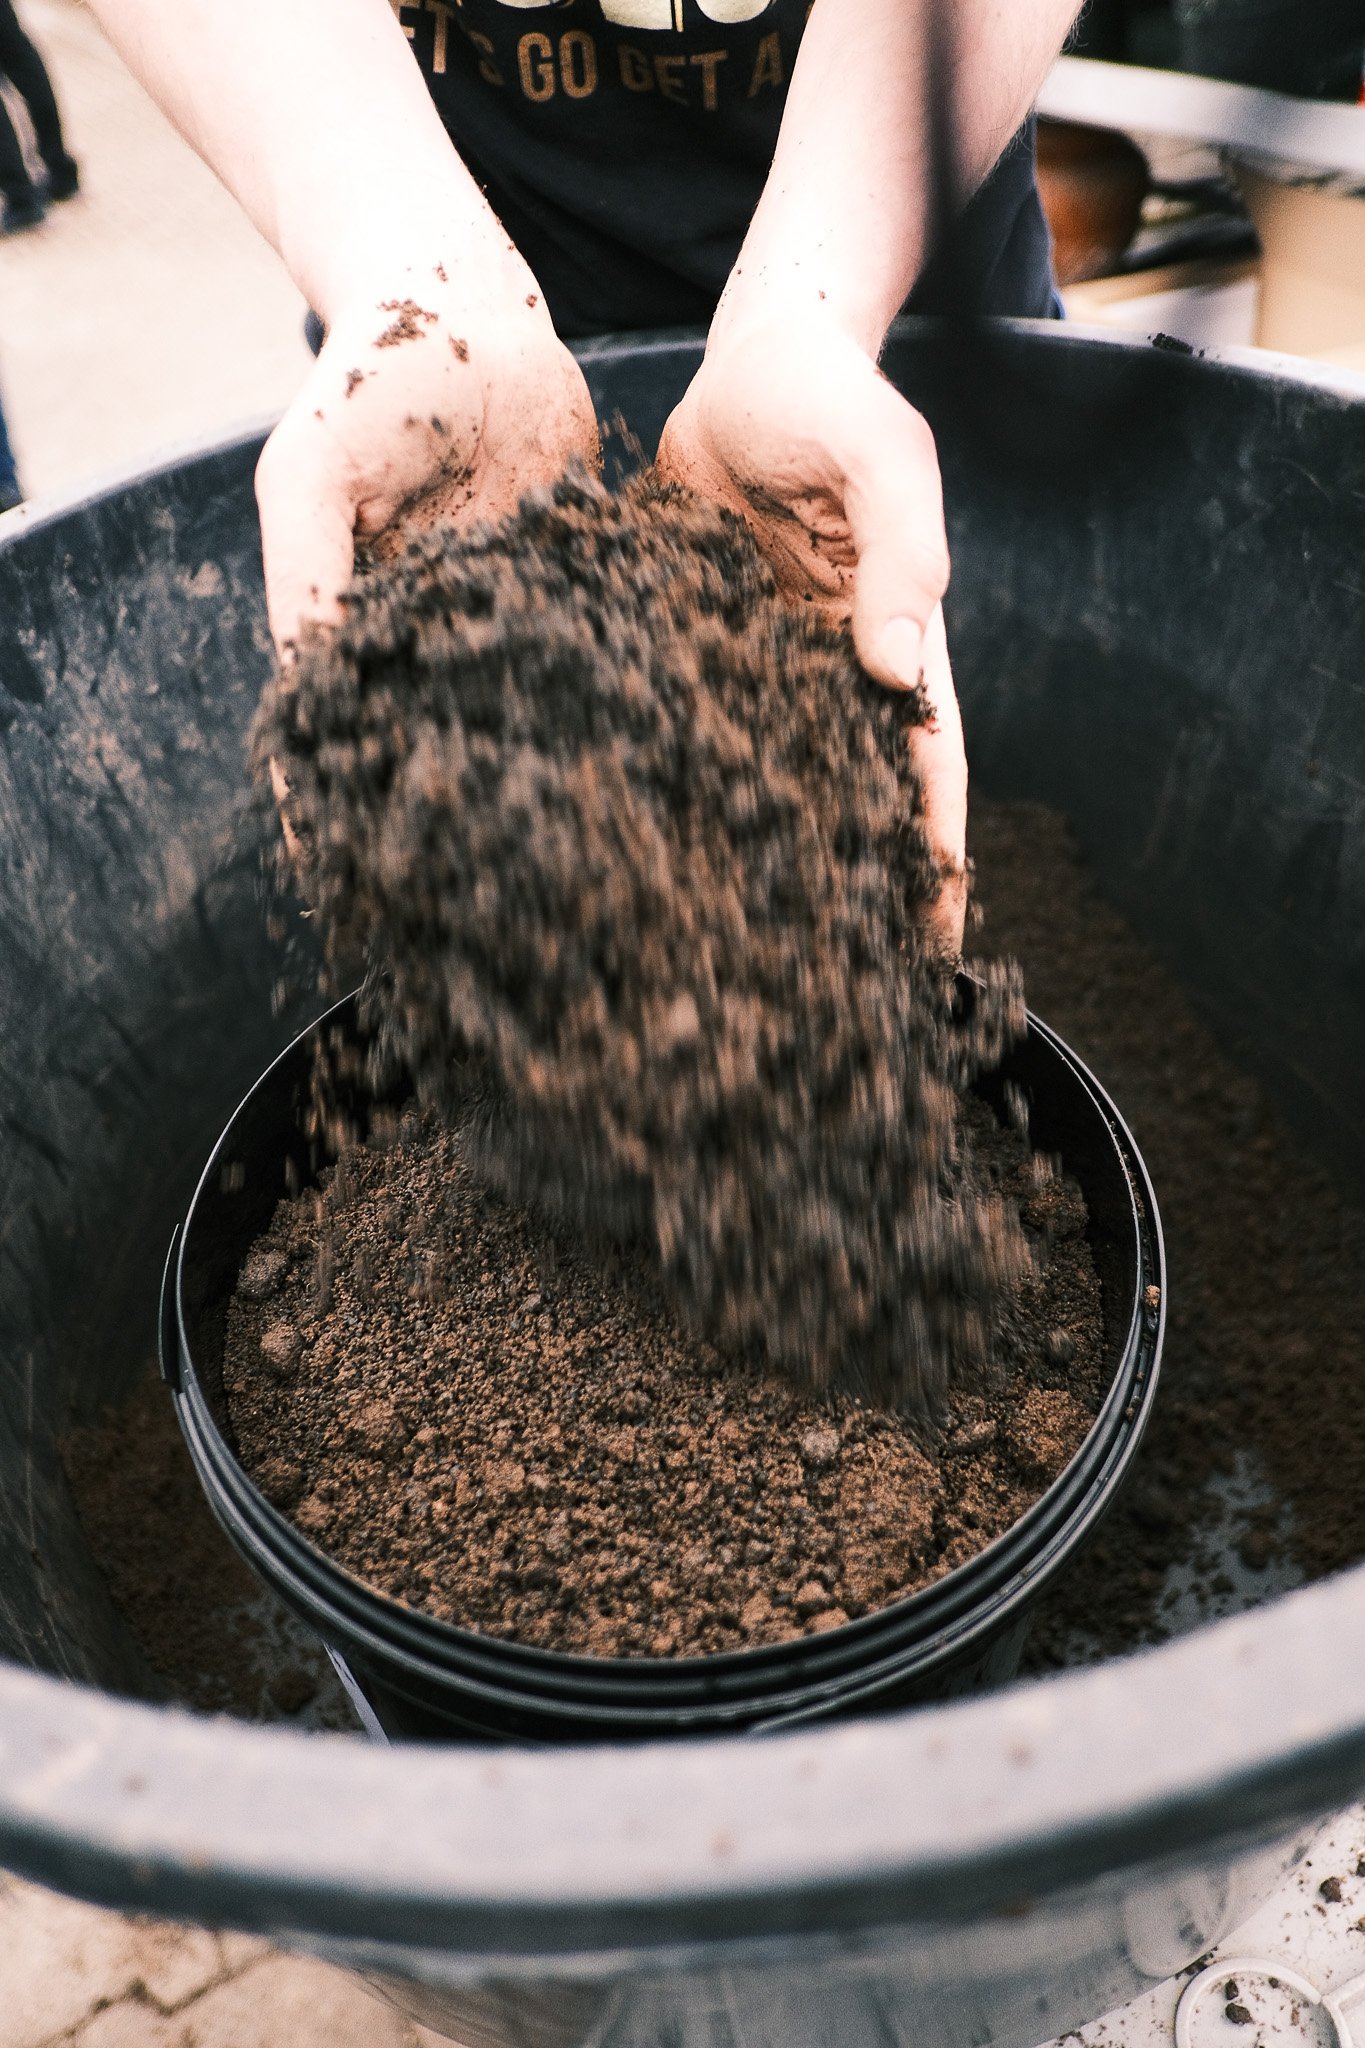
Station 4: Build pots
Step 2: Build pots (260x)
Get 4 lysimeter pots with holes at bottom (10 liters)
Put on pot stickers
Start with root fleece
Pour 2x 0,7 liter buckets of filter sand (~2-3 cm height), flatten carefully, fleece should be flat on bottom by now
Pour small 3,5 liter pot with pure soil, flatten, but don’t compress
Add CO₂ sensor if applicable
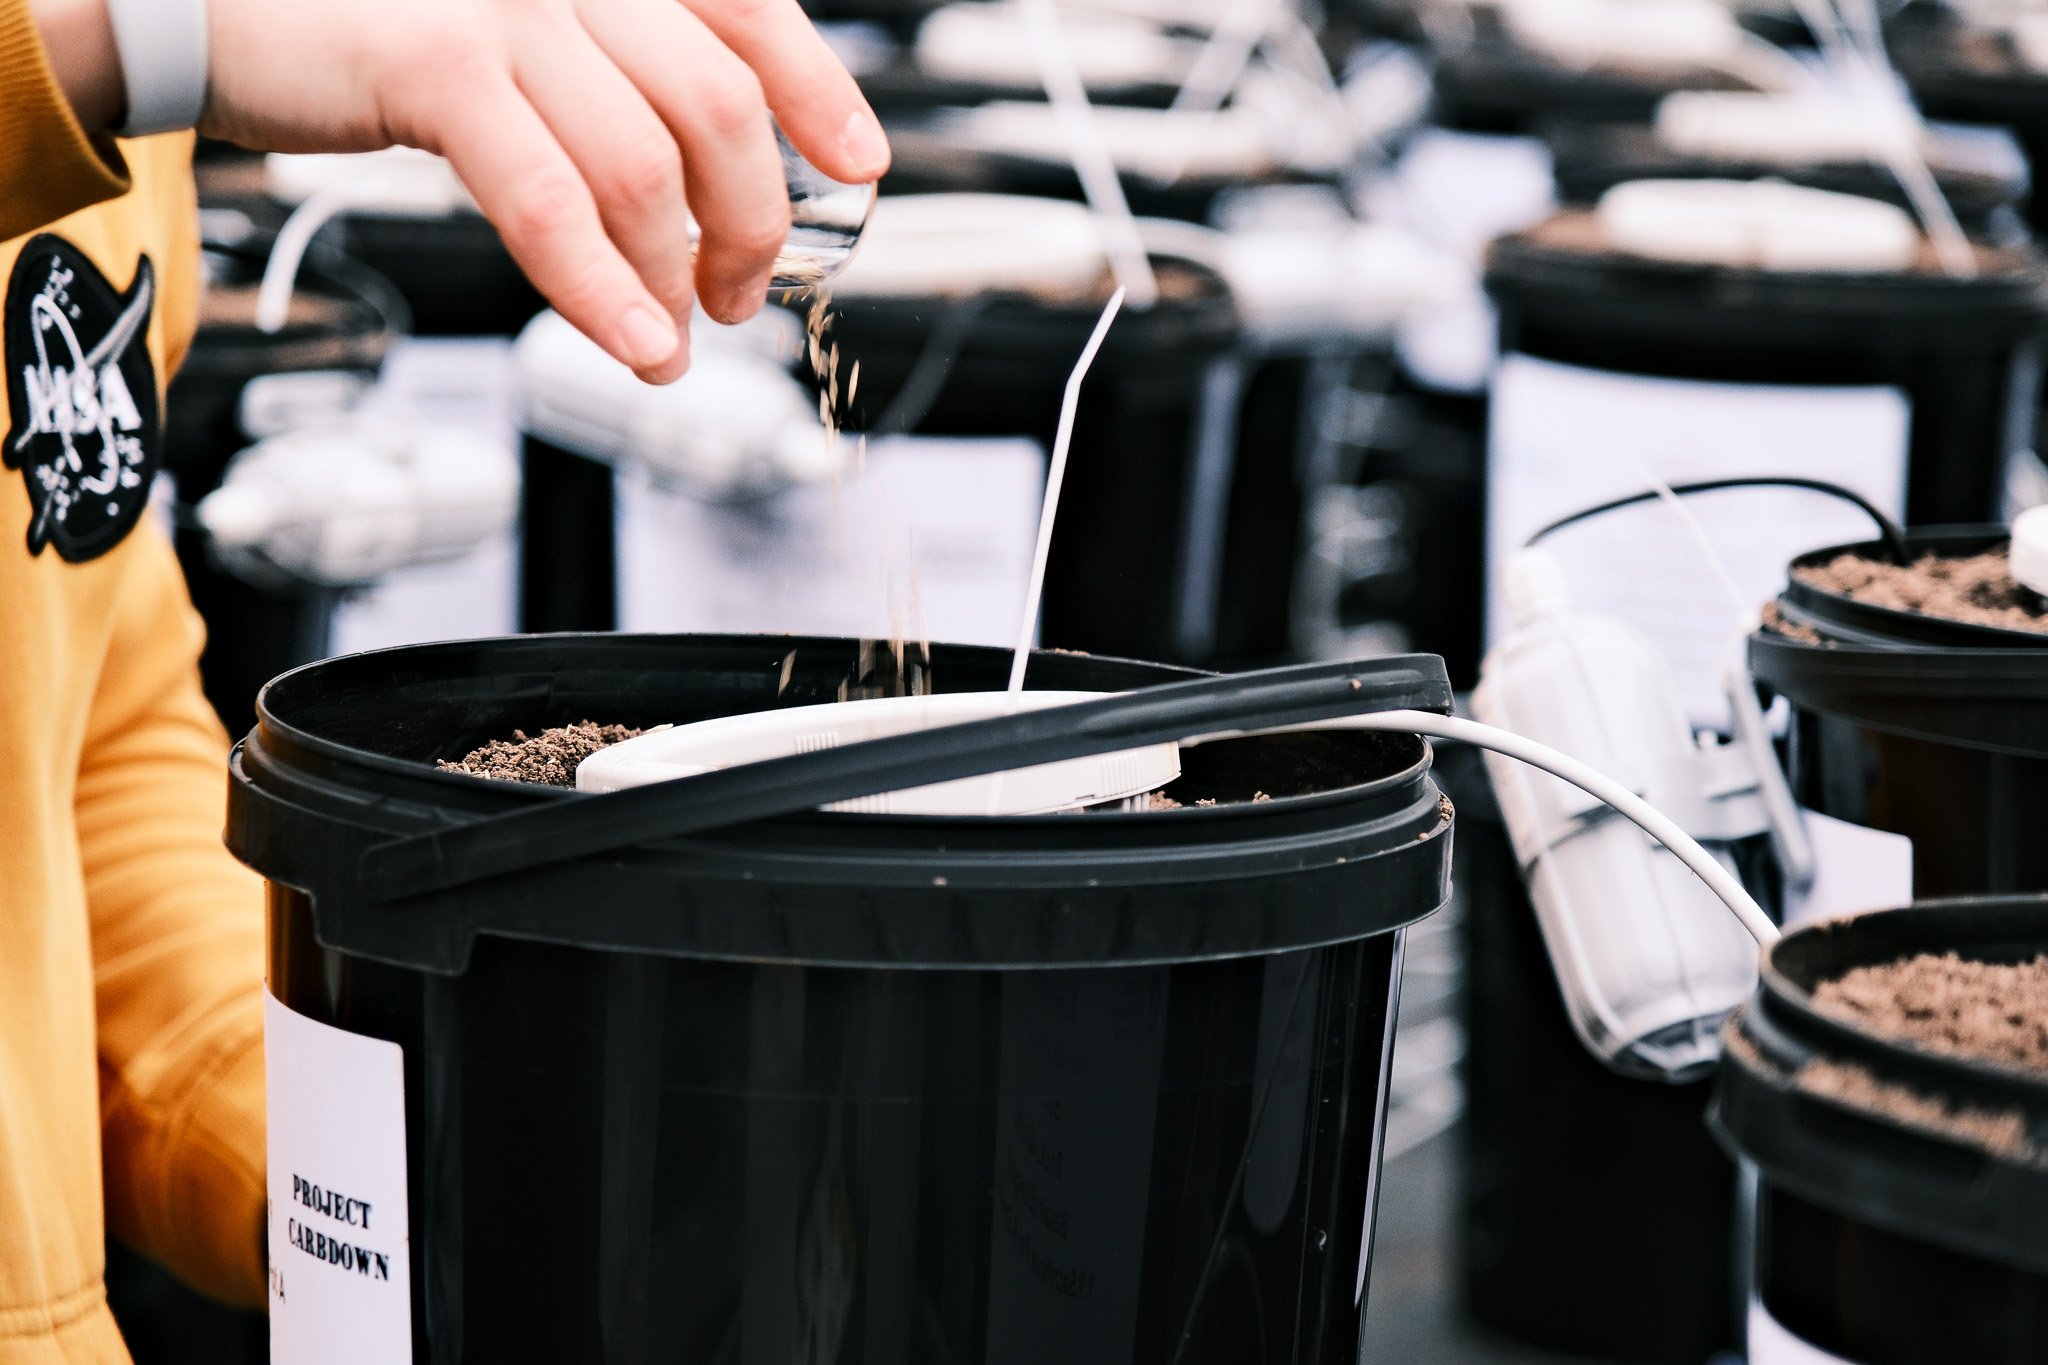
Fill pot with amended rock/soil mixture to the rim (from step 3)
Compact (drop bucket twice from 5 cm)
Fill up and flatten to top rim
Dump leftovers after 4th pot
Add Worms
Add tea bags (we distributed our 200 tea bags on the most interesting of the 300 pots)
Add seeds (we used 3 g of seeds per pot)
Required: desk, 0,7 liter filter sand bucket, shovels, gloves, stickers
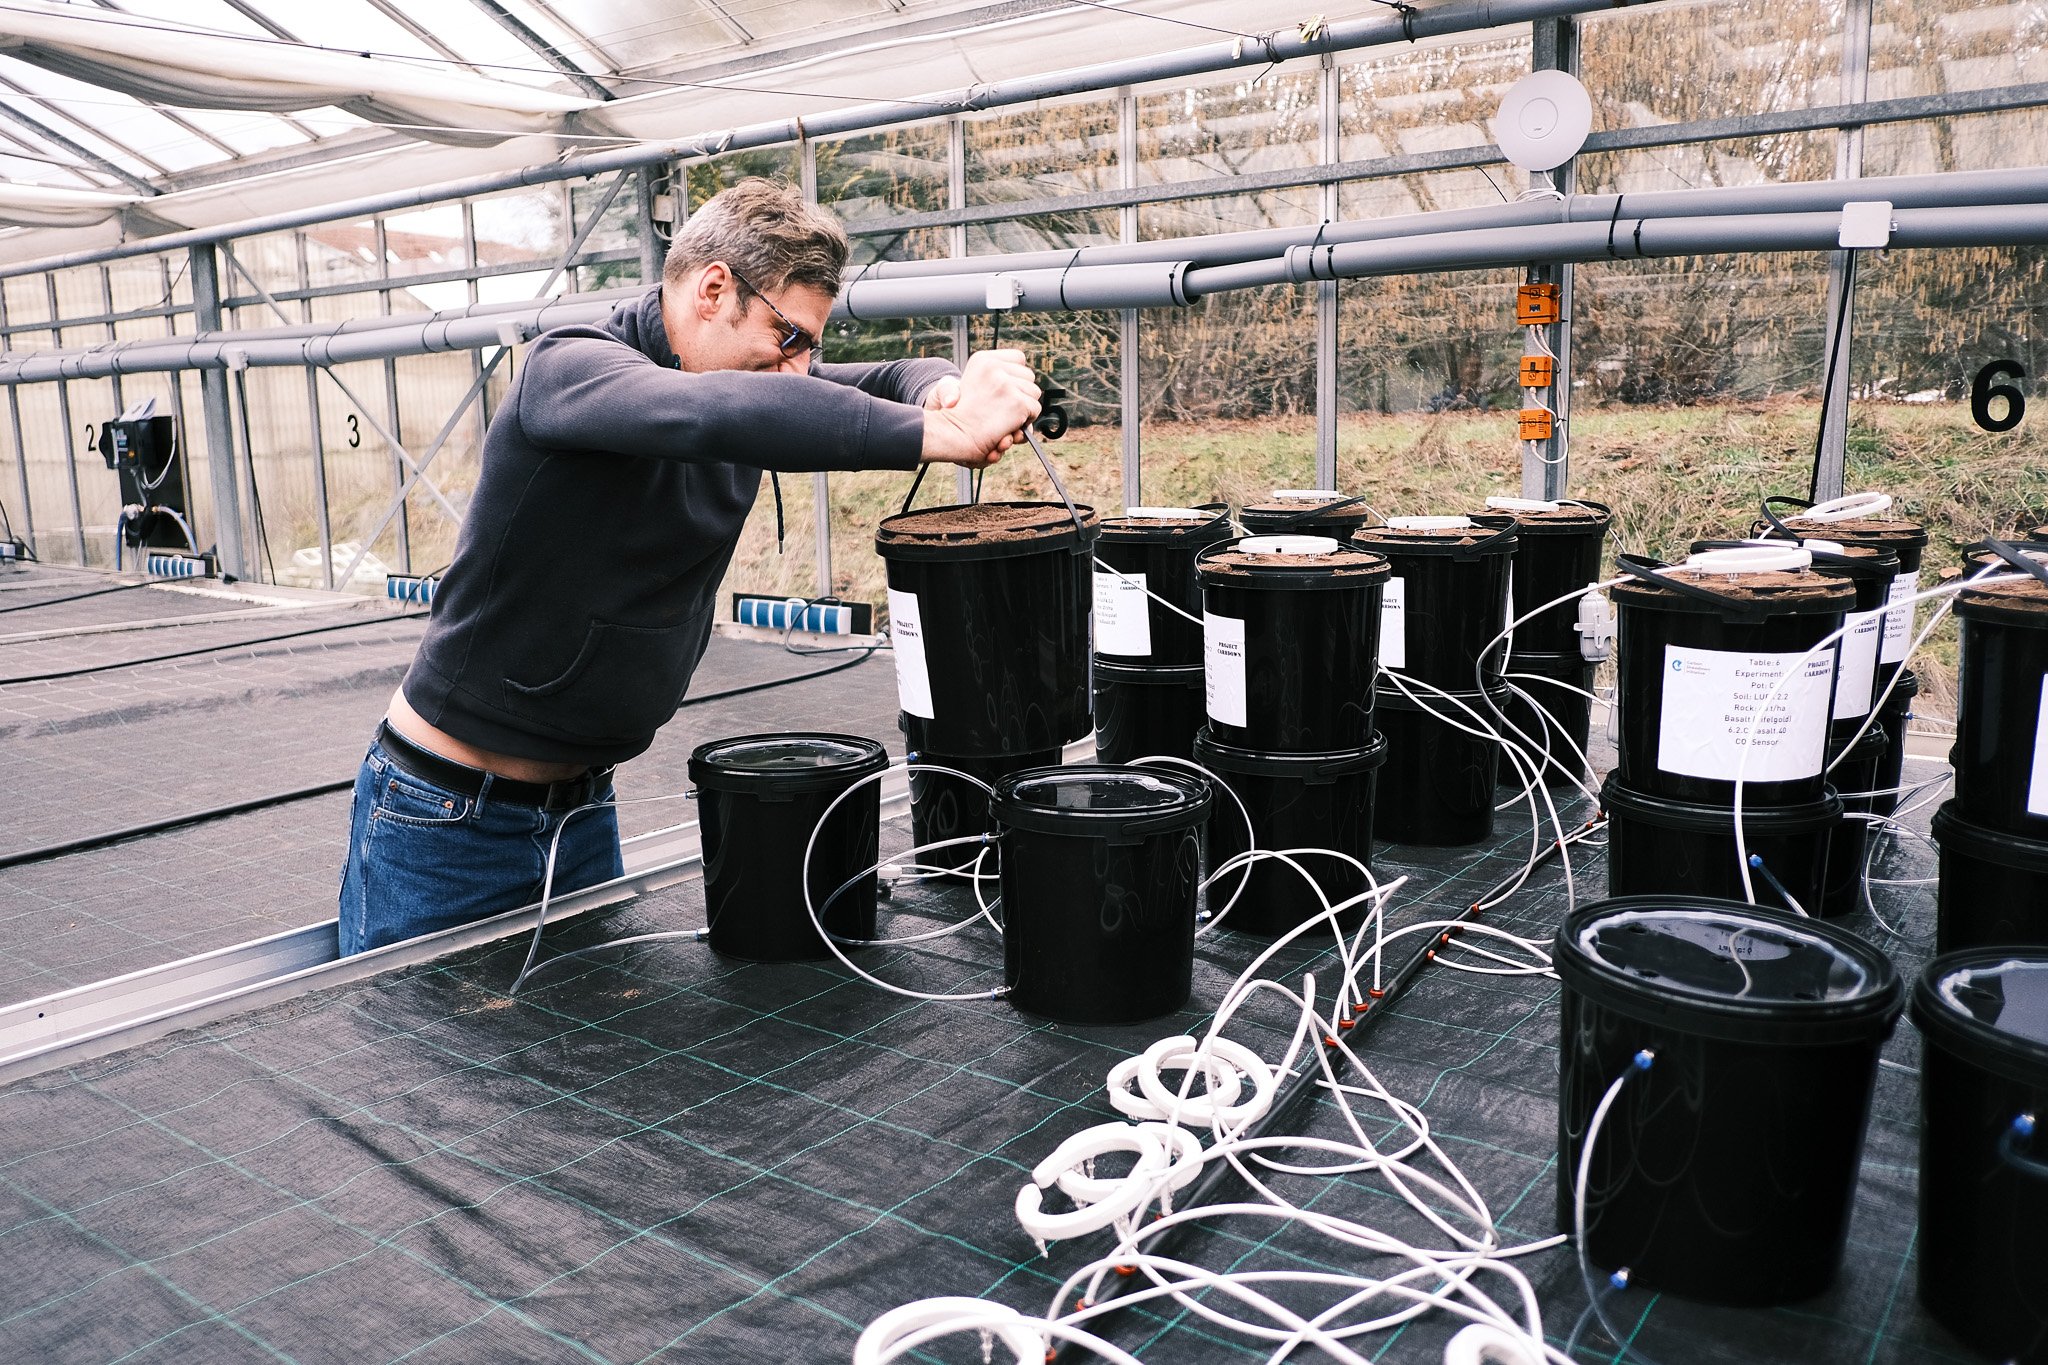
Station 5: Transport
Step 3: Transport to table (62 x)
Put 4 pots of one variant onto trolley
Drive up, load off
Required: trolley
Station 6: Installation on table
Step 4:
Put pots on tables in a suitable order which allows you to find a certain pot quickly later (based on the pot stickers), we numbered the pots according to table number, experiment/variation number and A/B/C/D for the 4 replicas
Create silicone sealing on lid of bottom tank
Stack onto collection tank
Required: gloves, a plan, strong scientists
Station 7: As soon as one table is complete
Step 5: Irrigation (250 x)
Add watering rings, connect to pipe
(sometime later) Connect digital sensors to cloud system
Step 6:
W*A*I*T
Watch grass growing
Monitor watering
Take samples and watch sensor data
Step 7:
Drink a beer and send a toast to the Project Carbdown team when you have made it through this list
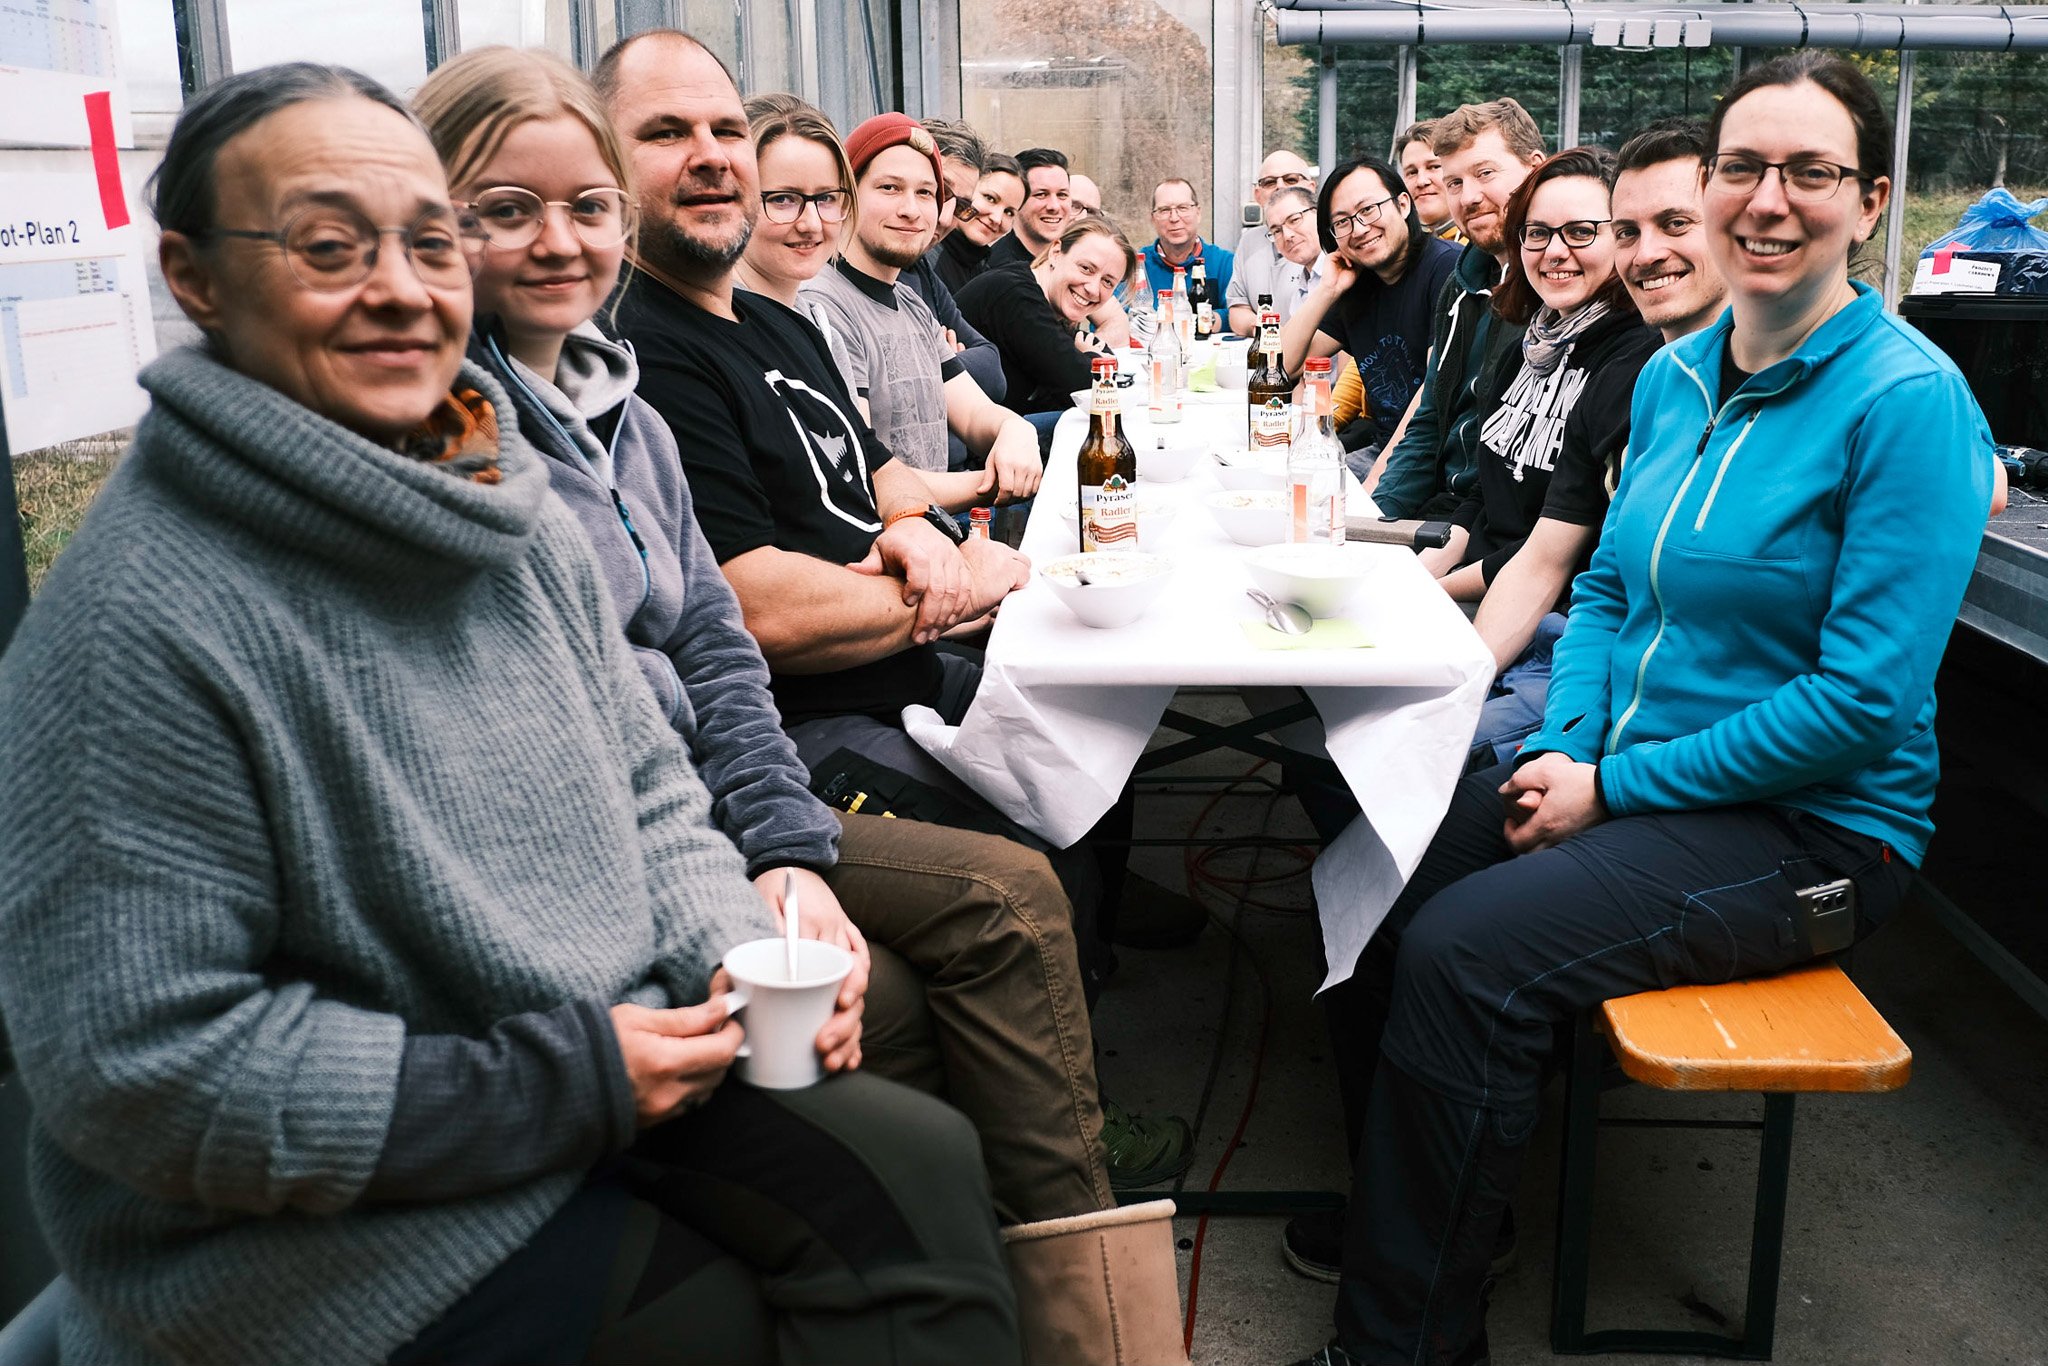
Recipe Ingredients/Shopping List
Many funny, friendly, happy people
A dedicated “runner” to buy/get things we have forgotten
Food/drinks/coffee/catering
A greenhouse
Rain/cistern water supply (not tap water or water from a spring/well, they likely contain too much alkalinity which potentially lowers the weathering effects and the sourcing of the water might change during seasons which makes comparison of data much harder)
Electric and IT infrastructure (power, Internet (we have a Starlink antenna and a Ubiquity Unifi network/camera system), surveillance cameras (for security and as the ultimate log book of what’s happening), a gateway for the LoRaWan sensors, Wifi, lots of sensors for automated data collection 24/7/365). Maybe you can even use plant lamps in the night to speed up things, our power connection wasn’t powerful enough for this.
Computer controlled watering system (<2% volume difference per pot)
Needs to be connected to precision water gauge with liter signal
Electronic valves according to greenhouse plan (we have one valve per table)
Water filter
Pressure reduction valves
>4 tons of soils => this obviously depends on your location and situation, here is what we used
1230 kg Fürth, a local soil that we had already used/analyzed extensively in the past (>80 buckets). This soil was also used in our XXL lysimeter experiment in a field nearby with the same rock application rates which will allow us to compare the data from the greenhouse to field data.
3x 500 kg standardized lab soils (in our case soil from German LUFA institute) (3 types, called 2.1, 2.2 and 6S)
10x 150 kg soils from 10 farmers of a previous field experiment
We sieved all soils collected from open fields twice
Rocks (here we show what we used, the types of rock depend on your sourcing)
>68 kg Eifelgold/RPBL basalt (we used a rather coarse basalt dust which we also used in other experiments to remain comparable, grains up to 2000 microns, 80% under 1000 microns)
>5,3 kg Schicker Diabas (coarse)
>5,3 kg Sibelco Olivine (a special mix, grain size distribution similar to our Eifelgold Basalt)
>5,2 kg Steel Slag (coarse)
Pots/Lysimeters
600 pots, black (10 L) => we used “RUND-EIMER 10,8 L TOP (BH) / SCHWARZ” from https://www.eimerundbecherprofi.de/ , one pot costs <2 Euro (must be black to block light and avoid algae inside pot and tank)
300 lids, black
20 transparent pots (for fluxmeter experiments)
20 pots (5 L) for experiment building
20 pots (3,5 L) for experiment building
600 fittings and nuts (access to tank water and air)
300 pipes (to sample/dump water)
20 tubes of Silicone
White permanent marker pens for writing on pots
300 watering rings with drip-valve and pipe (we used Netbow from Netafim)
500 kg filter sand (2-3 cm per pot x 300)
Root fleece (250 x pot, 120 x CO₂ sensor) we need 260* 0,09 m² = 23 m² plus 120x 0,1 = 10 m² => 33 m²/2 = 16 m
Sensors
Air temp/humidity/ambient CO₂
Luxmeter
Ultrasonic fluid level (goes under the lysimeter tank)
Ultrasonic large distance fluid level (goes into the cisterne)
(Soil) CO₂ sensors
Plastic containers to place CO₂ sensors into soil
Root fleece
Hundreds of zip ties
Soil pH/EC/moisture sensors
Grass Seeds (we wanted a simple to grow perennial plant that will create CO₂ in the soil all year long - we used Deutsches Weidelgras (lolium perenne) from Amazon)
Scales
Fine scale (milligrams) (for tea bags)
Kitchen scale (deci- to centigrams) (for weighing rocks)
Large scale (hundreds of gram to low kilogram weights)(for weighing pots)
Tools
4 large buckets (“mortar bucket ”, for mixing)
Concrete mixer
4 x shovels small
2 x brooms
10 x gloves different sizes
4 x folding rule
4 x knives
20 x smaller pots for weighing/preparing rock
Scissors (root fleece)
Measuring pot for filtersand 1,4 L or 2 scoops of 0,7 L
Drying oven (for cut-off grass)
5000 worms (20 per pot, from https://regenwurmer.de/)
Plastic tea bags, cable ties
Spoons for tea bag filling
2 x battery powered drills with 2nd battery and charger
2 x 18 mm forstner bit
Calipers (marking the lower hole for sampling water)
Lettering machine
Cappuccino machine, coffee, milk, cups (very important to keep engines running)
Estimated Time
Preparations of greenhouse site (cleaning, preparations, electrics, planning, prototype building, buying stuff, collections soils): about 1000 hours (Sep 2022-Jan 2023). On the building weekend 25 people worked for 14 hours (=350 hours). Afterwards several hundred hours to get the remaining things set up, develop day-to-day procedures, keep grass growing, etc. In total somewhere around 2000 hours until now.
Plus data analysis, writing papers, communicating with scientists, taking samples, grooming grass, etc. etc.
Estimated Cost
Soils: € 15.000 (the LUFA soils are expensive!)
Sensors: € 30.000
Plastic stuff (pots): € 2.000
Irrigation: € 3.000
Tools: € 2.000
IT: € 4.000
Diverse stuff: € 5.000
Rent for greenhouse (24-36 months)
Cost of heating, water, electric power
Personell
Cost for sample taking and lab analysis